
I have come to realize that an efficient and visually pleasing workspace is an important component of the hobby. Having a dedicated and orderly space allows me to get into my hobby headspace. I have gone through many iterations of my worktable and I finally had the chance to assemble a set up I was proud of.
I have been eyeing the Hobby Zone Modular Workshop System for several years but I never pulled the trigger on any of the products. I admired their clean and efficient ascetic. Whenever I was browsing for workshop ideas Hobby Zone seemed to be a core component of every “dream” hobby space on my list and in my inspirational photo album.
One of my impulses is to exhaustively research products and projects before I jump in. I typically start on google and work my way through personal blogs and YouTube videos. An in-depth look at the Hobby Zone stuff was a bit more elusive. I was able to track down some videos and a handful of blog posts showing off finished set ups but nothing showing details of the parts themselves. Luckily Evan also owns a range of their products so I was able to bug him about them. Conveniently, he also uses them as a core piece of his workbench.
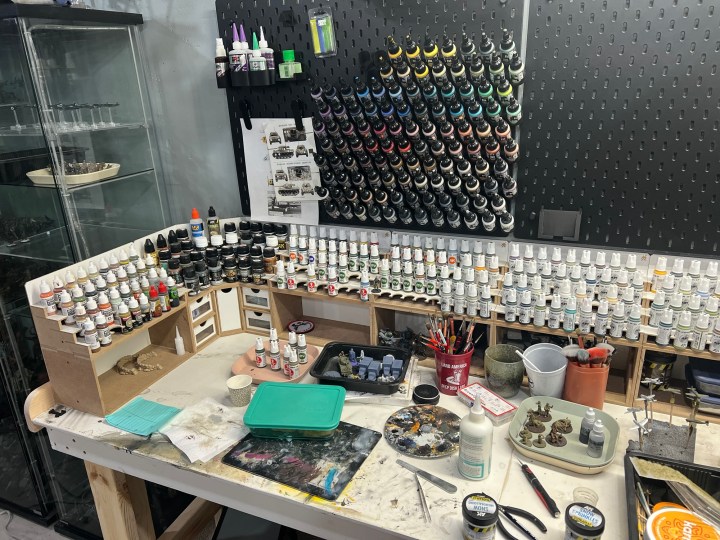
To start the desk facelift I recently upgraded my desk work surface to a pair of long Ikea worktops. I chose SÄLJAN oak laminate tops which are 74″ long by 25 5/8″ deep. I have them assembled in an L in the corner of my workshop. They are adequately deep at just under 26″. Maintaining as much workspace as possible was a priority so having a minimal footprint for my organizer was important.
I settled on a dedicated painting space and a separate space to build kits or work on terrain. The painting area was planned to be on the lefthand side up against my airbrush booth while the assembly area was on the right of the set up. I placed my hobby desktop computer in the corner to give me access while working in either spot.
After several fat chewing sessions with Evan I made a decision. I opted for three double high stacks consisting of five 26mm paint racks and one 36mm Paint Rack. The 26mm racks are designed to hold 17-18mm diameter bottles such as Vallejo, AK Interactive, and Army Painter. The larger shelved 36mm racks hold larger bottles like Citadel and AK Interactive enamel washes.
I didn’t want to drill into the concrete basement walls to mount the racking. Eventually I plan on finishing the basement wall so a wall mount would lead to more for me in the future. I was keen on using the Paint Rack Bases so the hanging units could be set on my desktop instead. At just under 4″ deep the paint rack bases left me a respectable 21″ of shenanigans painting space.
I was keen to add some drawers to hold small painting tools and a Paint Brushes and Tools Module to have my painting gear readily available. I figured this would help me resist coming back to the cluttered desk top we all know and lament.

So, for those of you who want me to shut up and give a look at a handful of Hobby Zone’s products let’s jump into the modules themselves!
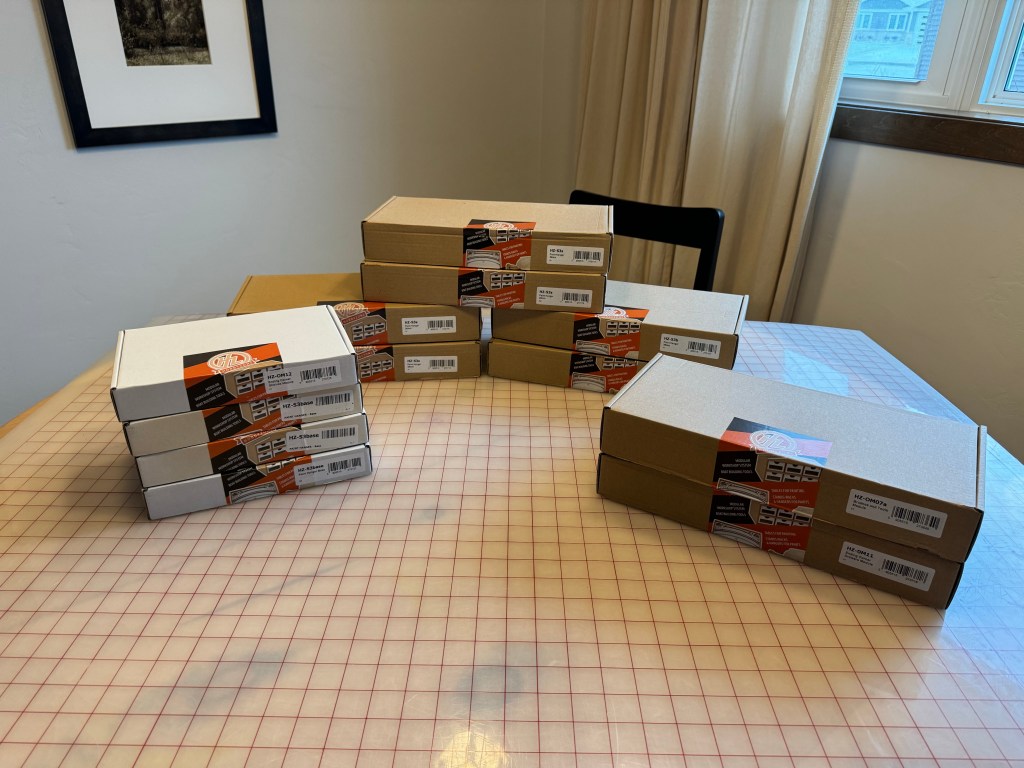
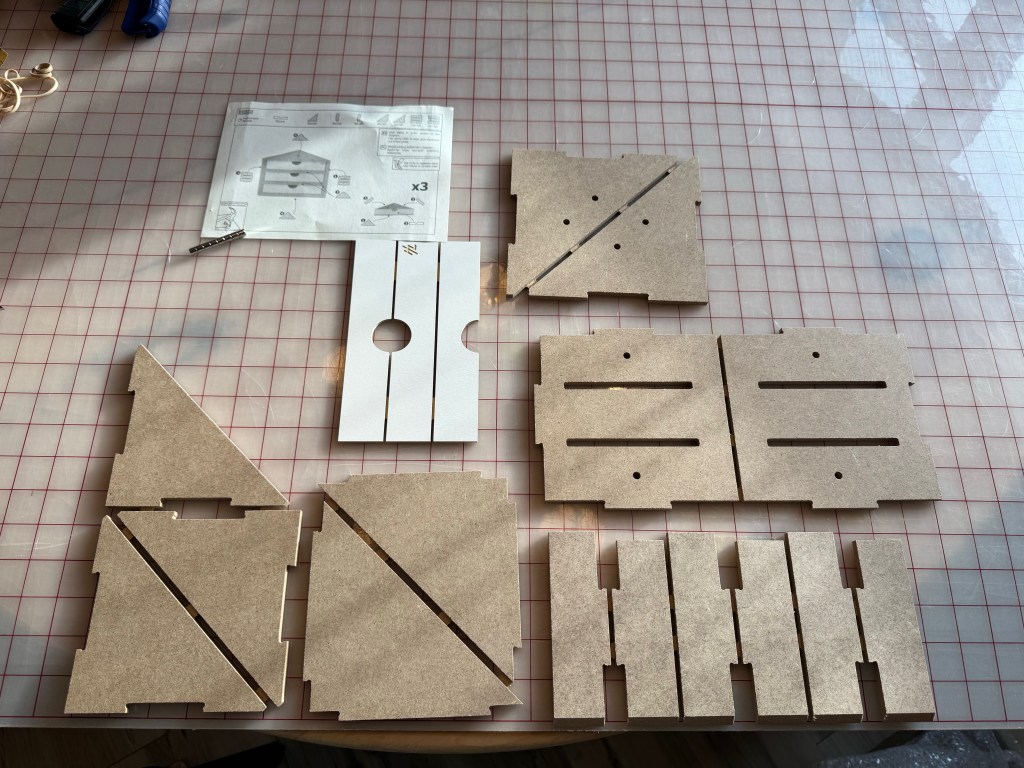
Here is the whole haul. Evan didn’t mention how much work these were to put together until I was chatting with him while assembling them. But he assured me they were worth the effort…
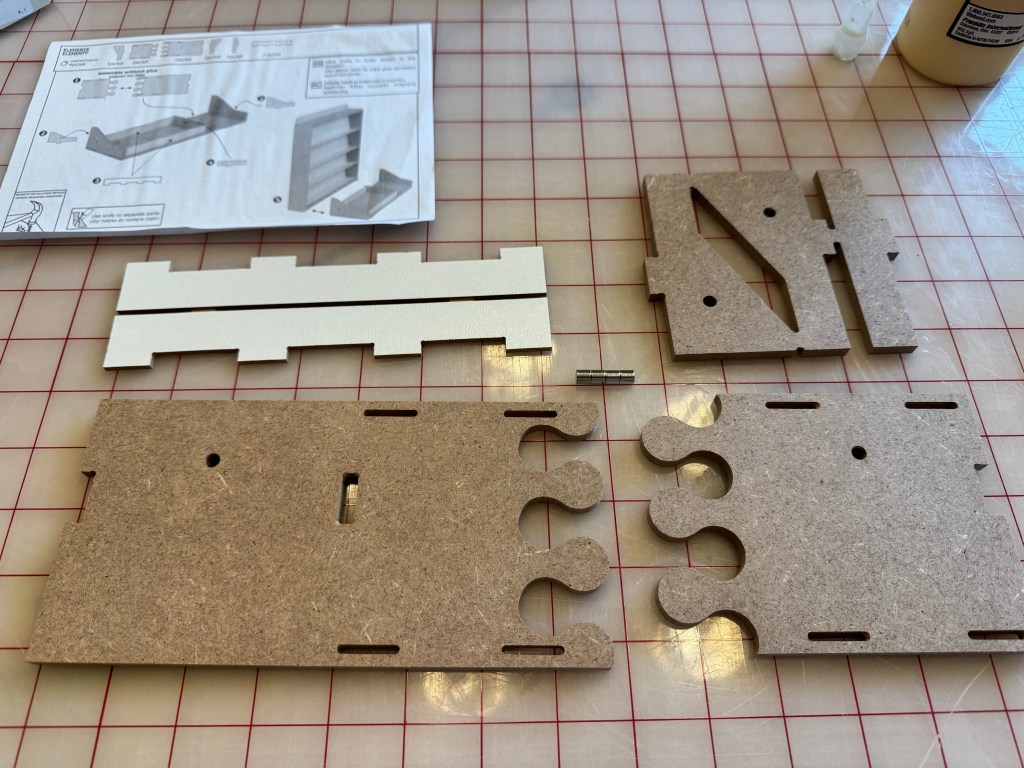
The wooden parts are made from machine cut MDF or plywood. The white paint is a coating that feels reasonably durable to the touch.
Also, so it’s not missed, a few pointers (some that I learned the hard way).
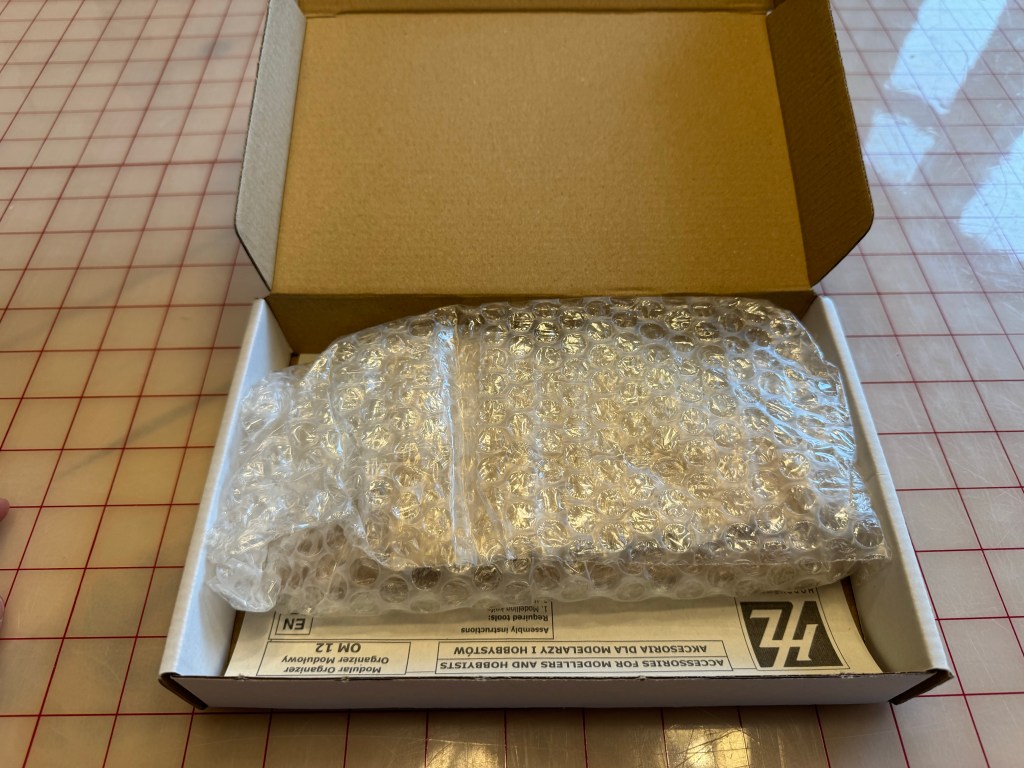
- Have a sharp utility knife and some fresh blades on standby. The wood components come on a sprue.
- Cut with the knife tip at a slight angle in towards the piece when removing the tabs. Slow steady pressure worked best for me.
- Have a way to square the parts, particularly if they are butting up to other components. I used a small framing square.
- Have some painters tape, clamps, and rubber bands handy to help hold parts together while the glue dries.
- Be sure to place your magnets with the correct polarity facing the right direction. I assembled one component and used that as a guide for the rest. I stored the unused magnets on the assembled piece’s magnets until it was time to put them in place. If you mess up your polarities you’re going to have a bad day. The magnets are friction fit but they wouldn’t be easy to get out once they are in place.
- Finally, have some 220-300 grit sandpaper on hand to smooth down any remaining material from the sprue tabs. Some of the tab attachment points will be visible once assembled so they would benefit from a little touch up.
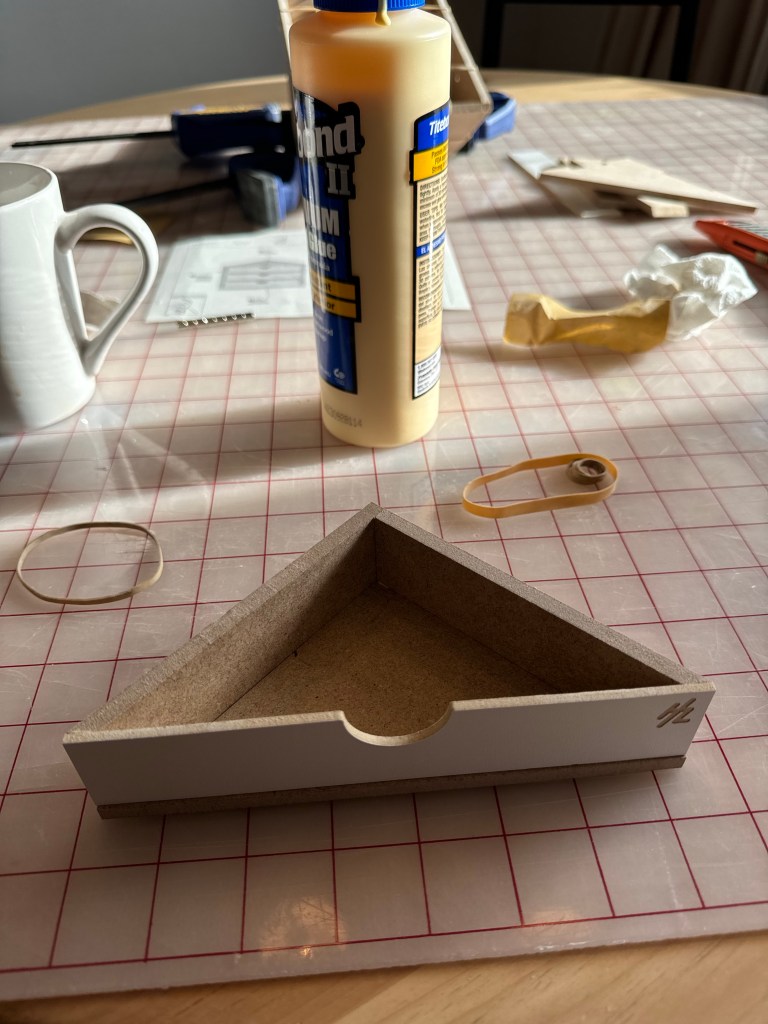
HZ-OM12 – Ending Corner Shelf


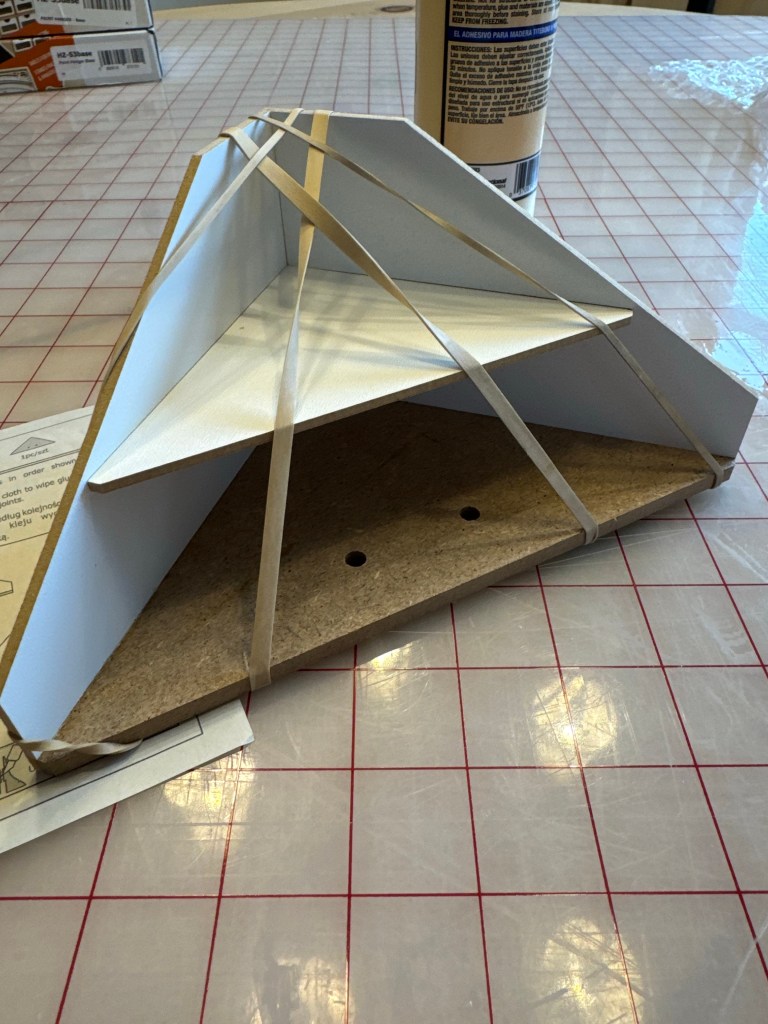
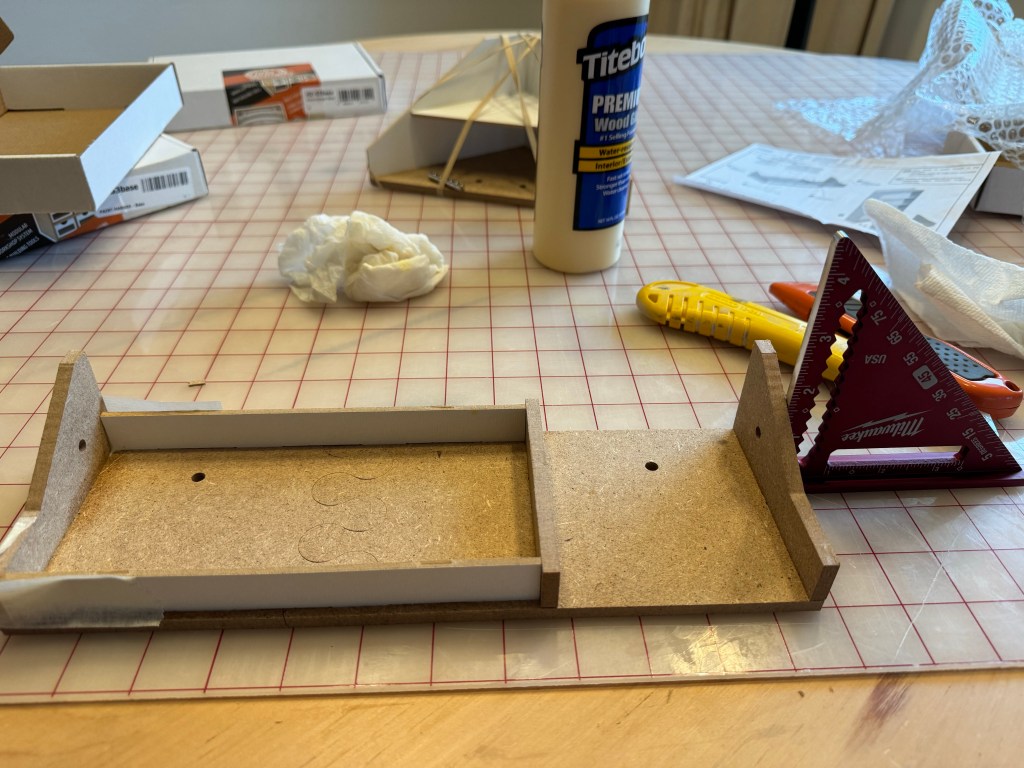
I decided to ease myself into the project with the most straight forward of my purchases, HZ-OM12, the Ending Corner Shelf Module. This kit came as four wooden parts plus a pair of magnets. The parts were cleanly cut and fit together well. The instructions were clear, though the construction of this module was pretty self explanatory. A little bit of Titebond wood glue holds the parts together easily. I used rubber bands and masking tape to hold the pieces while they dried. I added the magnets later after the glue had cured.
Assembled dimensions: 5.9″ x 5.9″ x 5.9″ (15cm x 15cm x 15cm)
HZ-S3base – Paint Hanger Base
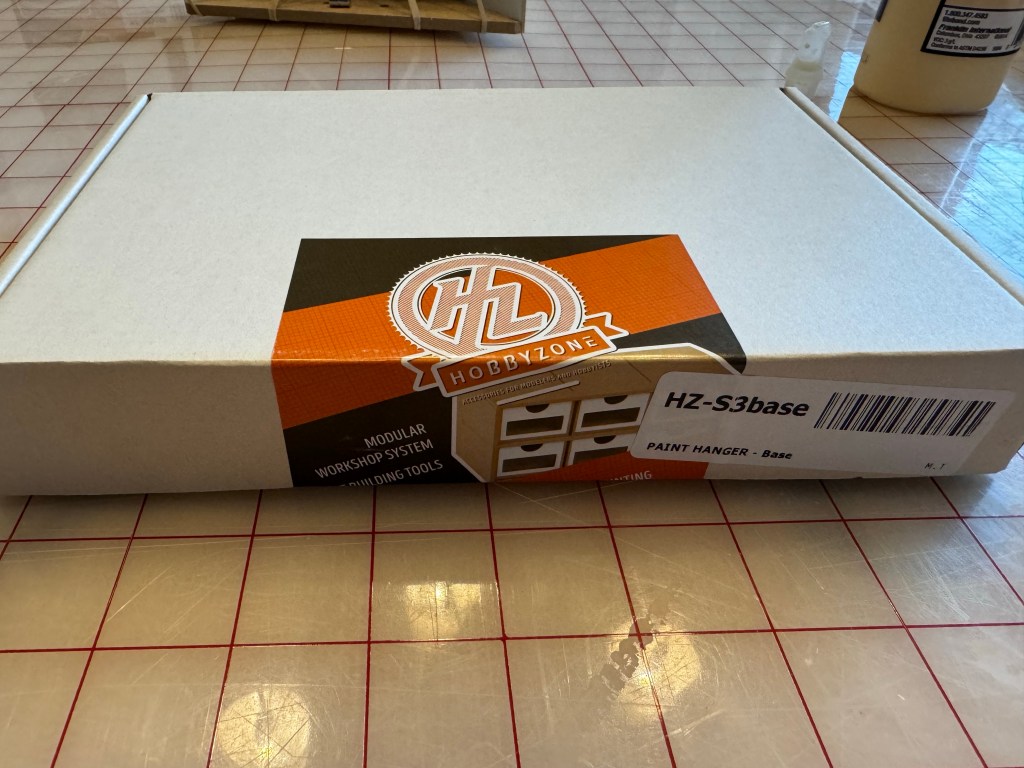
Feeling good about myself I moved to the next easiest looking module, HZ-S3base Paint Hanger Base. This part is designed to attach to the bottom of a wall hanging paint rack. This allows it to sit on a desktop instead of being hung up.
It came as seven wood pieces and included two magnets. The parts went together with little fuss. After the first one I ended up assembling the bottom and tray pieces first then added the side pieces when I glued it to the hanging paint rack. This allowed me to make sure everything was flush and lined up.
Once paired with a paint rack there is a sizable tray for pretty much anything. I use it to store extra paint and miscellaneous hobby tools.
Assembled dimensions: 11.8″ x 3.9” (30 cm x 10 cm)
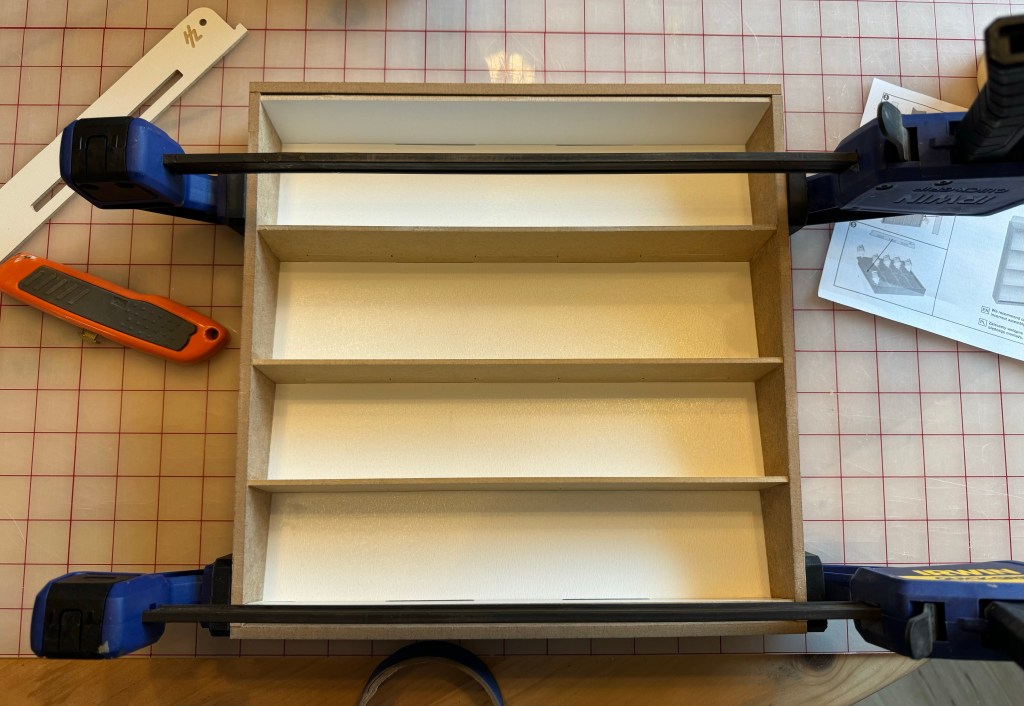
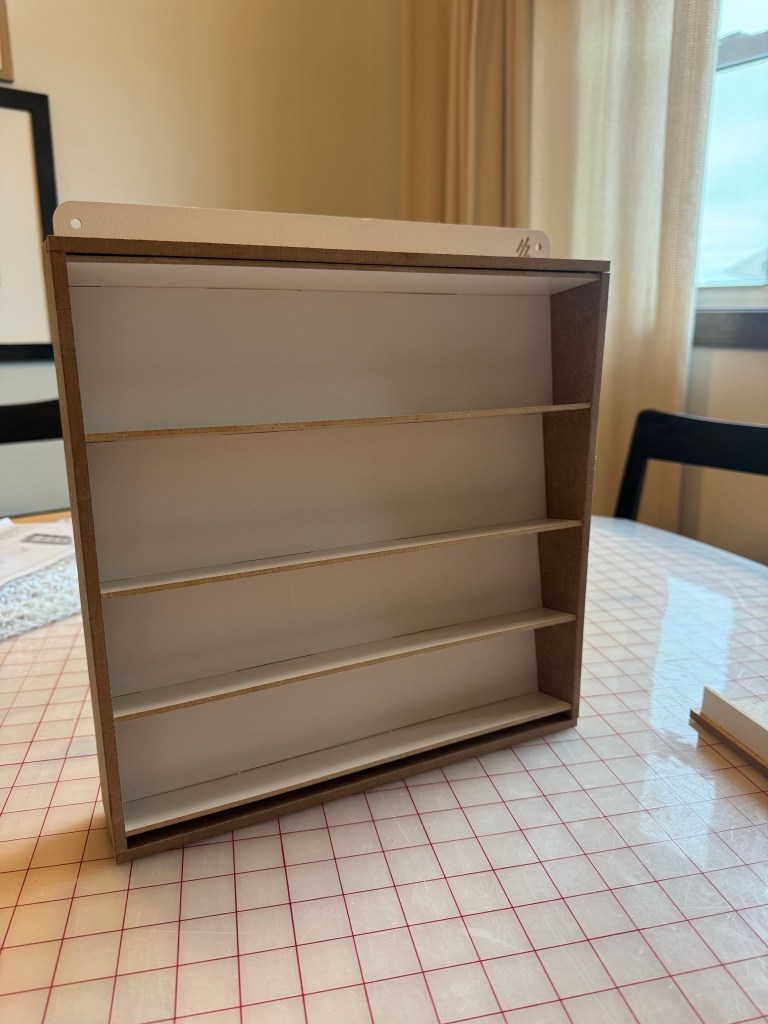
HZ-S3s – Paint Hanger 26mm
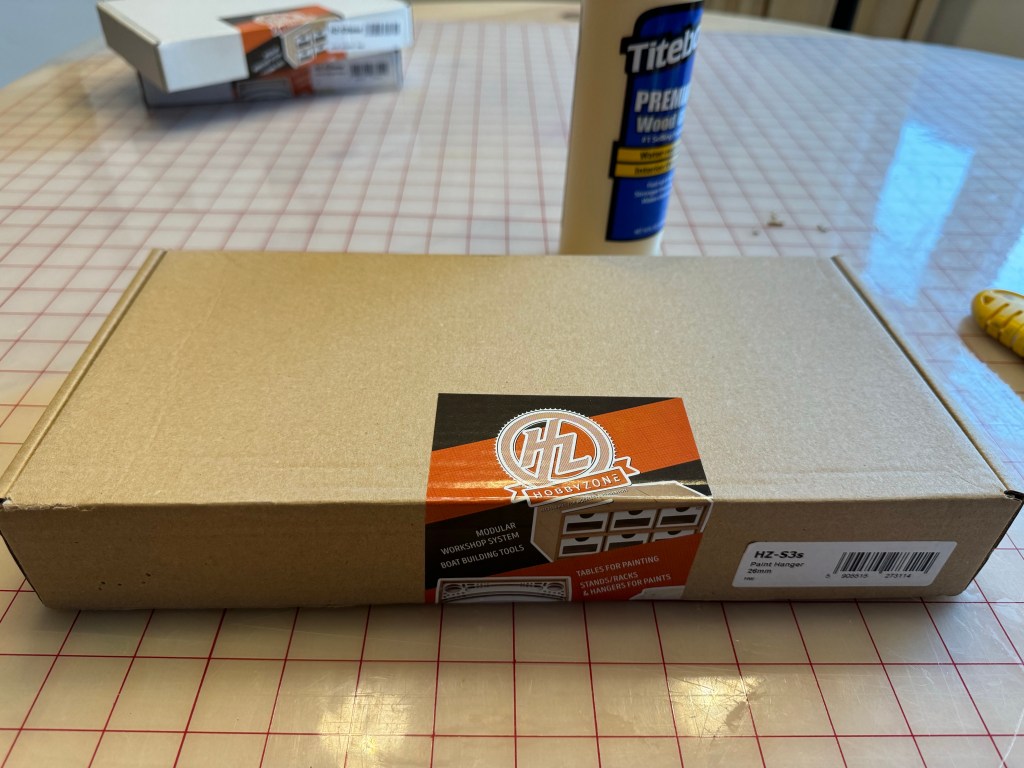
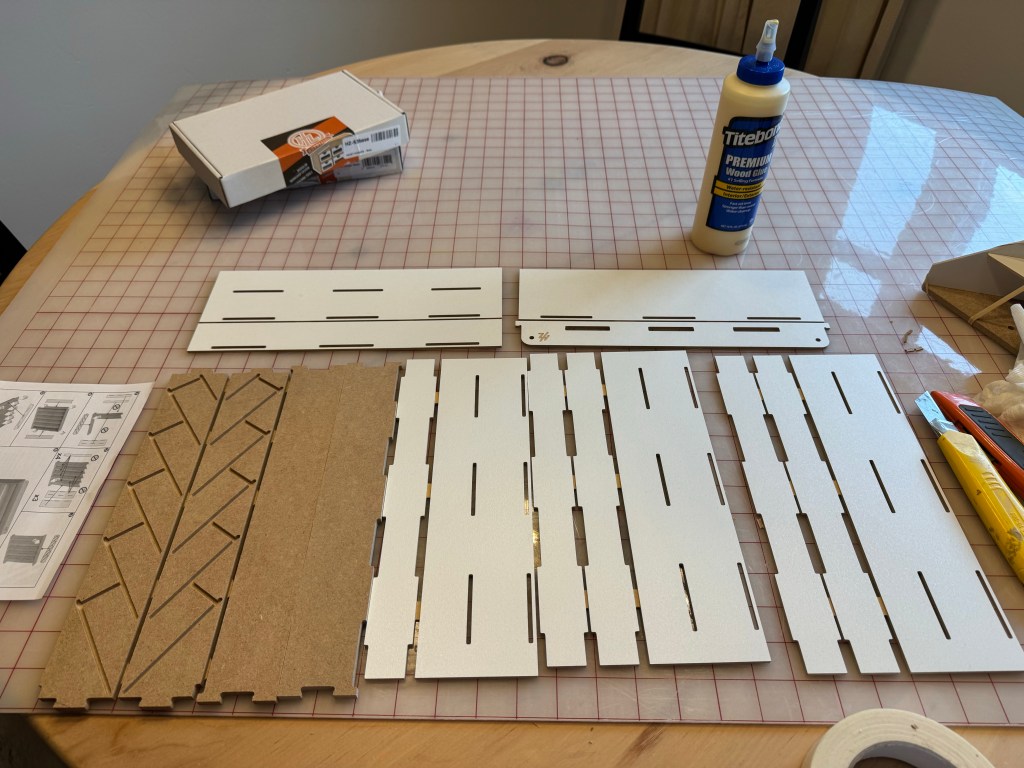
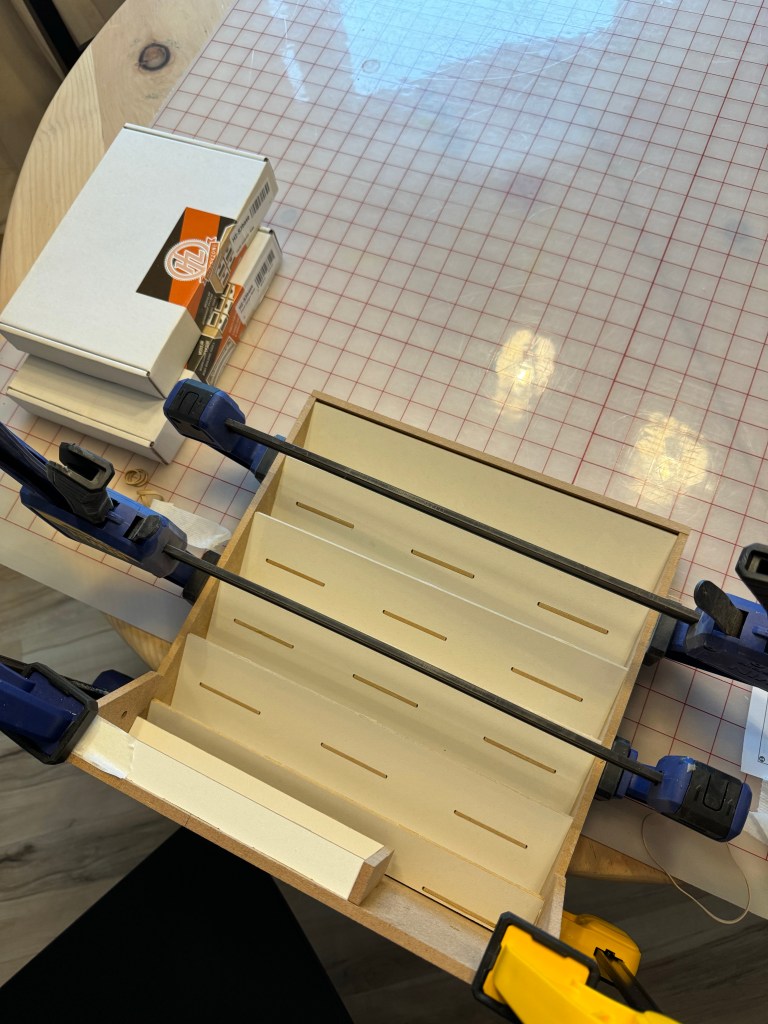
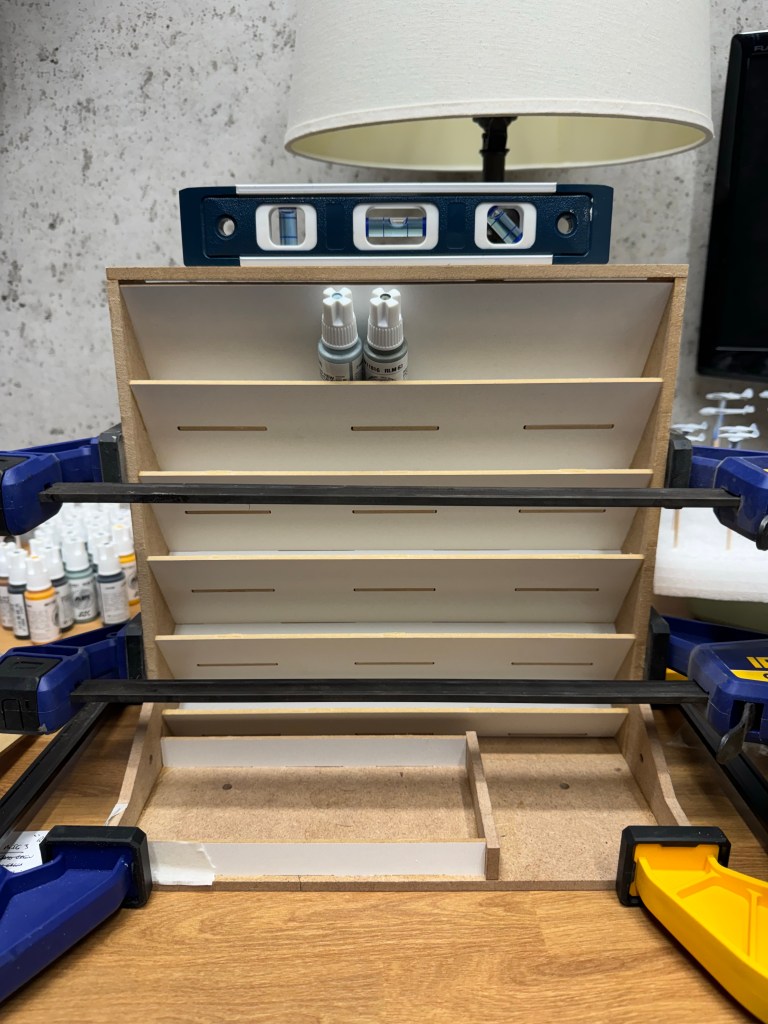
After two smooth assemblies I decided it was time to tackle one of the paint racks the HZ-S3s Paint Hanger 26mm. As I had five of these I got pretty good at building them. I started by gluing the racks to one of the sides working my way down putting a bead of glue in the slot before pushing the parts together. Once one side was done I placed a long bead of glue in the slot of the other side wall. Once the parts lined up I used clamps to hold them together. I also took a wet paper towel and cleaned up any glue that had been squeezed out.
These went together well but despite my best efforts I wasn’t able to get them perfectly square. This was probably due to my skill and the medium of the product rather than an issue with the product design. Honestly you don’t notice once they are filled with paint… unless you’re me. In retrospect I am being picky. In the end they hold paint bottles really well.
I was able to squeeze 55 paint bottles onto each shelving unit.
Assembled dimensions: 11.8″ x 11.8″ x 2″ (30cm x 30cm x 5cm)
HZ-S3b – Paint Hanger 36mm
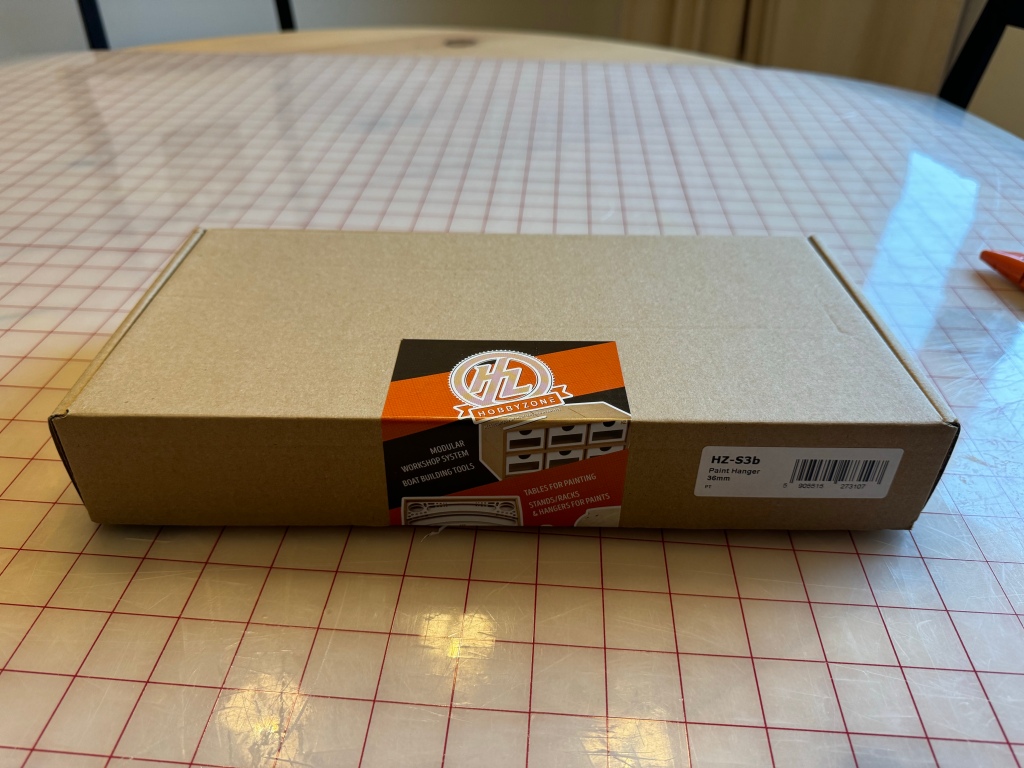

As I mentioned before the other paint module I purchased was the HZ-S3b Paint Hanger 36mm. I use AK interactive oil washes and Proacyl paints which are too large to fit into the 26mm Paint Hanger shelves.
I assembled the 36mm rack in the same fashion as the 26mm one. I didn’t have any issues and everything fit as expected.
Each shelf was able to hold eight AK enamel wash size bottles on each of the four shelves for a total of 32.
Assembled dimensions: 11.8″ x 11.8″ x 2″ (30cm x 30cm x 5cm)
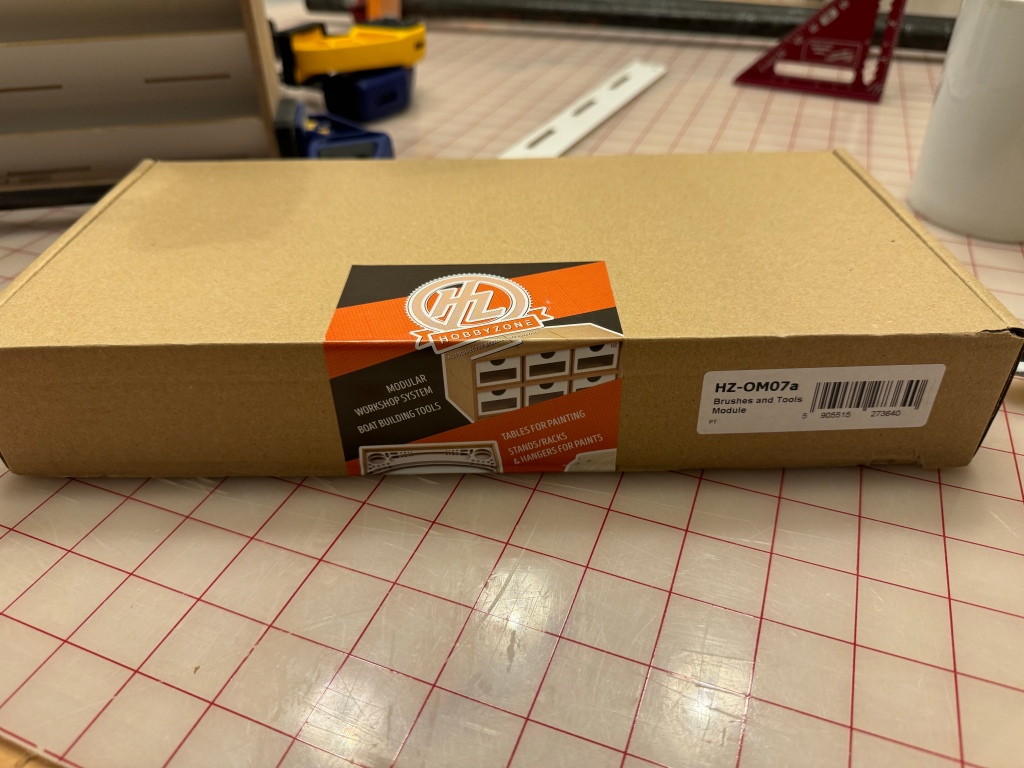
HZ-OM07a – Brushes and Tools Module
HZ-OM7a is a combination paintbrush and tool rack. This module went togther easily and has a ton of slots for ample vertical paintbrush storage. The brush rack is magnetized to connect with modules next to and below it. Construction was straightforward and all the parts fit well.
The paint brush section has enough for a whopping 116 brushes. There is a dowel bar to hold pliers, cutters, and tweezers. The front of the rack has storage for 14 small drill bits and a flat area to lay larger brushes.
Assembled dimensions: 11.8″ x 5.9″ x 5.9″ (30cm x 15cm x 15cm)


HZ-OM11 – End Corner Drawers Module
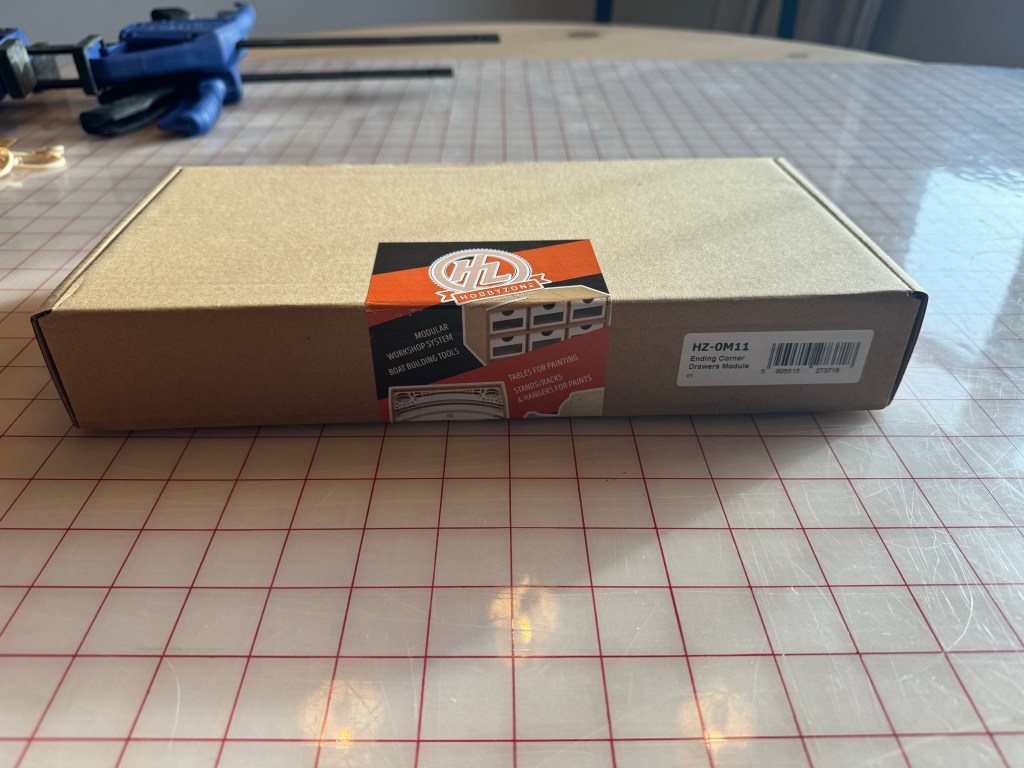


Sometimes you need a spot to store those little tools and nicknacks that find their way onto your hobby desk. I figured I should put masking putty and other painting supplies in an accessible spot and the End Corner module fit that bill. The drawers are pretty small as the over all depth and width of the unit is 5.9” x 5.9” (15cm x 15cm). The OM11 went together nicely without issue and combined with the End Shelf makes a nice finished end piece to my set up.
Assembled dimensions: 5.9″ x 5.9″ x 5.9″ (15cm x 15cm x 15cm)
The Final Initial Verdict

The Hobby Zone workbench kits are pretty slick. I am satisfied with the functionality. Each component accomplishes its designed task. I like that they are magnetized and stick solidly together. Each piece can be relocated and they are designed to be modular. You’ll notice each part is typically 11.8″ or 5.9” (30cm or 15cm) wide. All of them are designed to fit together without gaps or overhang.
The drawer units open and close without binding. The paints are displayed in a way I find pleasing and the clean white look gives me a fresh feeling space to paint miniatures.

While assembly took me probably eight hours over several build sessions the components are solid. Each part has a good heft and feels good to hold. Was it worth the cost in money and time? Yes.
The 12 Month Verdict
One of the best parts about writing for a blog in your free time is that you set your own release schedule. I started this article in January of 2024 and we are now in March of 2025. How have the Hobby Zone modules held up?
Hobby workshops are a fluid subject. Everything I assembled stayed assembled. I tweaked some things but the core of my set up is still the triple hanger rack. I invested in my paint and paint products collection pretty heavily. The six paint racks were almost at capacity and I couldn’t fit another set on my desk so I needed another solution.
While poking around I found a very useful Ikea pegboard called a Skadis. I hung this on the side of my airbrush booth where my paint brush rack was located. This added storage for around 100 new paints and oil washes. I will probably take a look at the Skadis and some of the components I’ve added in a future post.
I liked the paintbrush rack but I don’t need the 116 brush capacity. The unit took up a bunch of real estate on the desktop as well. I replaced it with a smaller 3d printed brush holder which attaches to the Skadis.

Now the big question. Do I find the Hobby Zone products worth it after a year of having them? Yes, I do. They are still aesthetically pleasing and versatile storage. I am looking at adding to the assembly area of my desk in the future and Hobby Zone units are on my radar. I recommend Hobby Zone products to a hobbiest willing to spend a little more money to have a functional, solid, and streamlined “out of the box” hobby desk storage solution.

That is a very impressive hobby space!
I’m jealous, having to make do with a small plastic serving tray which allows me to move a few figures, paints and brushes to a space somewhere in the house.
I am in awe of your extreme organised-ness!
LikeLiked by 3 people
Thank you! Believe me my desk is never that clean. I always have 3-4 projects cooking in various stages of neglect 😜
I also have some Ikea serving trays to move projects upstairs when the Mrs. allows. There is something special about painting outside or when the windows are open.
Cheers!
LikeLiked by 1 person
Impressive, Ben! 🙂 Glad you’ve found it so useful! And you can obviously never have too many Panthers!
LikeLiked by 2 people
Thank you John. And haha, nothing slips past you! I held off on big kitties for a long time, but finally needed (probably more like wanted) some for our up coming event. The trio are awaiting their final matte varnish. I hope they see the board more than once together 🤣
LikeLiked by 1 person
Dibs
LikeLiked by 1 person
That means you have to write about it 😜
LikeLike
Gonna be a short post
LikeLike
I bought Ben’s hobby zone setup. El fin
LikeLiked by 1 person