
Continued from Chapter 9
Preface
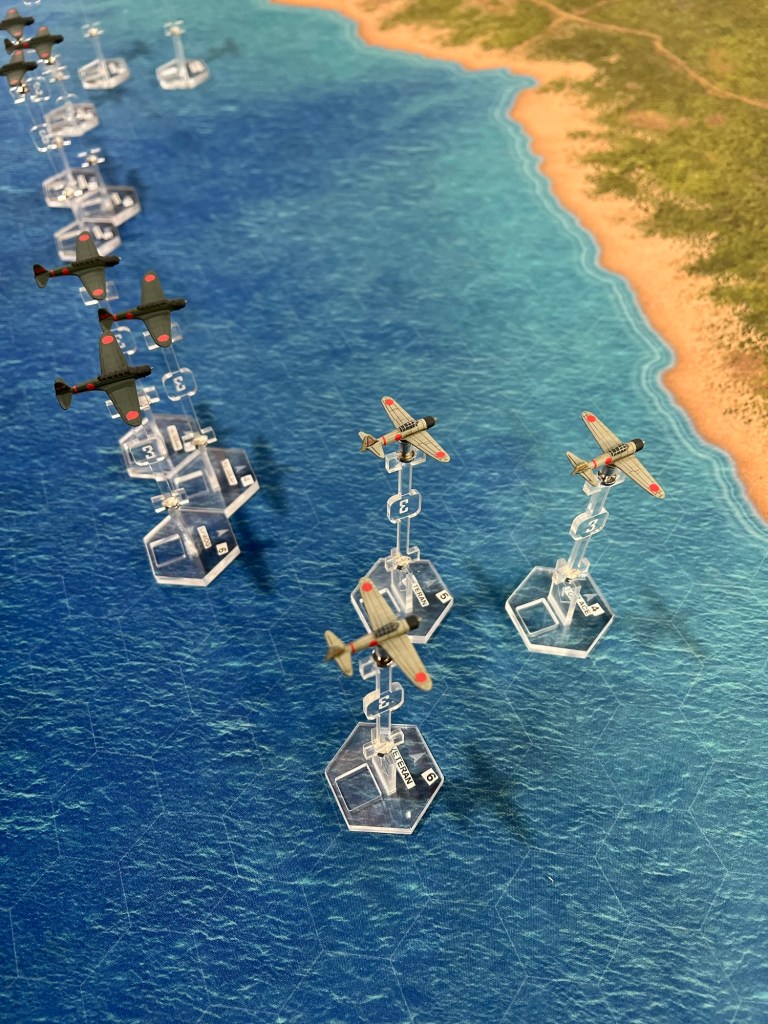
Welcome back to another installment of my first Bag the Hun campaign. If this is the first time you’re reading about it, I recommend going back and catching up here if you want the full story. In this article I’ll be conducting a scenario meant to be representative of a larger encounter: the attack of a force of Zeros and Kates from the Japanese carrier Ryūjō on US forces at Henderson Field on Guadalcanal during the battle of the Eastern Solomons. In actuality there was 16 Wildcats, 2 P400s, 15 Zeros, and 6 Kates. Here I’ve pared down the forces (I don’t have enough Wildcats or appropriate Zeros for the full thing) to just the bombers and their 6 Zeros assigned to close escort, vs 4 Wildcats and 2 P400s. I probably should’ve done 6 Wildcats in hindsight, but that’s how it goes. After the action I’ll briefly go over the post game book keeping for the Squadron Forward supplement.
Order of Battle
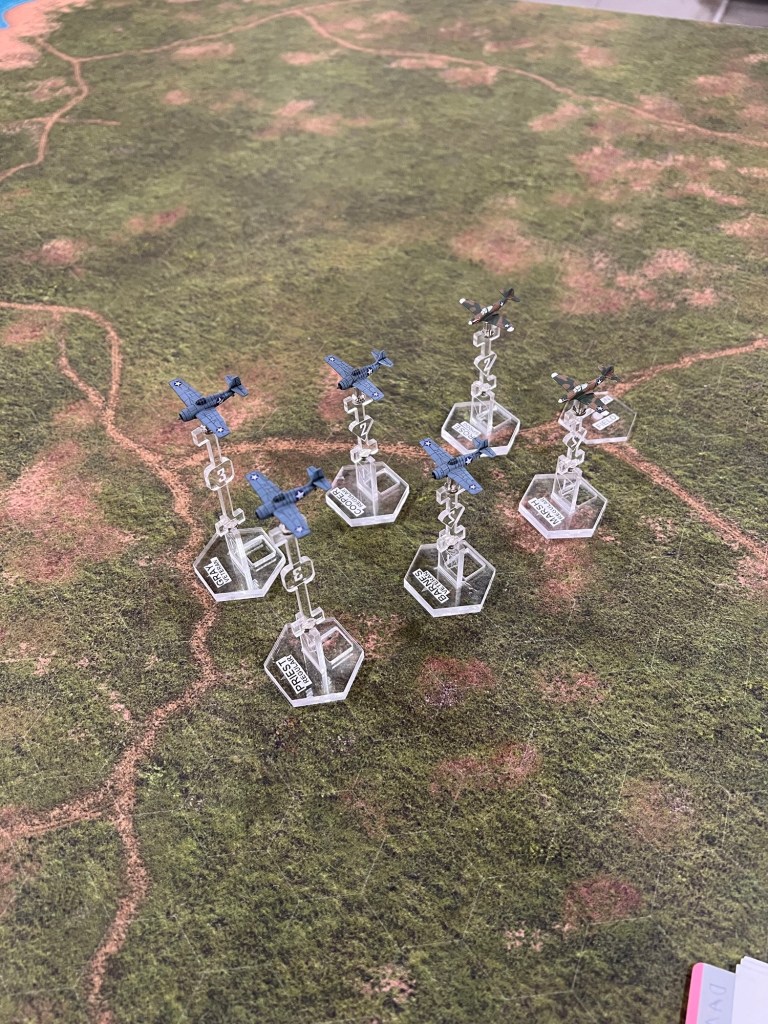
Cactus Air Force
Marine/Navy Flight One
Lt. Doug Gray / Veteran / F4F-4 Wildcat
Ens. Vincent Priest / Regular / F4F-4 Wildcat
Marine Flight Two
Lt. Barnes / Regular / F4F-4 Wildcat
Ens. Cooper / Regular / F4F-4 Wildcat
USAAF Flight One
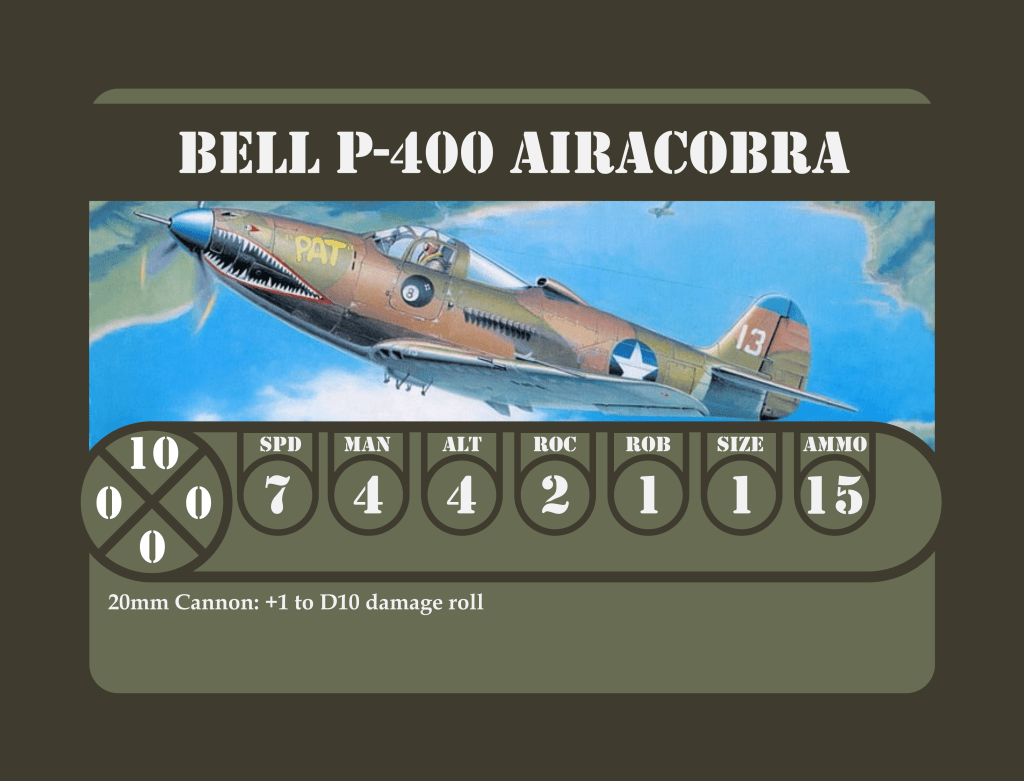
Ens. Marsh / Regular / P-400 Airacobra
Ens. Rose / Sprog / P-400 Airacobra
IJNAS Fighters
First Fighter Shotai
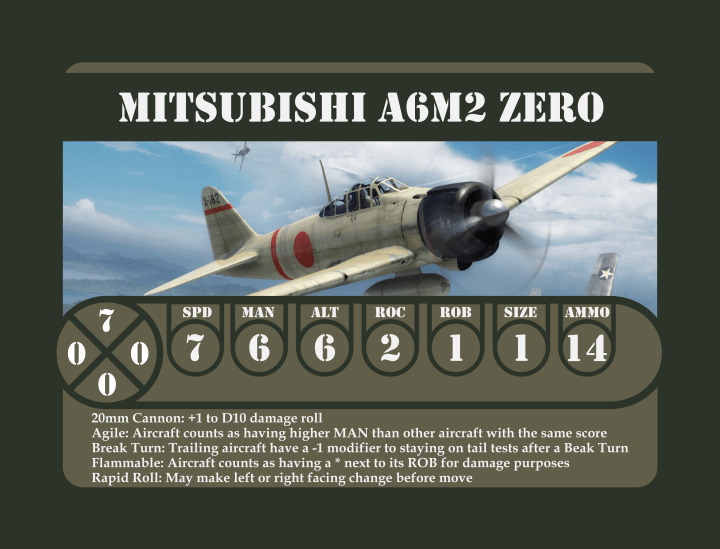
Zero One / Top Ace / A6M2 Zero
Zero Two / Veteran / A6M2 Zero
Zero Three / Veteran / A6M2 Zero
Second Fighter Shotai
Zero Four / Top Ace / A6M2 Zero
Zero Five / Veteran / A6M2 Zero
Zero Six / Veteran / A6M2 Zero
IJNAS Bombers
First Bomber Shotai
Kate One / Junior Ace / B5N2 ‘Kate’
Kate Two / Veteran / B5N2 ‘Kate’
Kate Three / Sprog / B5N2 ‘Kate’
Second Bomber Shotai
Kate Four / Regular / B5N2 ‘Kate’
Kate Five / Veteran / B5N2 ‘Kate’
Kate Six / Sprog / B5N2 ‘Kate’


TURN 1
Vincent Priest looks out at the wing of the F4F Wildcat, climbing steeply over the island of Guadalcanal. A month ago Priest hadn’t even known this place existed. Several weeks ago Priest was shot down over the island during their fight with the Japanese above the invasion of Guadalcanal. After a week of careful movement, and some help from the local islanders, Priest was returned to American lines. Sleeping in a foxhole, he’d been waiting for available spots on a Marine R-4D when Douglas Gray had found him. With the transports full of critical medical cases there was no room for a stray pilot. Douglas Gray, a Marine Aviator, convinced Priest to hop in an F4F and help them fend off the Japanese attacks. The Marine squadron was desperately short of men and material and welcomed a fresh a pilot to their ranks. So now, after getting news of a Japanese raiding force approaching from the north, here is Vincent Priest, aloft once again.
Priest is flying as Gray’s wingman. Behind them climb another pair of Marine Wildcats, piloted by Barnes and Cooper. Nearby two freshly arrived Army P-400 Airacobras are clawing their way higher as well. Marsh and Rose, their pilots, also new arrivals not only to Guadalcanal, but to combat as well.
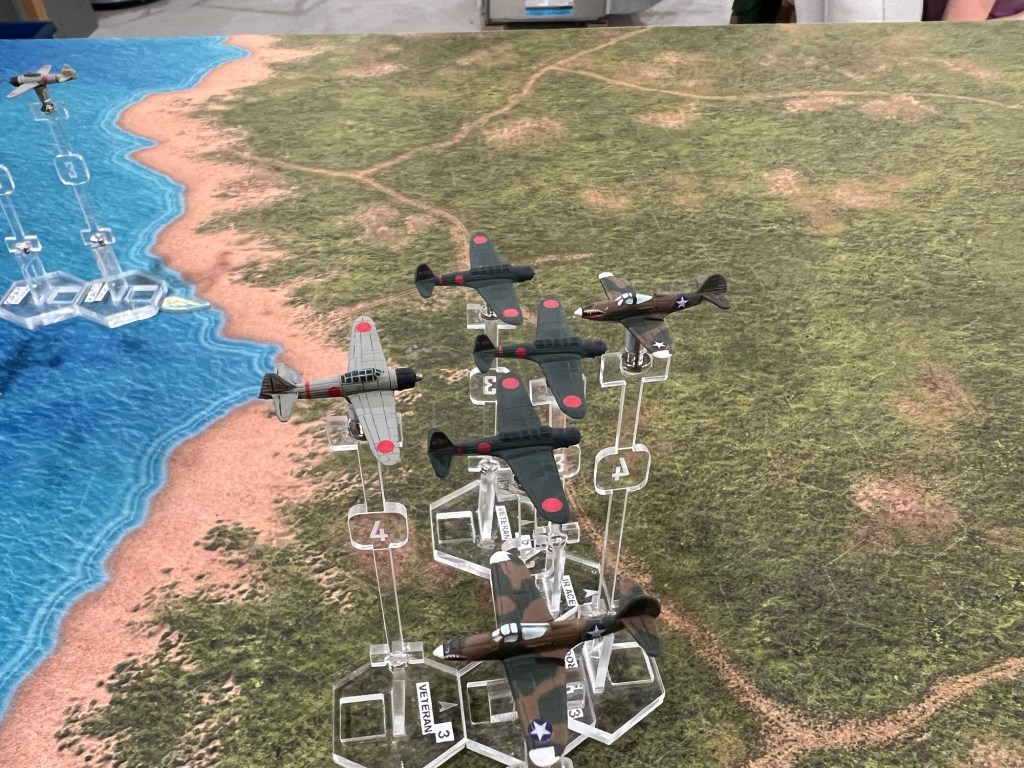
Gray spots the Zeros first, then quickly reports bombers nearby. No sooner are they called out than three Zeros streak by Priest and Gray, quickly maneuvering behind the pair of climbing Wildcats.


The US forces are at an instant disadvantage here on skill levels alone. Most of the first turn went by without much happening as the forces closed. The exception was a trio of Zeros which utilized a great card draw to move multiple times and slide in behind two of the American fighters right away. This mechanic is one of the odd ones in Bag the Hun. Generally a flight, or single plane, will only move once per turn, on their movement card. Aces get a Bonus Card they can move on in addition. If they are a flight leader, and their flight hasn’t yet hard their own Movement Card drawn, the Ace can take the formation along with them for their bonus move, so it requires some luck in card draw order. Add in an Altitude Bonus card and there’s your three moves. It’s brutal when it happens but its relatively rare for it to pan out that way.
TURN 2
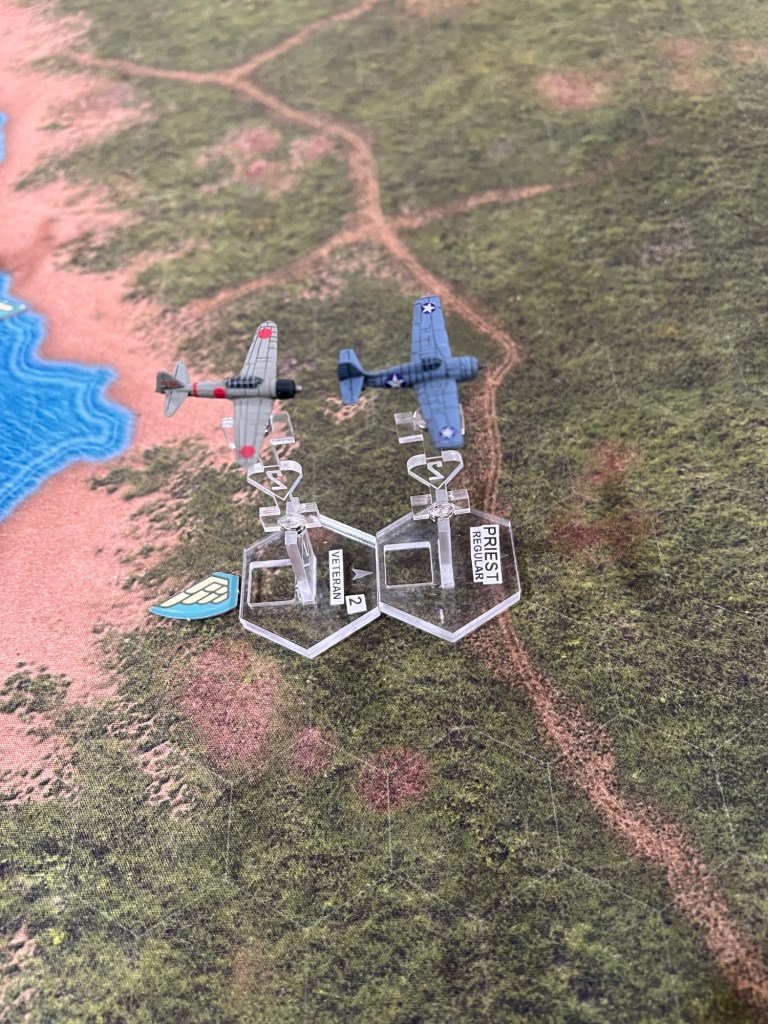
Gray and Priest, hotly pursued by three nimble Zeros, attempt to get a “Thatch Weave” started, hoping Priest can get a shot at the Zero that has honed in on Gray’s plane. Yet, new to flying together, the cross-branch pair of aviators are unable to make it happen. The pair of pilots quickly find themselves separated, and each with their own tailing Japanese fighter.
Nearby Barnes and Cooper also find themselves assailed by a trio of attacking A6Ms. The pair of Wildcats turn into the attackers and streak towards the bombers hiding behind the Zeros. The Zeros try to keep up with the Wildcats but their formation turn becomes a mess and leaves them disorganized and unable to attack the Marines.
Marsh and Rose top out their ability to climb in their P400s. Lacking functioning oxygen systems, the Airacobras stay lower and attempt to close with the Kate bombers. A lone Zero streaks by Rose’s nose before he can get a shot off, and the pair of Army fighters are left alone as Marsh lines up on a Kate.


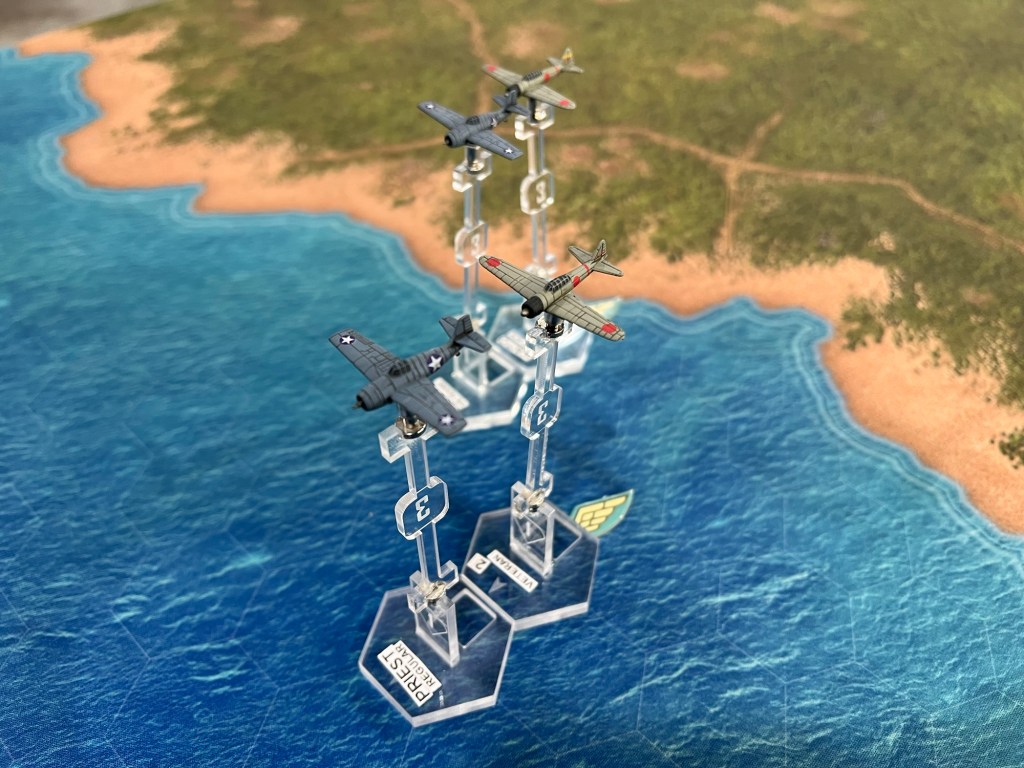
Turn two saw a lot of aggression from the Japanese fighter cover that did a good job of breaking up the US fighters and making them split into piecemeal pairs or individual. The Thatch Weave is a historical tactic used by US pilots in the Pacific against the nimbler Zero and essentially consisted of two Wildcats weaving back and forth. This way, if a Zero got behind one of the pair, the other pilot in the pair would have a shot at it as their paths crossed. It’s a hard thing to represent on the tabletop and is its own maneuver in Bag the Hun. If both pilots don’t pass the test though, it fails, and that’s what happened with Priest and Gray. Had they succeeded Priest would have been allowed to resolve a range one shooting attack against the Zero, and then would have ended up still as a pair, but on Gray’s opposite wing.
TURN 3
Gray desperately maneuvers his Wildcat in a series of evasive actions but unbeknownst to him the pilot on his tail is an extremely talented ace with his mind set on victory. Gray’s F4F is riddled with holes from the Zero’s guns and cannons, suddenly it snaps out of control tumbling towards the sea below.
Vincent Priest’s Wildcat shakes and shudders as his pursuer’s fire finds its mark. Unable to shake his opponent in his now stricken aircraft, Priest turns and decides to try to make Henderson Field, hoping the anti-aircraft fire will drive off the Japanese fighter behind him.
Marsh and Rose pass quickly behind the Japanese bombers, unable to get lined up for a shot. Tracers dance around the Airacobras as the tail gunners of the Kates are unable to hit the Americans. Marsh leads the pair in a turn back towards the bombers hoping to come around for a second try.
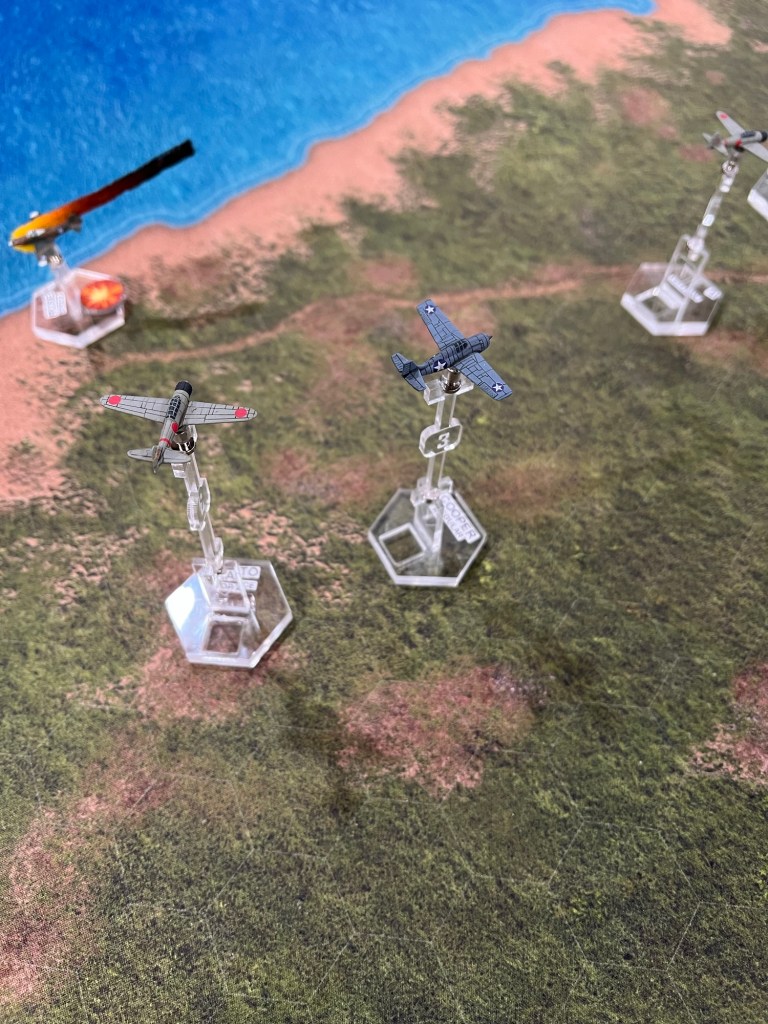
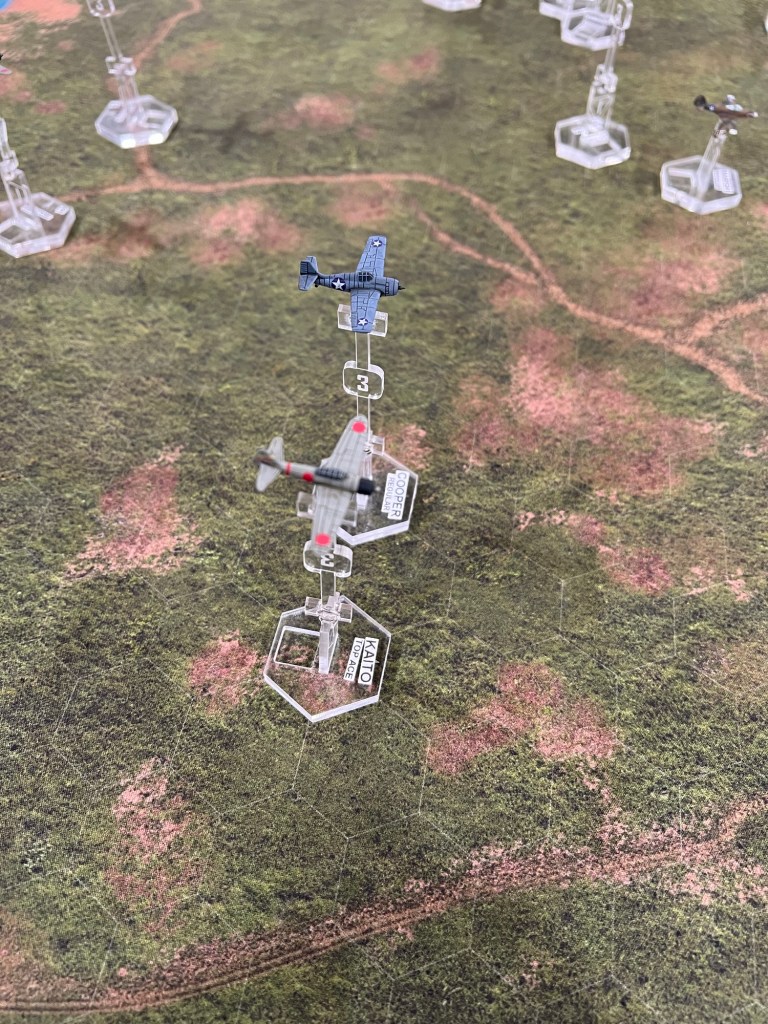
Barnes and Cooper pass head to head with a Zero as the maneuver, trying to find a target. In their turns Barnes drops lower inadvertently and is rewarded with a Zero that materializes behind him, forcing Barnes to take evasive action. Cooper, alone, rolls out of his turn and spots a flight of three Kates headed straight at him. He takes aim at the lead one and has only time to let loose a short burst but sees it shatter the front of the bombers cockpit. As Coopers pulls out and begins a turn he sees the bomber turn and dive aimlessly into the jungle below.
Nearby at Henderson Field the first flight of Japanese bombers passes over the field, dropping their eighteen 60kg bombs on the 90mm anti-air position below. Luckily for the beleaguered Marines below the bombs land wildly dispersed, with only a lone bomb landing close to the emplacement. Even that lone bomb is far enough off target to cause no damage.


Immediately the Japanese fighters knocked both Priest and Gray out of the fight, which was quite the blow to the force balance overall. Luckily Cooper made up for it by getting a hit on a Kate, which killed the pilot. The Kates’ bombing run on Henderson didn’t go very well. The bombing rules in Bag the Hun are a bit complex the first few times through, but like most of the system get easier after a few reps. They certainly lean towards the historical reality of it being hard to hit things from the air, and with only three bombers the result was about what I expected. The P400s continued to be a bit of a learning curve for me, being capped at altitude four and not having the ability to turn a hex face before movement (I’ve codified this as “Rapid Roll” in my cards, stealing terminology from other games to make it easier to remember across systems) the Airacobras feel a bit lackluster comparatively, but hey…. they were!
TURN 4
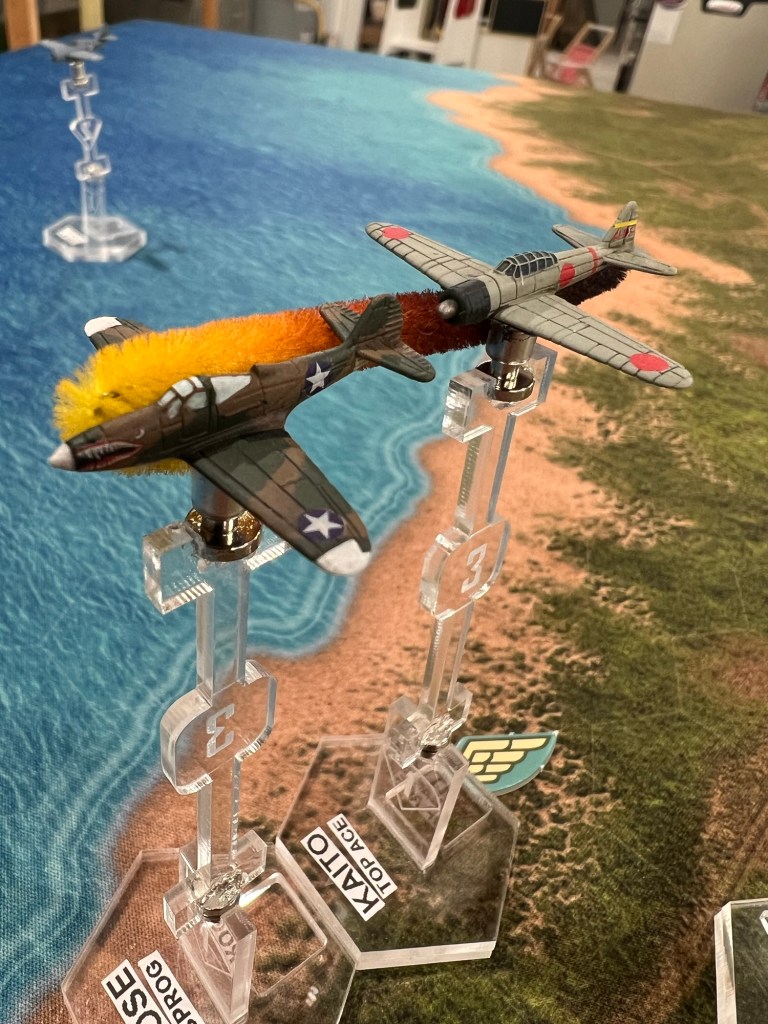
Gray fights his out of control Wildcat trying to bring the aircraft back under his control. His attempts are unsuccessful as the stubby fighter continues its rapid descent to the sea below. Kaito, the ace responsible for his damage decides the Wildcat is as good as finished and turns his nimble Mitsubishi fighter back towards the greater action.
Priest quickly approaches Henderson and gambles on making a fast landing as to not make himself a victim of the Zero behind him. His Wildcat crashes onto the airstrip, one landing gear collapsing and sending the whole aircraft skidding off to the side. As it comes to a halt Priest looks around, surprised to find himself unscathed. The Zero that pursued him quickly pulls up, climbing and turning back north to find other prey.
Marsh spots a flight of three Kates descending towards Henderson, and makes an aggressive turn to pursue them. Unfortunately, Rose is checking behind them and misses his leader’s turn. He looks back to find empty sky around him. Rose starts a turn left to try finding Marsh, or get back towards Henderson if not. As Rose turns Kaito’s Zero settles in on his tail, having spotted the lone P400 and completed a series of complex maneuvers to attack his new quarry.
Marsh approaches the Kates from behind but this time their tail gunners find their mark, hitting Marsh’s aircraft, causing the engine to stutter and burp. Marsh breaks off his attack and seeing that his engine likely doesn’t have long to live, turns to line up for a landing at Henderson. The second flight of Kates continues unopposed to drop their bomb load on the 90mm emplacement at Henderson. This time several bombs find their mark, causing some light damage and forcing the crew to cease firing.
Cooper tries to locate Barnes but doesn’t see him anywhere. He does however see a lot of Japanese fighters. Barnes shakes the Zero on his tail with his evasive actions but quickly finds himself set upon by a fresh attacker. The Japanese pilot scores hits all over Barnes’ aircraft. Barnes realizes that his Wildcat won’t last long and sees Henderson a short distance away and makes for the field.
Rose’s P400 suddenly snaps to the left and rolls violently. Rose manages to see that he no longer has a wing on his left side. Rose struggles with the door trying to get out of the doomed aircraft, having been completely unaware of Kaito’s deadly attack.


Another gut punch of a turn for the US forces this time. The demise of Rose’s P400 to Catastrophic Structural Damage, Marsh taking Engine Damage from the tail gunners and Barnes taking Critical Instrument Damage (which forces the aircraft out of the fight) means that the US force is effectively down to one fighter: Cooper. Meanwhile all six Zeros are alive and well, two Top Aces and four Veterans against an Average pilot, which is terrible odds for Cooper. The second pass of Kates goes better for the bombers. A little late for the result to matter in the fight but the Light Damage reduces the AA shooting capability by one dice, and resulted in the Flak position being Pinned (unable to fire on the next Flak Card). In a positive light Priest rolled great for his landing attempt despite the damage to the plane (It’s a rental anyways.)
TURNS 5&6
Gray decides that he has run out of time to recover the Grumman fighter, and instead opts to bail out. His chute opens and Gray drifts down to the water below. He splashes into the water and is quickly recovered by friendly forces.
Cooper spots a Zero pulling away from a stricken P400 and tries to get behind it for some revenge. However he quickly finds himself out piloted by his opponent and the situation is quickly reversed. Cooper tries a few violent turns and shakes his attacker, who turns away to the north. Cooper decides discretion is the better part of valor and opts not to pursue the Zero. Cooper instead turns for the airfield.
Rose struggles to get out of his P400 but he is pinned by the G-forces of the tumbling airframe and unable to escape before the fighter impacts the jungle canopy below.
Marsh manages to land his damaged Airacobra on Henderson, ensuring the aircraft can return to the action after some repairs. Moments later Barnes makes his own landing attempt, however the Zero behind him refuses to let him go and just short of the runway the Wildcat erupts into a ball of flame as the Zero pilot makes his kill for the day. The Zero makes a victory roll as it climbs away from Henderson, the anti-aircraft rounds missing it by a healthy margin. To the surviving pilots on the ground the spectacle seems representative of the day they’ve had…

Cooper made an ill fated attack on Kaito and failed to get on the tail. Kaito had no problem turning all around and ending up behind Cooper and on his tail thanks to a Ace bonus card. Luckily for Cooper Kaito never got a chance to shoot before Cooper somehow managed to shake the Top Ace with a few Break Turns. Rose met an unfortunate end, but getting a Sprog to bailout is an exercise in frustration. He had three attempts, but Sprogs get a -1 on the D6 roll… Marsh made a normal landing but Barnes was less lucky as the landing while being pursued rules let the attacker shoot if they get the chance for the rest of the turn. Essentially if you’re trying to land a plane, you don’t want to do it if you have someone behind you who hasn’t had their Fire Card drawn this turn. It worked out for Priest earlier, but not for Barnes.
Overall the scenario was a tough one from the start for the US force. The real scenario involves an additional 9 Zeros and 12 Wildcats, and while that certainly would’ve helped I simply don’t have enough models painted at this time for that one. I would like to return to the scenario one day and play it 1:1 to see how it goes though. I expected a hard run for the US side after rolling the pilot skills up from the charts in the book. The actual result was more brutal than I anticipated, but sometimes that’s how it goes. The scenario was clearly a Japanese victory, though their bombing goals only achieved very minor successes. Now I’m off to finish Adepticon 2025 prep work, and I hope to be back with another installment sometime in April or May when I find the time. Thanks for reading.
Evan
Addendum: I’ll quickly run through the Squadron Forward results for this mission, despite most of the pilots not being involved I’ll be doing it anyways to represent some passing of time.
POST-GAME
(Squadron Forward)
Losses (VF-2 only):
-None
Gains:
-Two replacement F4F Wildcats have arrived
-Two new replacement pilots:
Ens. Simon Valdez
Skill: Average
Personality: Cheery
Motivation: Government
Background: Up from the ranks
Simon is a true Texas patriot. A man who found his calling to be the service to his country for its own sake. Originally an enlisted man Simon has found his way up the ranks to an officer position, called a “Mustang” in the Navy. Dreaming of flight since watching early carrier aviation in the 1930s Simon finally found his way into the cockpit of a fighter and is ready to avenge Pearl Harbor in the Pacific.
Ens. Robert Vernon
Skill: Average
Personality: Pragmatic
Motivation: Government
Background: Average Joe
Another Texan out to serve his country, Robert wanted to fly, and especially to fly in the military. He saw the Navy as a pragmatic choice, reasoning at worst he’d end up on a ship and that sounded better than slugging a rifle around in the Army. He received an appointment to Annapolis and graduated in 1939, and was moved to a position as an instructor pilot. Once the war started, Robert tried as hard as he could to move to a combat unit, and finally found himself assigned to VF-2.
Events and Other:
– Vincent Priest moves from a 4+ to return to base to a 3+ next time after rolling a 1. Looks like it’ll be more time on Guadalcanal for him.
– Dick “Bastard” Blanchard receives a promotion. Despite his unsavory attitude VF-2 needs leaders in the ranks. Bastard is now a Lieutenant Junior Grade.
Squadron Status:
-Eleven pilots available to fly
-One pilot stuck on Guadalcanal
-Twelve F4F Wildcats available to fly
-Ben Wilson leads the VF2 ace race, with 13 kills to Dan’s 9, Evan’s 8, Priest’s 3 and Bastard’s 2

can’t wait for April. Can you tell me where you got the great coastline hex mat?
LikeLiked by 2 people
https://wars175x.narod.ru/wargameprint/battlemats/bm032v6.html photo came from there, then I had Deepcut Stufios print it for me!
LikeLiked by 1 person
awesome, thank you.
LikeLike
You’re making me want to try Bag the Hun! I really should get around to it as a Lardies fan. Lovely planes–this game looked great!
LikeLiked by 3 people
He’s pulled me into BtH pretty hard. The game is a lot of fun with the tension of the card pulling. I don’t think you’ll be disappointed.
LikeLiked by 1 person
It’s a great game and if you’re a Lardy fan and a plane fan you’ll be sure to enjoy yourself!
LikeLiked by 1 person
An action-packed game but not great for the US forces! We’ve all had games go like this one though! As always, enjoyed the read! 🙂
LikeLiked by 1 person
. . . and it turns out I played a game of Blood Red Skies last night with US forces and got absolutely trounced in a similar manner! Four Zeros escorted three Vals on a raid on a US airfield and I defended with four Wildcats and two P40s – at the end of the game I had one P40 left in the air and it managed to shoot down the only Japanese loss in the game, one of the Zeros! Despite losing dramatically it was a good game though!
LikeLiked by 1 person
That seems like a familiar outcome! Glad it was fun though, and always happy to hear about more narrative BRS games!
LikeLiked by 1 person