
The winter of 1944-1945 stands as an iconic part of World War Two history. The Battle of Bulge dominates that frozen season and if one wants to put the largest battle fought by the US Army in the Second World War on the table, you’re going to need some American GIs bundled up in their winter gear.
Luckily for anyone interested, Warlord Games is releasing a beautiful new Winter American kit in hard plastic. I was fortunate enough to get my hands on a few sprues early so I could write up this guide. There’s also some great Winter American options from RKX Miniatures, and I’ll go over how to take a non-winter looking mini and make it fit in with your winter ones as well. US forces in the Bulge did not always have proper winter gear. Adding some of these less prepared troopers in with the greatcoat clad figures makes a good hodge-podge unit look which is especially great for depicting forces operating in places like Bastogne.
Before we dive in let me just forward my guide with a few items. First, I generally don’t follow the traditional Base/Wash/Highlight type of painting. If you’re looking for a clean, well contrasted look by all means have a read through, but it’s not the style you’ll find here. I prefer to do base colors, some highlight dry brushing, and then I let a heavy enamel wash all over do the heavy lifting for me. I then reduce that off with spirits to get my final product. It produces a more subdued result with a little grittiness to it thanks to the filter effect of the enamel wash. I like it because it’s fast, and I’m a fan of a weathered, grittier looking minis. You’ll find a consolidated list of paints used at the end of this article. Now let’s get on with it…
Preparation
I start by assembling my minis from a kit, cleaning up a 3D print, or washing new metals to clean them up. I throw them on a base (this time I tired 3D printing my own, but I’m terribly inconsistent from force to force). The next step is choosing a basing medium. For the winter troops I wanted a little muddier looking basing than my usual baking soda and glue gets me. I picked up AK Interactive’s Muddy Ground as it seemed to provide the look I wanted. While prepping the bases I start with a thin coat of the texture. We’ll come back to basing at the end of the guide.
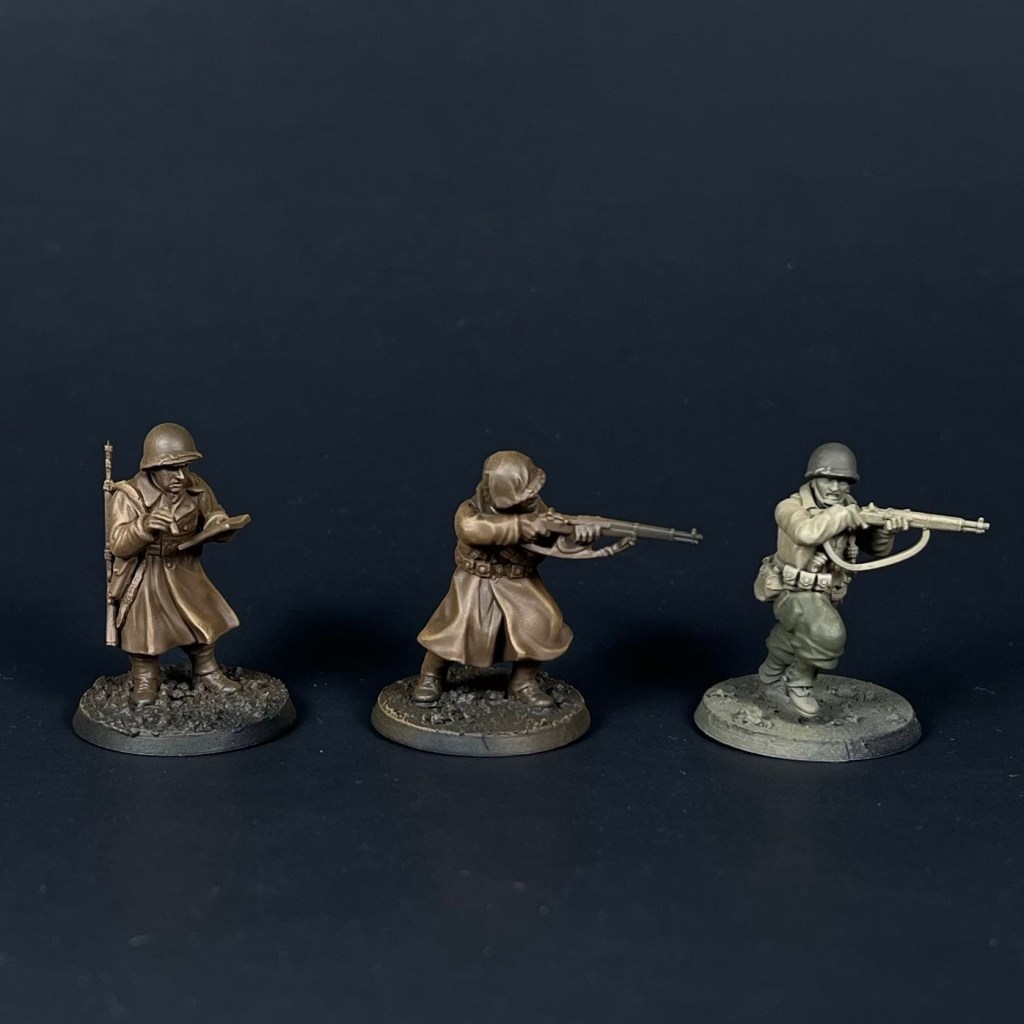
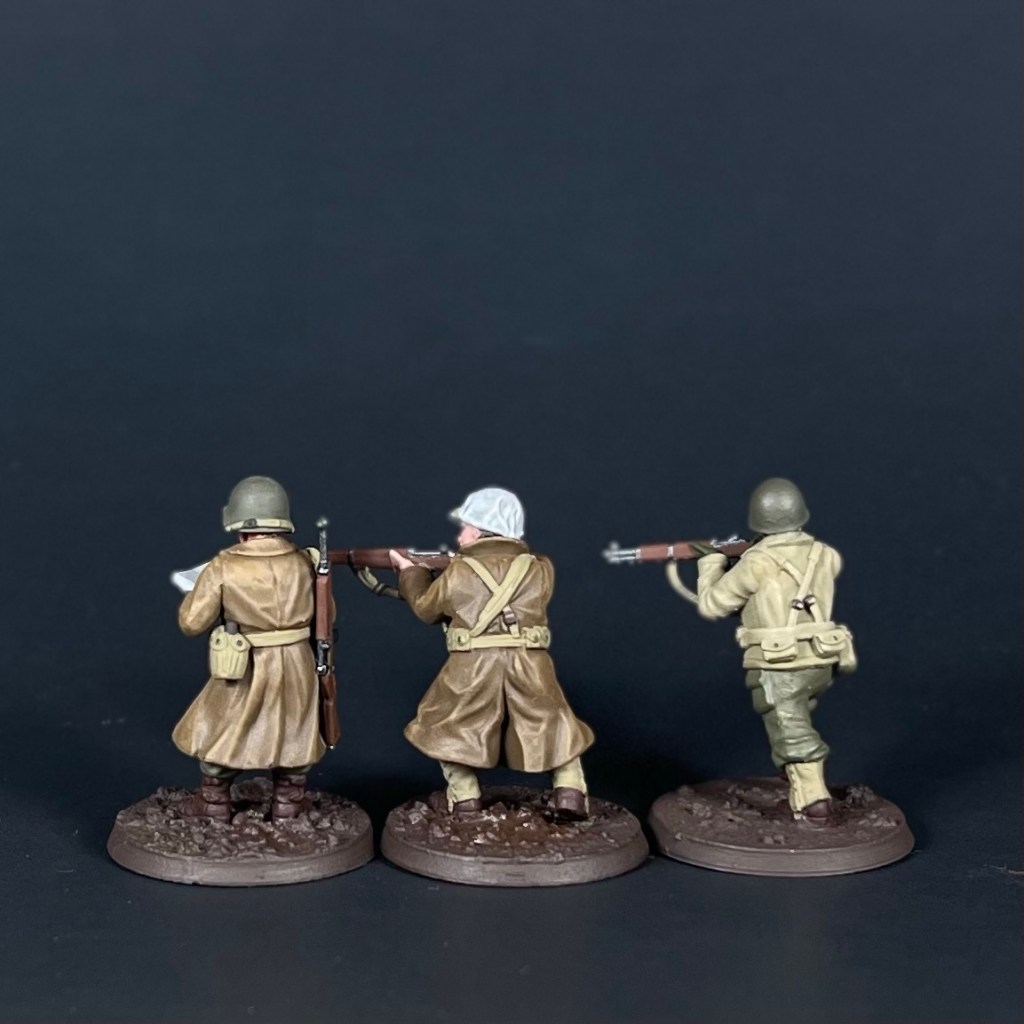
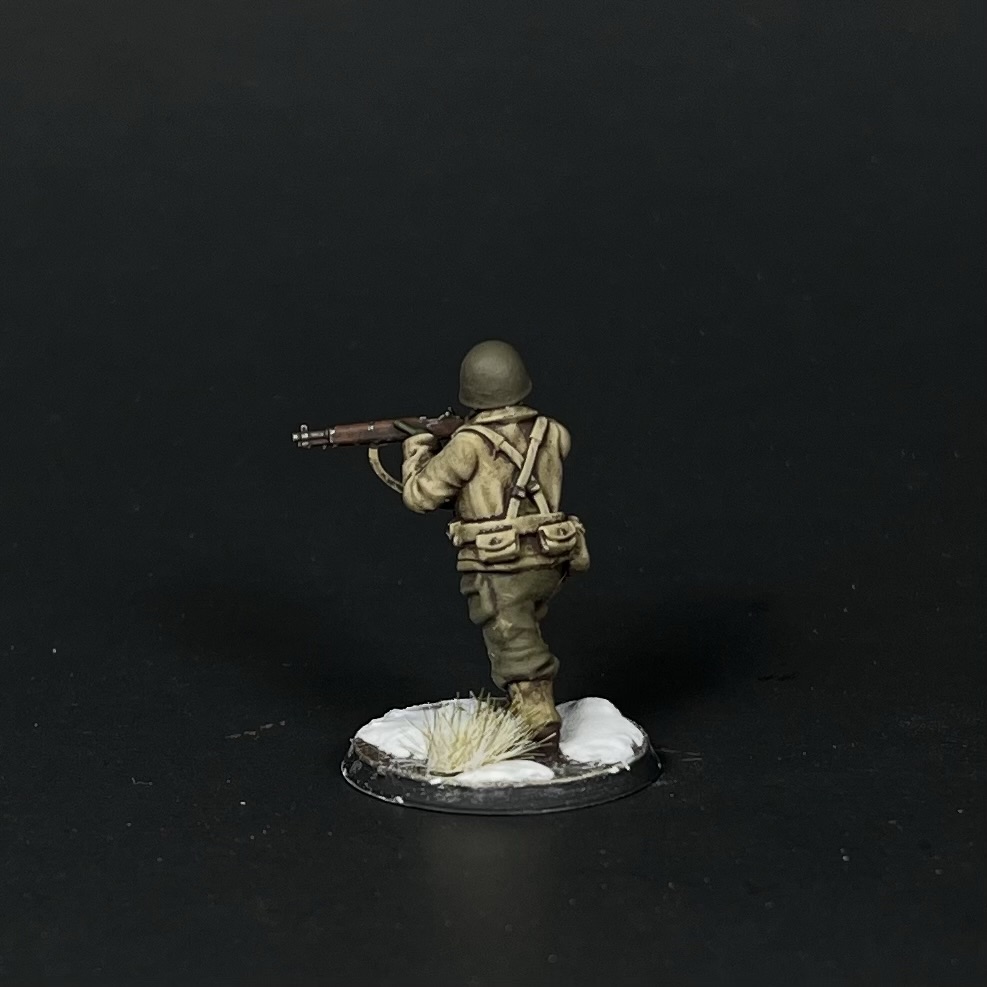
So here are my miniatures for the guide; a Senior Leader for Chain of Command with his map and slung rifle and a riflemen in full winter gear. Both are from the new plastic Warlord US Winter box. For comparison I also included a 3D Breed Join or Die WW2 US Rifleman. I’ve been loving this set and this is a good chance to show how to make a normal US Rifleman fit into a winter collection. I already started painting him a while back so forgive me as he hangs out in a few pictures until the process catches up to him.

The final preparation step is priming the miniatures. I use Badger’s Stynylrez Black Primer shot through my airbrush. That said any suitable black primer will do the trick.

Painting
My first step in painting is to airbrush on my base color for the miniature. For US winter forces that means one of three choices based on what the miniature is clad in:
Winter Greatcoat – Pro Acryl Dark Golden Brown
M1941 Jackets, or any other Khaki coat – AK Gen3 Canvas Tone
M1943 Uniform – AK Gen3 No.9 Olive Drab
Two of the minis are in greatcoats and I had started the third in the M1941 uniform scheme.

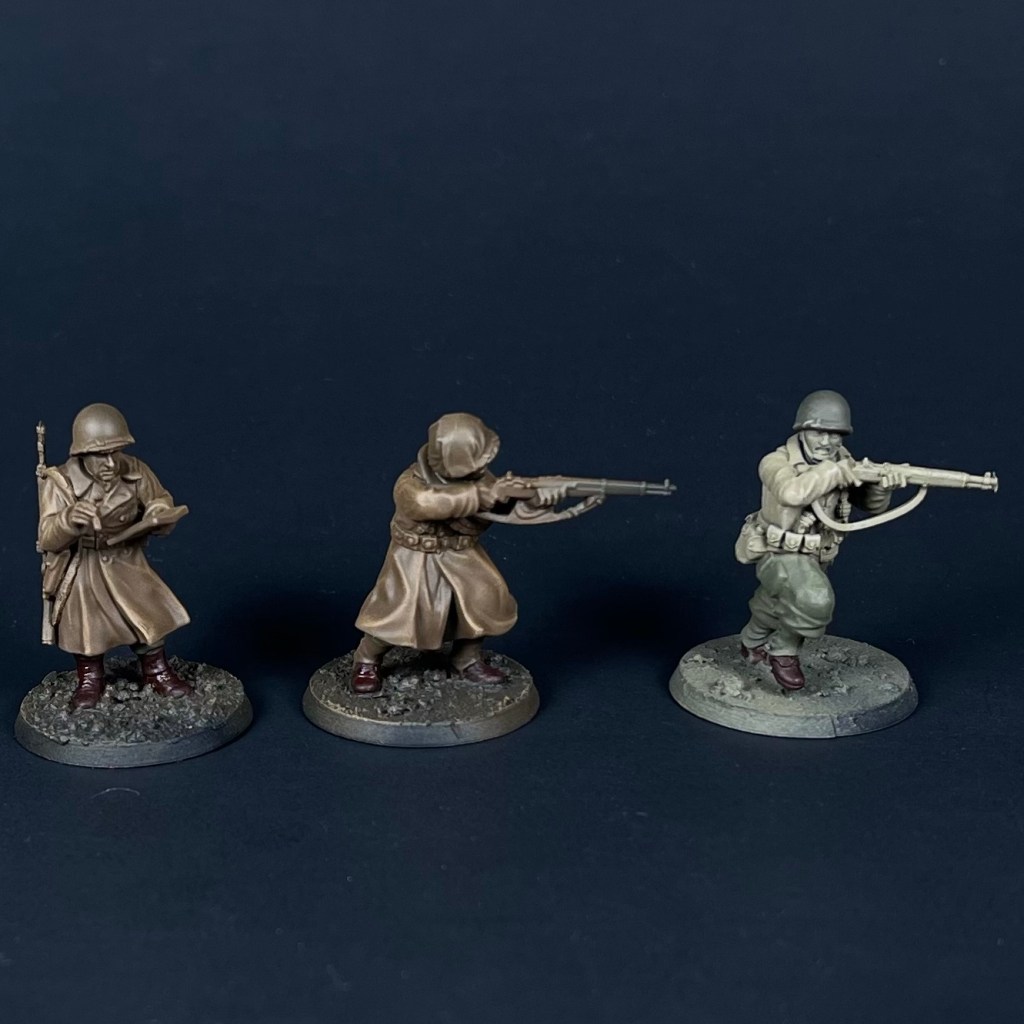
Now I’ll do a gentle drybrush over these overall uniform colors. I use Pro Acryl Dark Orange Brown for the greatcoats and Vallejo German Camo Beige for the khaki M1941 scheme. For the M1943 scheme I recommend AKG3 Olive Drab Base.
With the drybrush done it’s time to basecoat everything else. I start with the pants usually. I vary this depending on the pants I want to represent, and there’s really only two options for late 1944 to early 1945:
Brown wool pants– Pro Acryl Dark Golden Brown
HBTs or M1943 pants– AK Gen3 No.9 Olive Drab
Before you go for the throat because I used the same color for the HBTs and 1943 pants consider a few points. First, it’s easy. Second, the OD colors aren’t massively different and I think the overall composition of the full green 1943 vs the half and half Khaki/HBT sells the look just fine. Third, it’s your mini, do it different if you so choose. I usually get the boots done right after with Pro Acryl Mahogany.
Skin is next on my agenda and I try hard to keep this simple so I don’t go insane. Pro Acryl Tan Flesh is applied, then washed with either Pro Acryl Flesh Wash or Citadel Targor Rageshade. The latter I like for the cold purply vibe it has, as it just feels colder to me. I use them interchangeably for a little variety. I don’t paint eyes. Other people do skin a lot better than I do, so shop around if you don’t like mine or use your own trusty method. While I’m here I also paint any facial or visible head hair in some sort of brown usually. It doesn’t matter what you use really as long as it stays in the realm of what you might expect to see for hair colors. I personally go between a few colors I use for other things in the scheme for other things because hey, they’re right there and it’s fast and easy. If gritted teeth are visible I’ll hit them with something like AKG3 Grimy Grey.
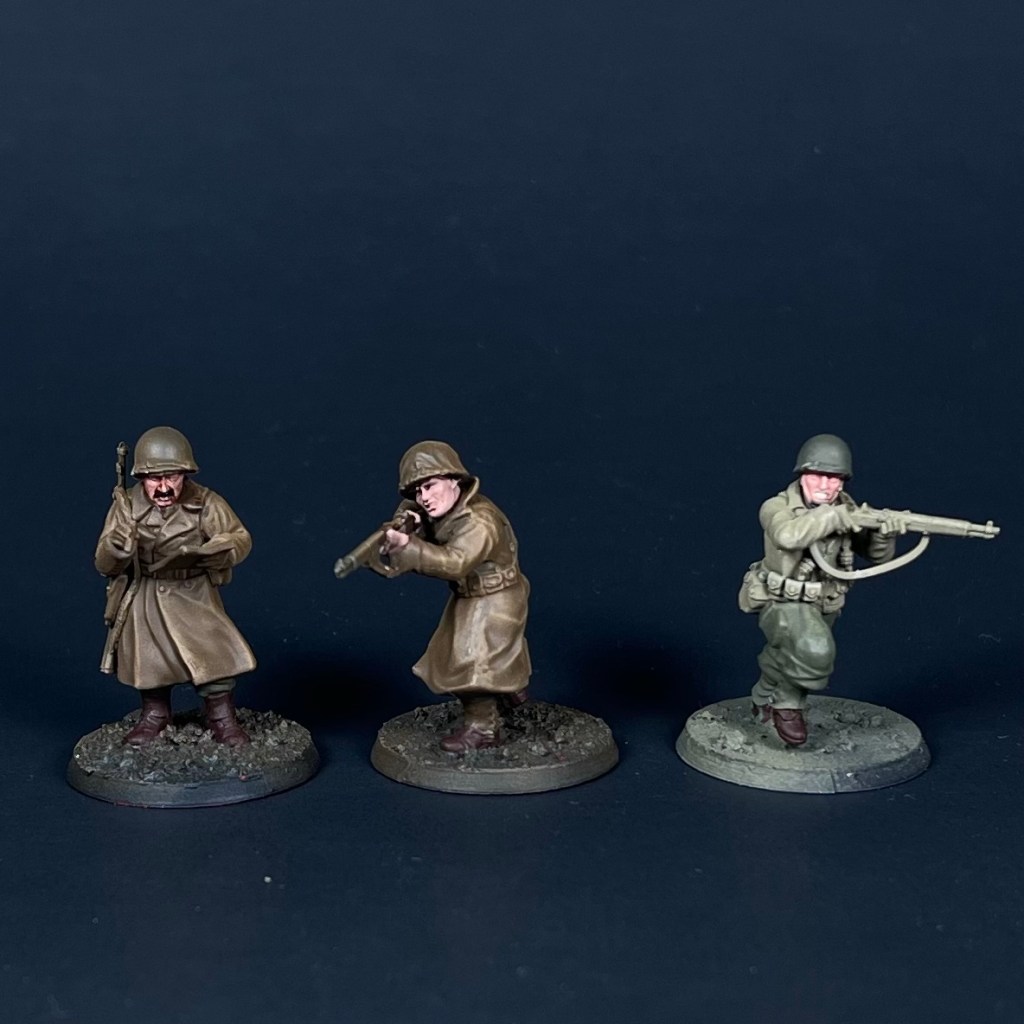
After skin, I do the helmet base coat. I like a darker OD than the No9 that might be in use already on the mini, so I chose AKG3 Dark Olive Drab. If the helmet has a cloth white cover on it (about half of the Warlord kit heads do) don’t fret, I have an easy four step process for it.
White Helmet Covers
1. Basecoat Pro Acryl Bright Neutral Grey
2. Wash with a grey wash (I use Citadel Soulblight Shade)
3. Drybrush with Pro Acryl Bright Neutral Grey
4. Quickly highlight the ridges of the cloth wrinkles with a good white, I use Pro Acryl Bold Titanium White

On to the web gear next. This I do almost all in AKG3 Canvas Tone. In the case of a mini sprayed with that as the basecoat I’ve got good news: it’s already good to go. While I’m working with Canvas Tone I do up any rifle slings, helmet straps or webbing, and anything else I spot that deserves that khaki-canvas coloration. If the model has canvas gaiters, do them up in AKG3 Canvas Tone as well.

Now we’ll make a pass with AK Gen 3 Dark Olive Green. I’ve chosen this color to use for gloves, scarves, and the like just to give them a good pop of color vs all the other drabs and khakis. I also use this color for grenades, entrenching tool handles, bayonet scabbards, and anything else that needs to be OD green but also stand out a little from the rest of the OD goods. This is where I do one simple trick (pro painters hate him!) to make the normal rifleman look a little more wintery. I paint his hands the glove color! It’s that easy and suddenly you have the idea that oh, its cold where this chap is. A few items which would be leather like pistol holsters will get a coat or two of Pro Acryl Burnt Sienna for that reddish leather tone at this point as well.
The guns are next, for anything wood on them I start with Vallejo Flat Brown, I then use Vallejo Premium Metallic Steel to do the metals. I take this opportunity to do metals on things like bayonets, scabbards, and the tops of grenades. Finally, I do any little “one off elements” in this case a cigar and map on my officer figure.

We’re in the home stretch now: Pro Acryl Black Brown (Any other dark deep brown would work!) I use this for the buttons on the khaki jackets, the clasps on web gear, the buckles on straps (I paint the buckle black brown then go back and put a line of Canvas Tone on top to show that strap adjustment style buckle), and canteen tops. Finally, for the greatcoat buttons grab a brass, I use Pro Acryl Light Bronze, and give them that little pop of color.
The only thing left to basecoat now is the base itself, which I do in Pro-Acryl Dark Umber.
The Wash
At this point I’m at the “trust the process” step. I never think they look good yet but I plow on anyways. First, and very importantly, is a gloss clearcoat. I use Vallejo Premium Color Gloss Varnish. This protects all that hard work we just did above. Enamels can be reduced off with white spirits, basically removing nearly all of it, so you can always start over if the mini is protected. Enamel also just flows better over the gloss finish.
Grab an enamel (you could do an oil wash too, it would work just as well it’s just more labor intensive). I really like AK’s Dark Brown Wash for this. Apply it over the whole model (yeah, you’ll feel like you’ve just ruined the model, it’s part of the fun). You can use an airbrush or a trusty junk brush for it. Just slop it on heavily like so:

Now, we’re going to remove most of this wash from the model, letting it do the work to provide us definition and a type of highlight. You’ll need artist type white spirits (I use AK’s, but I’ve used plain old mineral spirits in a pinch too, it works well enough), Q-tips, an old brush, and maybe some makeup sponges if you like using those.

First a quick note about how long to let the enamel sit on the model. If you take the enamel wash back off right away the effect will be minimal. When the enamel is still very wet the spirits will wash it away with no problem. I like to let them sit a bit (maybe 10-15 minutes in my basement) until the enamel is kind of tacky on the surface, then I get to work. You can also leave the enamel until its dry and take it off too, this will make a heavier effect. Be warned with the latter however as aggressive removal can wear through the gloss coat and hurt the paint work below (ask me how I know). Essentially the longer you let it dry on the model, the tougher it will be to remove and the stronger the effect will be.
To remove the enamel take a Q tip and dab a liberal amount of spirit on to the model and let it sit for a few moments. Then just begin rolling the Q-tip gently over the surfaces of the model and you’ll see it take the enamels right off. If you find some tougher to remove spots, grab your brush and use the bristles to get it out/off. If you have a makeup sponge you can use it to do more drastic removal by wiping a sponge (wet with spirits) ever so gently across the model. If video medium would help you understand this process check out this one by Grimdark Compendium. It’s a 40k model, but I won’t tell if you don’t. He’s clearly going for a heavier look in the video but the process is still the same. Let the spirits dry (a hairdryer can help accelerate this if you’re impatient like me) and take a look at the model. If you’re happy with it move along in the guide, if you’re not either take more spirits and work it more, or apply more enamel wash and start over if you think you took too much off.

Take your newly washed model, once it is fully dry, do a final once over for missed details (I had to add my officer’s helmet rank markings.) Then give it a good matte clear coat to protect everything and knock down any shine. Next is the base…

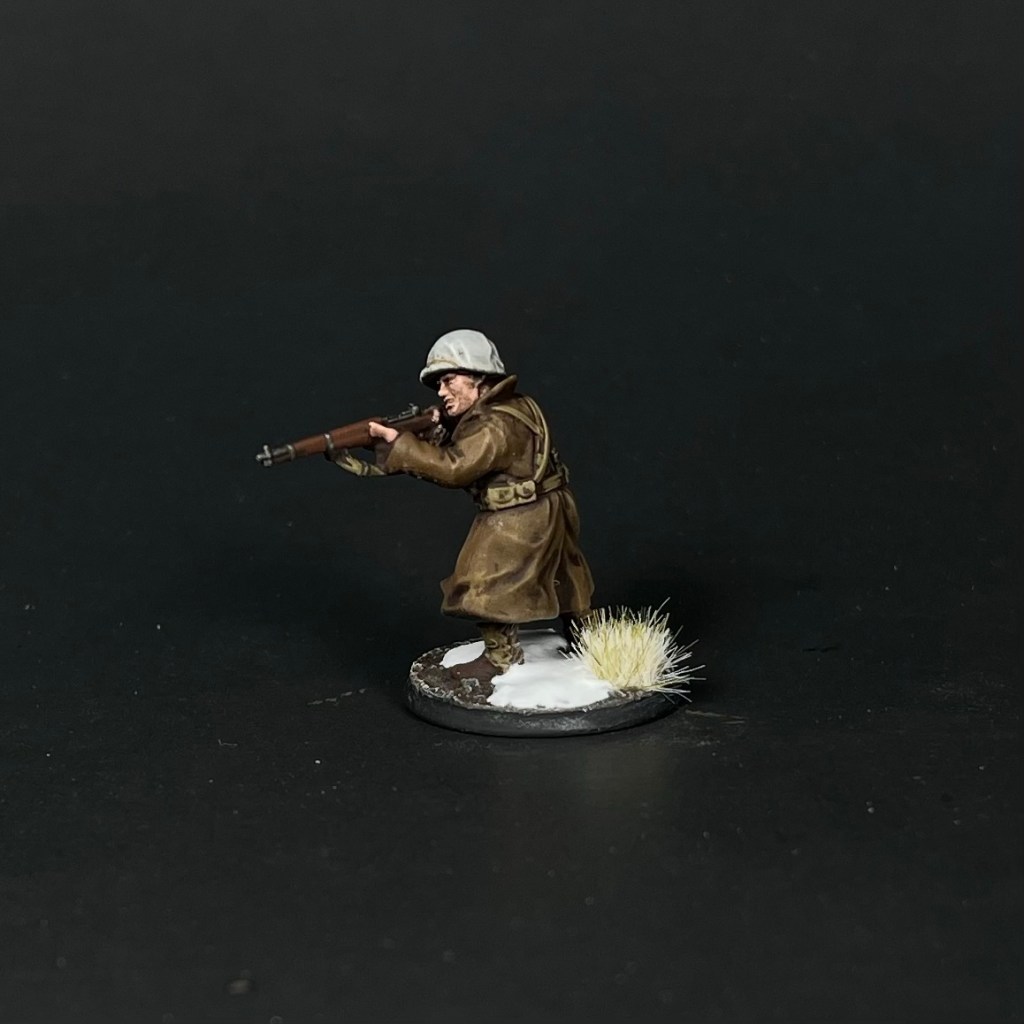
The Base
Now for another part that sells the frozen theme, the winter base. We have a great winter base tutorial written by Ben and its right here. I used equivalent-ish colors but I copied his tutorial because I don’t like to reinvent the wheel.
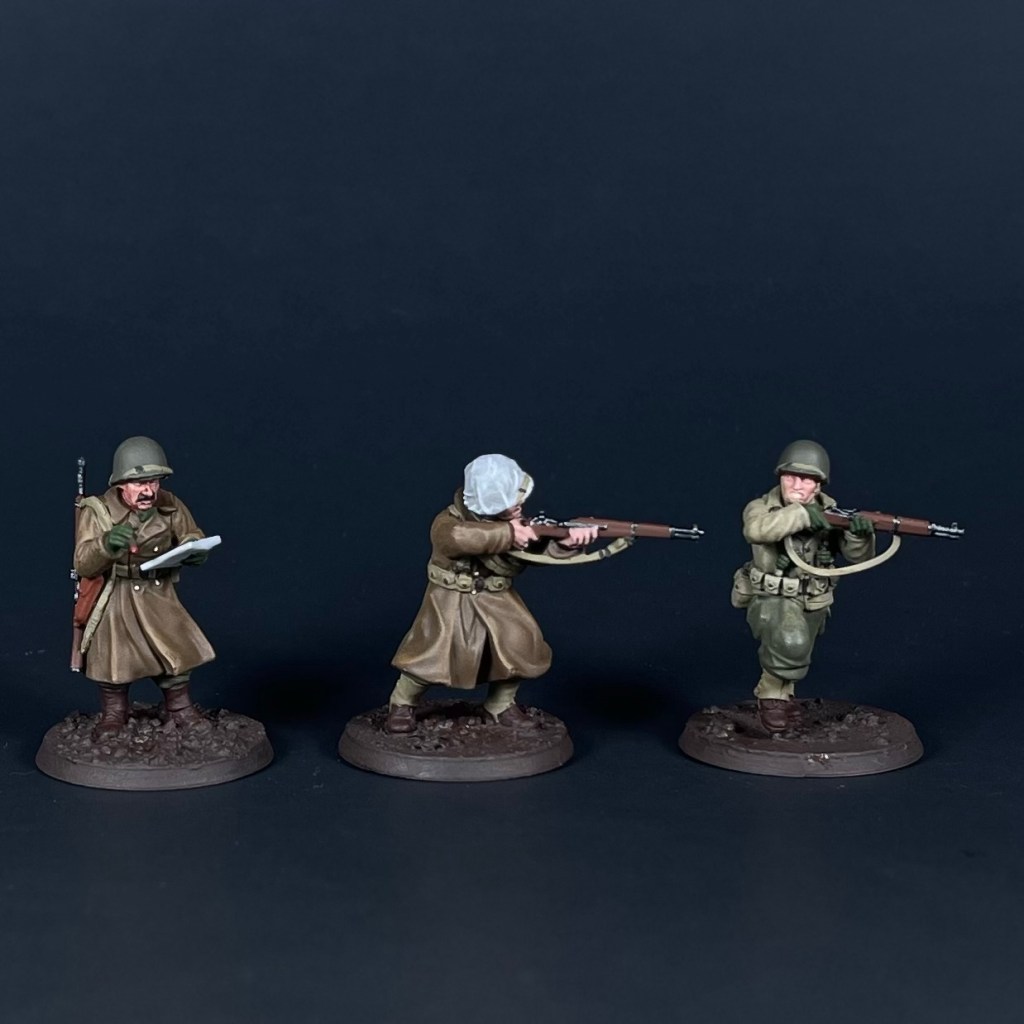
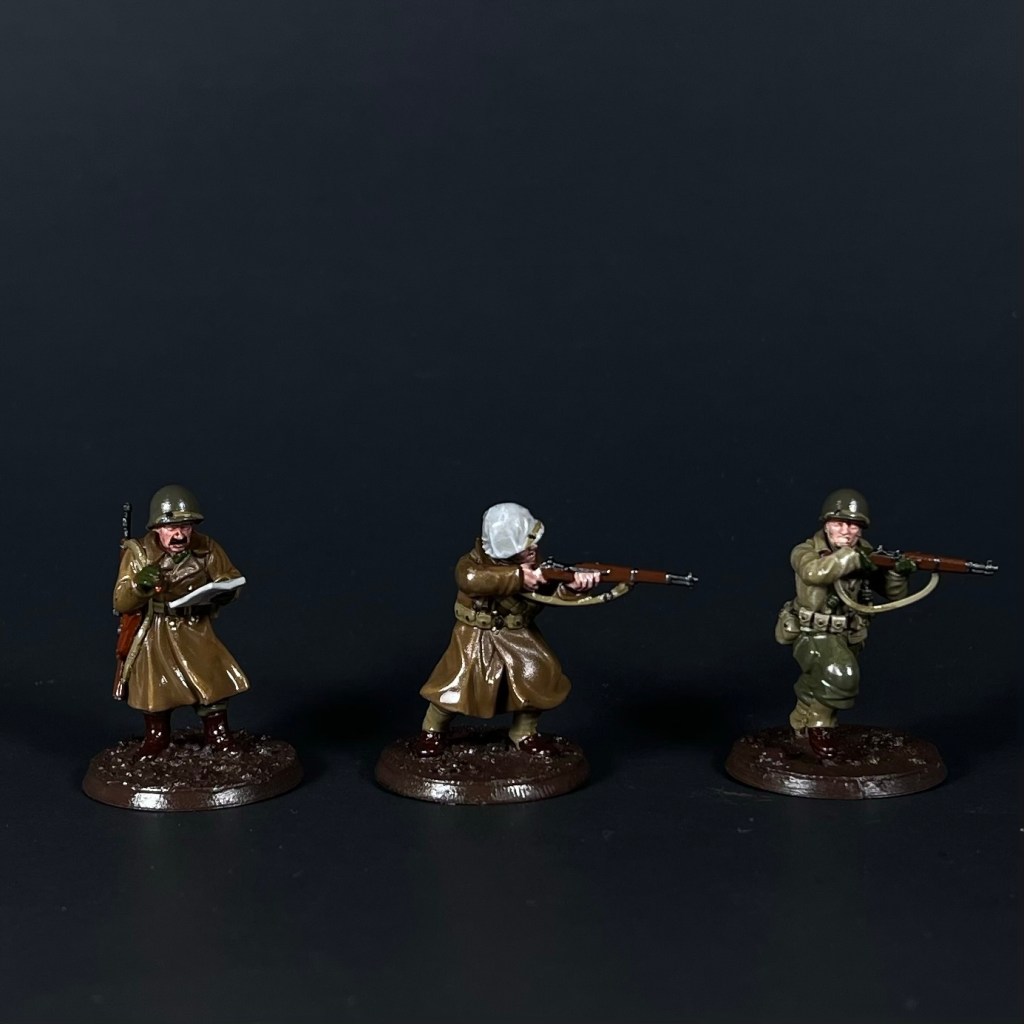
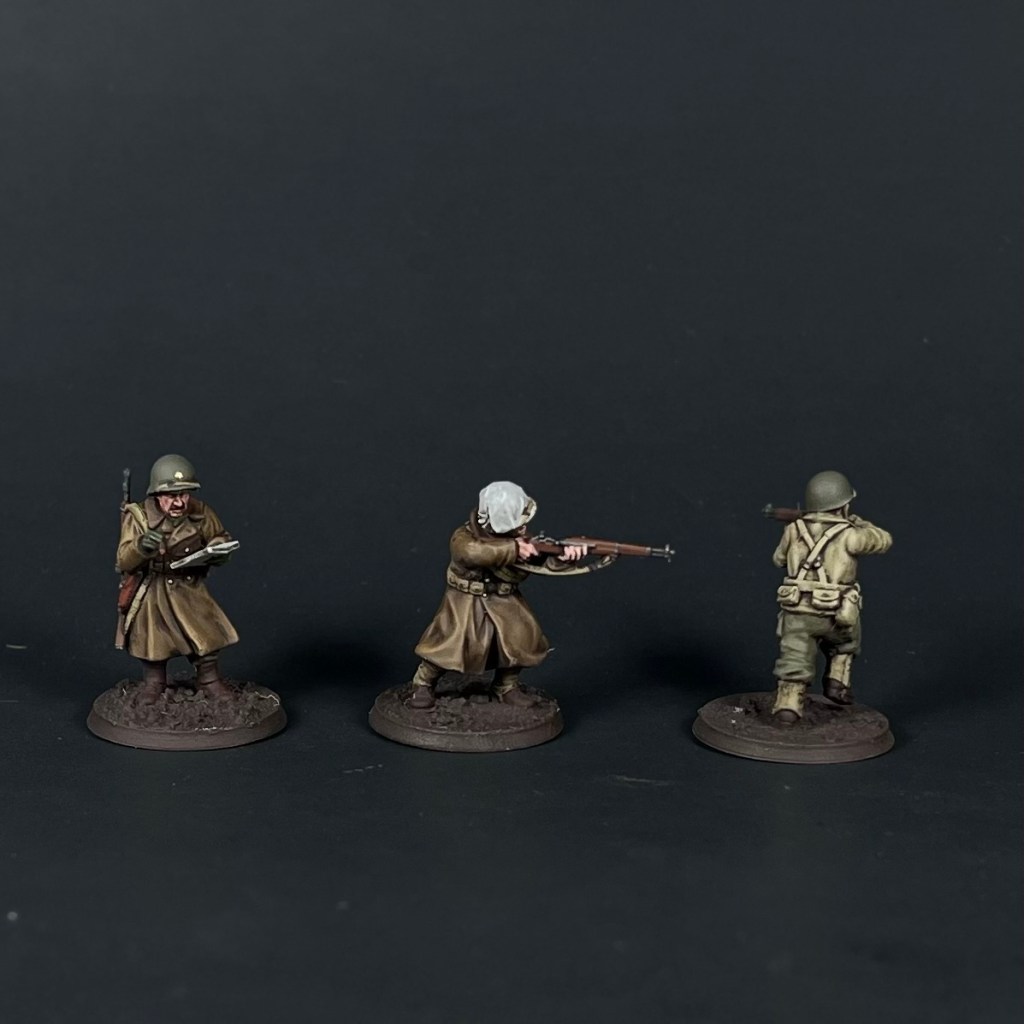
The Finished Product


There you have it, the finished minis. Overall, I find this a pretty quick method which yields nice results. Speed is handy if you’ve got to do a whole force for your Battle of the Bulge 80th Anniversary game this December. If you don’t have that game scheduled, why haven’t you? Get on it!
The Paints by Brand
AK Interactive:
-AK11436 Canvas Tone
-AK11339 No.9 Olive Drab
-AK11860 Dark Olive Drab
-AK11421 Dark Olive Green
-AK11334 Olive Drab Base
-AK045 Enamel Wash Dark Brown
Monument Hobbies Pro Acryl:
-Dark Golden Brown
-Tan Flesh
-Flesh Wash
-Dark Orange Brown
-Bright Neutral Grey
-Mahogany
-Black Brown
-Bold Titanium White
-Burnt Sienna
-Dark Umber
-Light Bronze
Vallejo
-Premium Color Matte Varnish – 62.062
-Premium Color Gloss Varnish – 62.064
-German Camo Beige – 70.821
-Flat Brown – 70.984
-Steel – 77.712
Badger
-Stynylrez Black Primer
Citadel
-Targor Rageshade
-Soulblight Grey
The Paints As Used
Greatcoat: Dark Golden Brown, Dark Orange Brown, Light Bronze
Khaki uniforms, web gear, rifle slings, helmet straps: AK11436 Canvas Tone, German Camo Beige – 70.821, Black Brown
OD uniforms: AK11339 No.9 Olive Drab, AK11334 Olive Drab Base, Black Brown
Gloves, scarves, grenades, bayonet sheaths, etc: AK11421 Dark Olive Green
Rifles: Flat Brown – 70.984, Steel – 77.712
Skin: Tan Flesh, Flesh Wash, Targor Rageshade
Helmets: AK11860 Dark Olive Drab, Canvas Tone, Black Brown
White Helmet Covers: Bright Neutral Grey, Soulblight Grey, Bold Titanium White
Boots: Mahogany
Leather: Burnt Sienna
Bases: Dark Umber, German Camo Beige – 70.821, Bright Neutral Grey

They look great!
LikeLiked by 2 people
Thanks! They’re fun to knock out and I have about 40 of them at the gloss coat stage right now, with more coming up behind!
LikeLiked by 2 people
Very nice, Evan! 🙂 You do realise you’ll be considered a heretic by some for using an enamel wash (not by me – I use them all the time on vehicles and buildings)! 😉
LikeLiked by 1 person
Wait until they find out I like oils and lacquer based acrylics too!
LikeLiked by 1 person