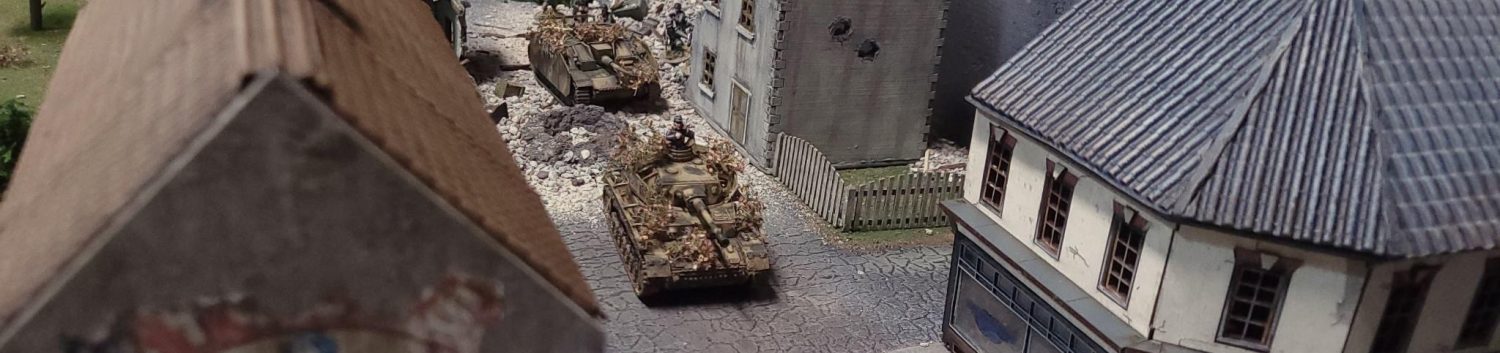

Once the miniatures are bought, assembled, and primed it was time for the real fun (and work) to start. For the Battle of the Bulge event I needed 700 points for my half of the German force. The Jagdpanther took up a lot of the points but I was able to squeeze two squads of 10 and one Unterfeldwebel. For those counting that is one squad shy of a full rifle platoon. This article will cover how I painted up additional soldiers to begin fleshing out the original “short” platoon but I used this process with the original batch. Here are Part One: Planning and Part Two: Preparation of the late War Winter Grenadier article series. Also if you’re looking for a companion guide on painting Winter Americans we have you covered! Check out Evan’s guide here.
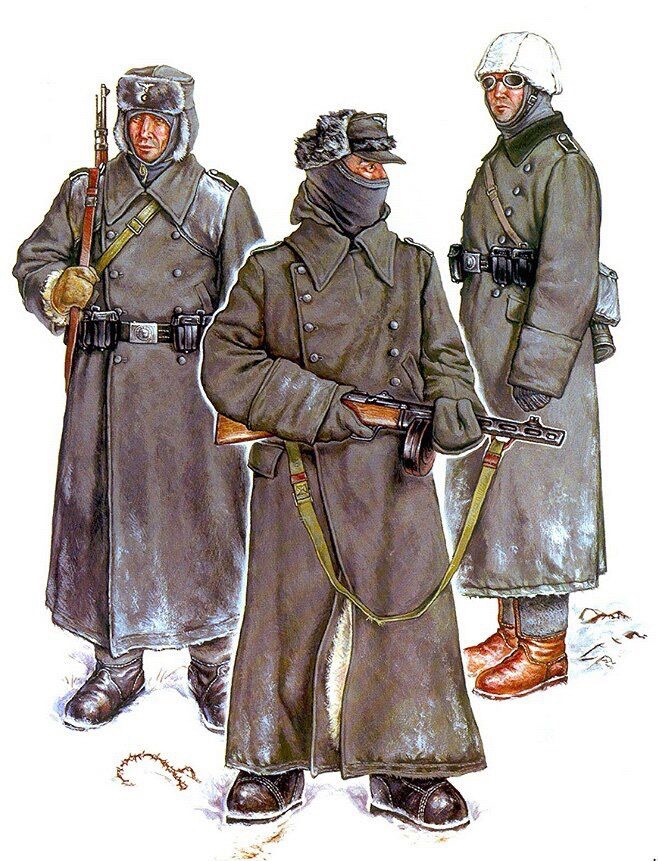
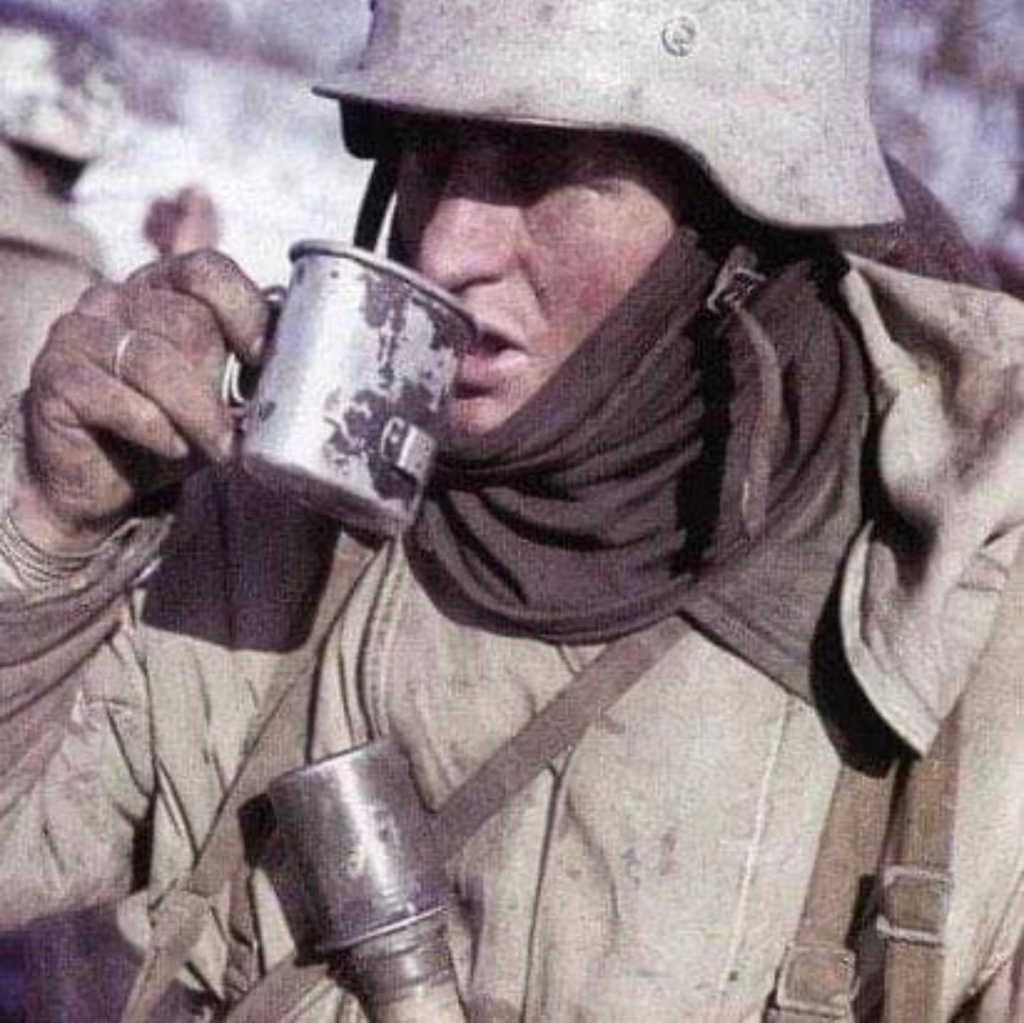
I really enjoyed the research stage of this project. There are quite a few period photos of Germans bundled up to ward off what was a record low temperature winter. I dug into my google search bar and was rewarded with many color palettes from Osprey Publishing’s excellent Men at Arms series of books.
The core force is a winter grenadier rifle platoon that can be used from winter of 1941 to winter of 1944. I aimed to fluff out the light machine guns as well to be able to field a panzergrenadier unit as well. Typically a panzergrenadier platoon had double the number of light machine guns as a rifle platoon. Some of the gear changed throughout the war but fieldgrey and white still carried on.
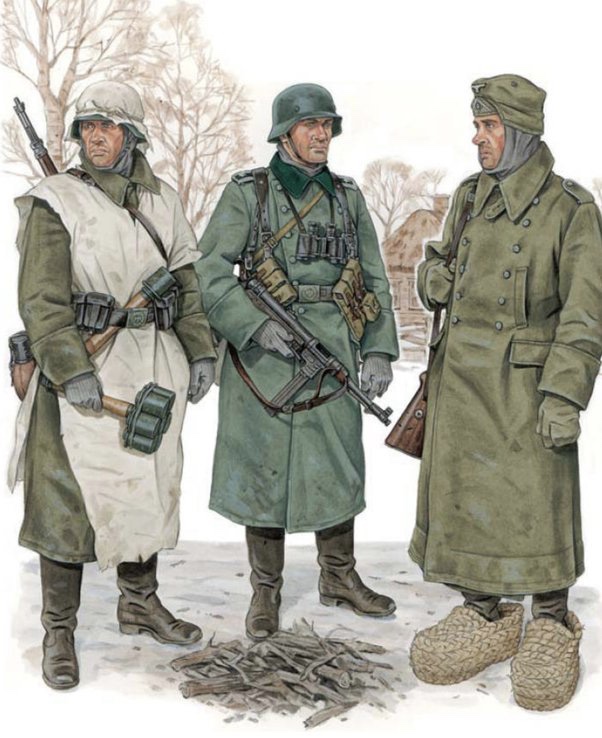
As I wanted the force to double as a Volksgrenadier platoon some of my grenadiers are armed with late war equipment such as StG44s and panzerfaust single use anti-tank weapons. I wanted to make the Volksgrenadiers a mishmash of veterans with new recruits mixed in to hold the line. Newer gear would be seen along side older gear in the same squad. Living in the northern part of the US really gives me an appreciation for warm gear on bitter cold days. I wanted to challenge myself to add elements that told a story of men thrown into a desperate position in an incredibly unforgiving time of year.
Paint Schemes
Much like miniature choice we are spoiled by the amount of talented painters we have instant access to. YouTube and Google have never made it easier to find ways to paint our man dollies. One of my favorite parts of a project is searching for inspiration in the form of historical photos, color templates, and other people’s painting tutorials.
The biggest challenge for me was learning to paint a satisfactory white and a lot of it. Many of the Germans I had picked out had white overcoats or white smocks. As miniature painters know, white can be a beast of a color to tame. The typical base, wash, highlight way of painting will work but I needed to make slight modifications so it did not appear dirty or stained. In addition to the challenge of the white, Germans require a decent amount of time as their kit had an array of colors and included camouflage on the zeltbahn shelters.

After researching miniature paint schemes I settled on a YouTube video by Pete the Wargamer as a guide for the white clothing. I like that his white wasn’t stained by washes but still had the depth. I highly recommend his painting tutorials as they are easy to follow and yield great results. The biggest take away I got from Pete is when doing white you can start with an off-white color such as Army Painter’s Spaceship Exterior. Army Painter Dark Tone Ink wash mixed with Army Painter Quick Shade Medium 1:1 is then applied over the Spaceship Exterior. The thinned wash creates just enough of a shadow that it sells the depth of any folds but keeps it light enough to not stain the white. Army Painter Dead White as a highlight was also used as an extreme highlight to give it some subtle, but needed, pop.
Artizan Designs has a handy guide for painting German forces. I was also able to find this extremely helpful guide on Painting German Uniforms of WWII with Vallejo Paints. This was especially helpful as I mainly use Vallejo Model Color paints. These guides were extremely valuable as they offer suggestions for German gear colors throughout the war.
I was pleased to find a video from Tabletop CP on painting Winter Grenadiers. I have been a fan of Travis’s for a long time and his WWII content for Chain of Command and Bolt Action content is always superb. His models look the part, are a great standard to aim for, and watching the minis in action proved to be very motivating.


The guide below is an amalgamation of the guides and tutorials I found. I am not the world’s most awesome painter, but I was able to paint up some minis I am proud of. Again, importantly, some washes were a 1:1 mix with the ink and Army Painter’s Quickshade Medium. This allows you shade areas with more control versus straight washes. It is important to use the mixes on the larger areas such as the fieldgrey and especially the white.
For convenience I listed all of the colors I used for this paint scheme at the end of the article.
The Guide

Once the minis are assembled and prepared they are cleaned and ready for a primer. I greenstuff any gaps and base them up with a mix of Vallejo sand pumice and sandbox sand. The pumice and sand is sealed with a mix of PVA glue, water, and isopropyl alcohol.

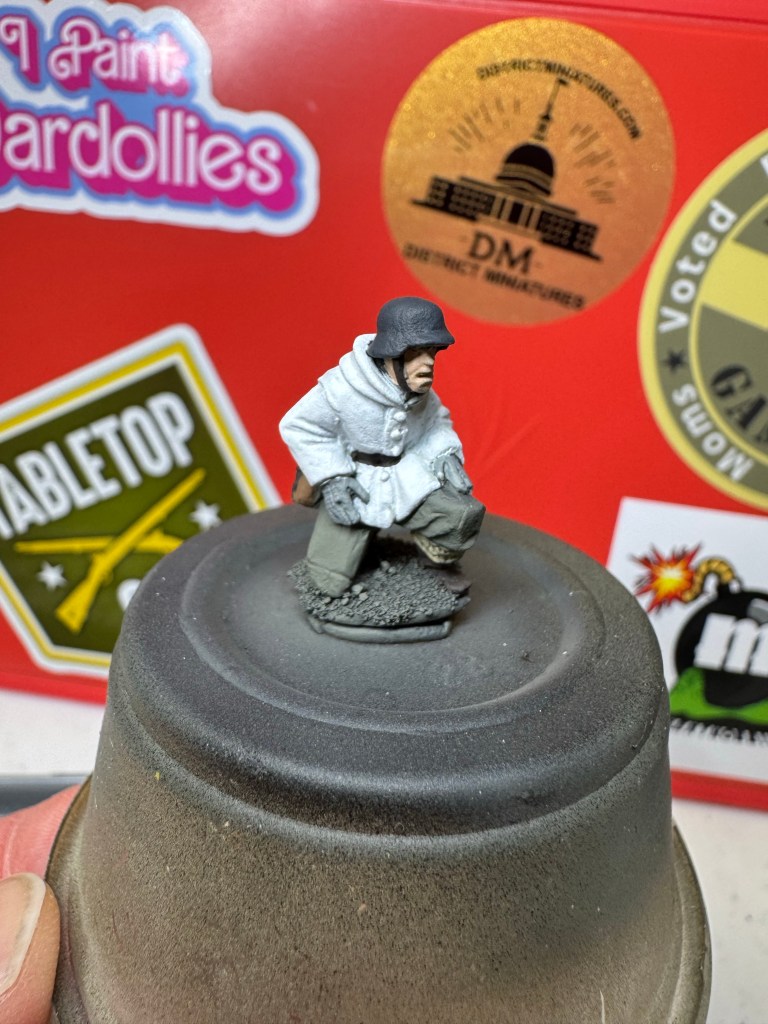
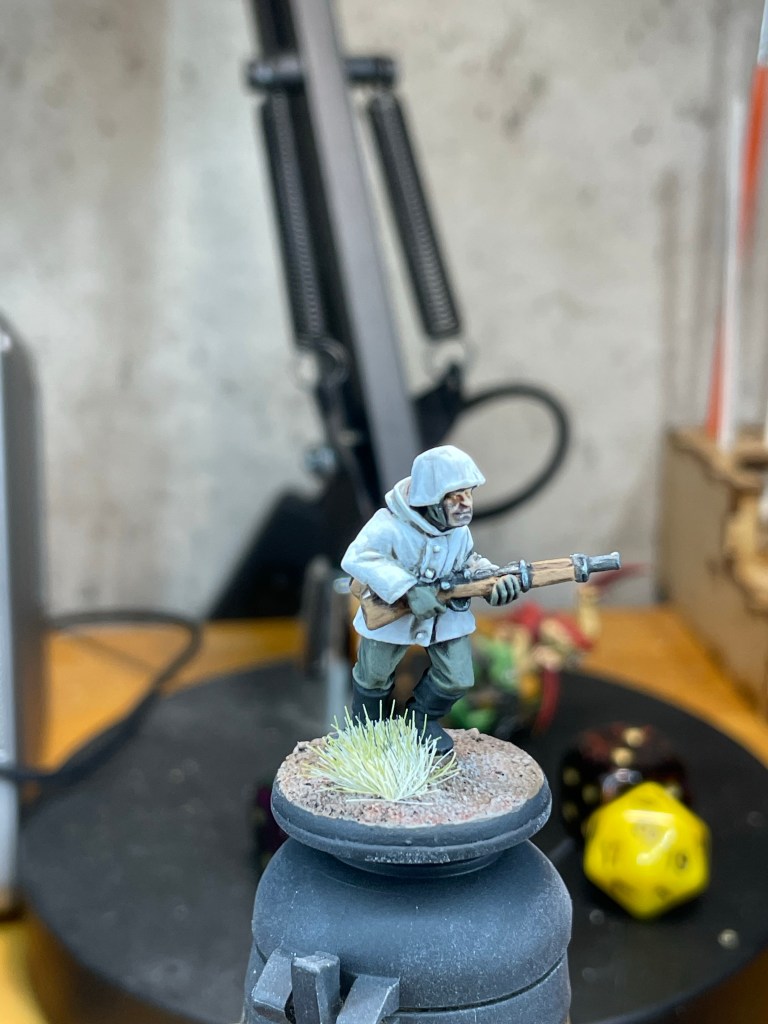
For my first batch of winter grenadiers I chose to use flat gray Painter’s Touch primer from Rustoleum. I typically use black Rustoleum primer but as we are painting a white here and there, or a lot in the case of minis with over whites, we can do ourselves a favor and start from a nice midtone. This way we can paint the white without needing 6 layers to get to a nice full color. The lighter primer also should help keep our colors nice and bright. I don’t like to use pure white primer as any missed spots will really stand out instead of becoming a shadow. Any medium gray primer will do.
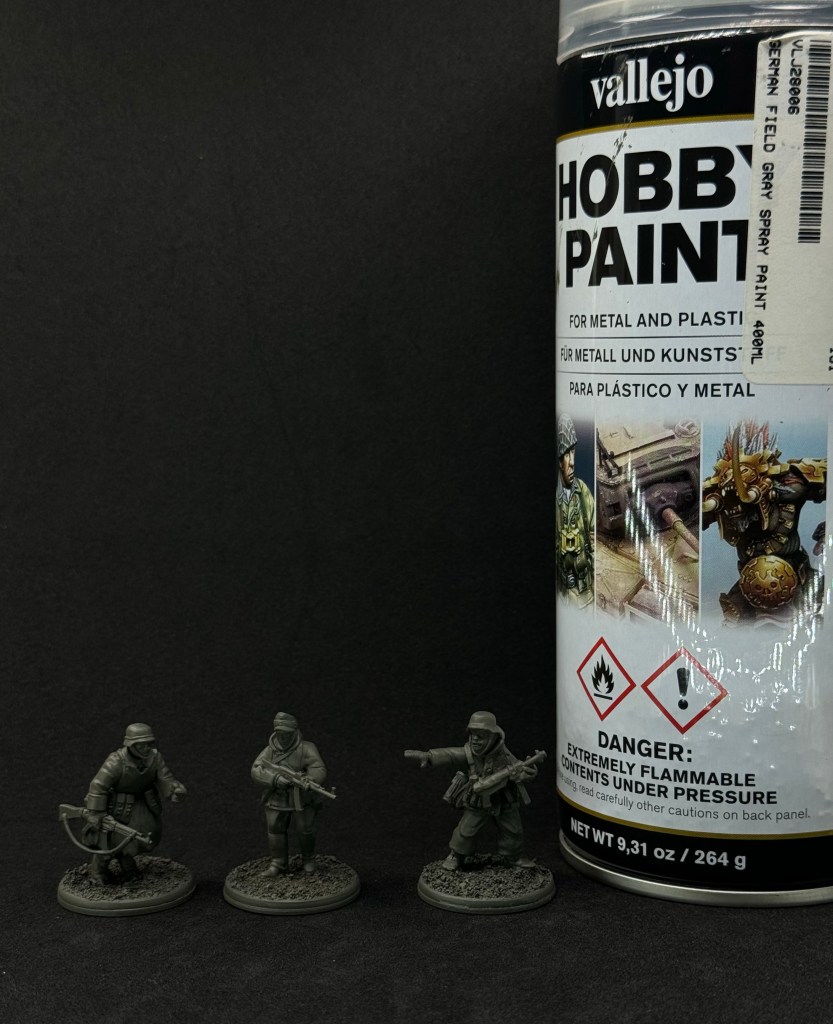
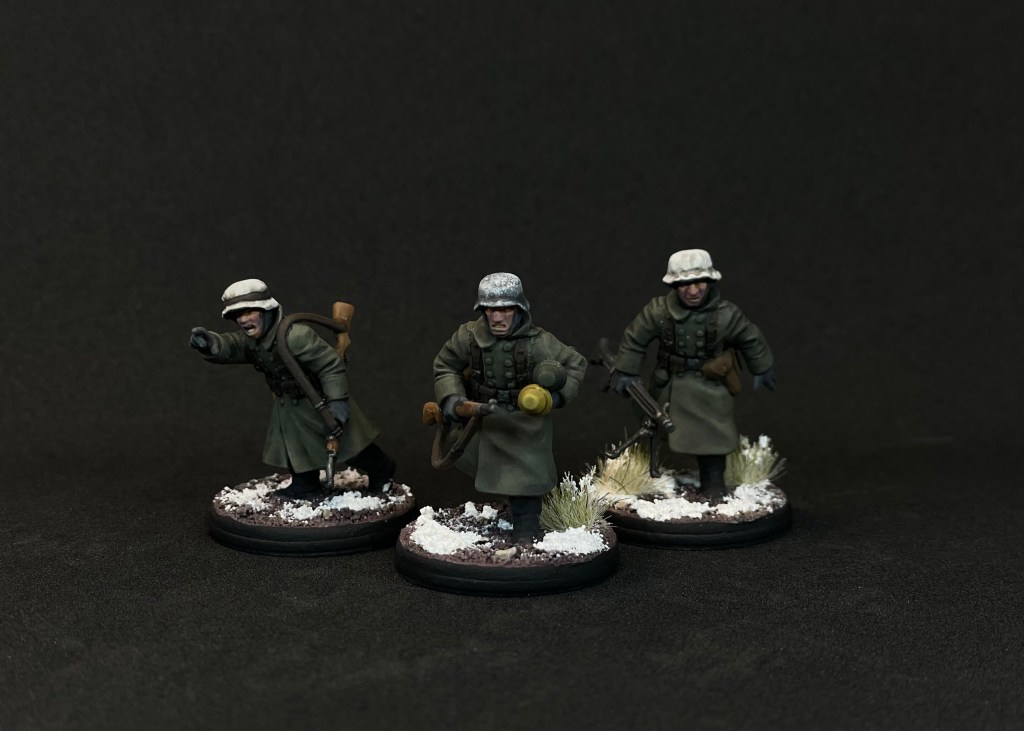
On later batches of grenadiers I started to use Vallejo Field Gray spray primer. Many of the minis I was working on were wearing field gray overcoats. The spray primer matches Vallejo Model Color (VMC) German Fieldgrey 70.830 perfectly. Being able to prime them with the main uniform color saved me some time. The later layers of colors had the same pop as the colors on the gray primed minis. To see a comparison, the assault rifle squad at the end of the article had half of the minis primed in field gray and the other half in Rustoleum gray. Feel free to use this primer if you can get ahold of it!
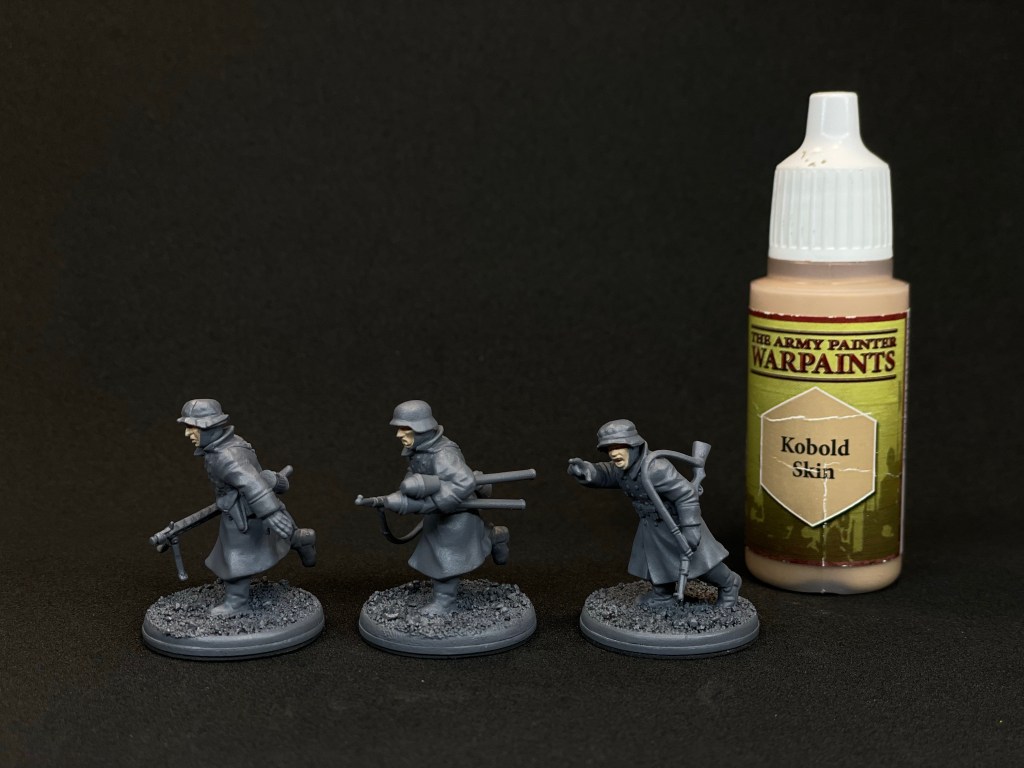
I started with the flesh as I feel it’s easier to get the tight spot painting out of the way first. Seeing as I am a glutton for punishment I used Army Painter (AP) Kobold Flesh instead of any of the wonderful Pro Acryl flesh paints. While it is fickle Kobold Flesh gives a nice neutral skin tone. This usually takes two or three coats.

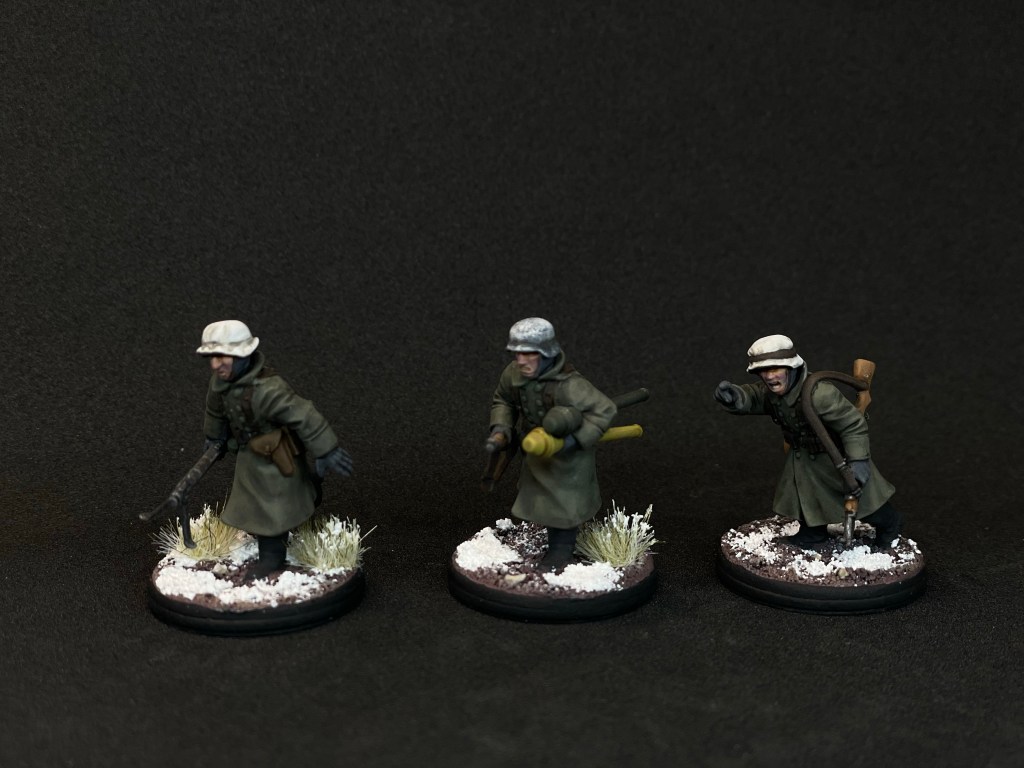
The pants, coats, gloves, and scarves are then painted with Vallejo Model Color (VMC) German Fieldgrey 70.830. An alternate color for the greatcoats is Army Painter Fieldgrey. I have also seen evidence of lighter green and brown coats being used. I will be exploring alternate colors in the future but I will still use the ever handy German Fieldgrey here.
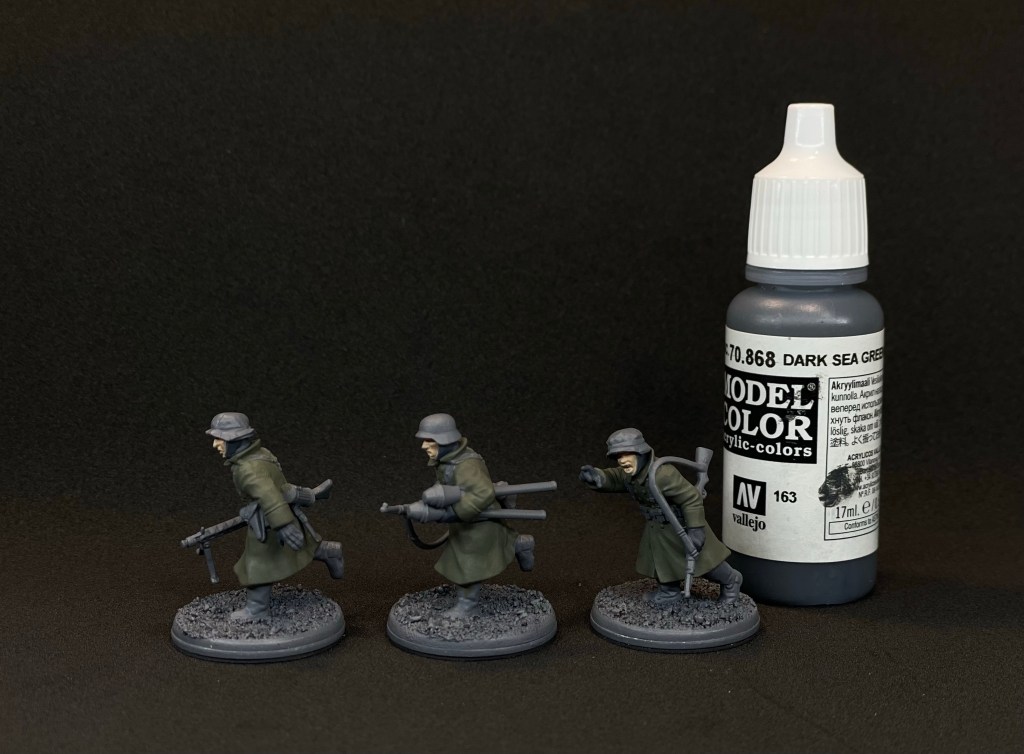
Two alternate colors for the gloves and scarves are VMC Neutral Gray 70.992 and VMC Dark Sea Green 70.868. I went with Dark Sea Green for these three minis to add some variety. As with the greatcoats I have seen different browns, greens, and gray tones in source photos.
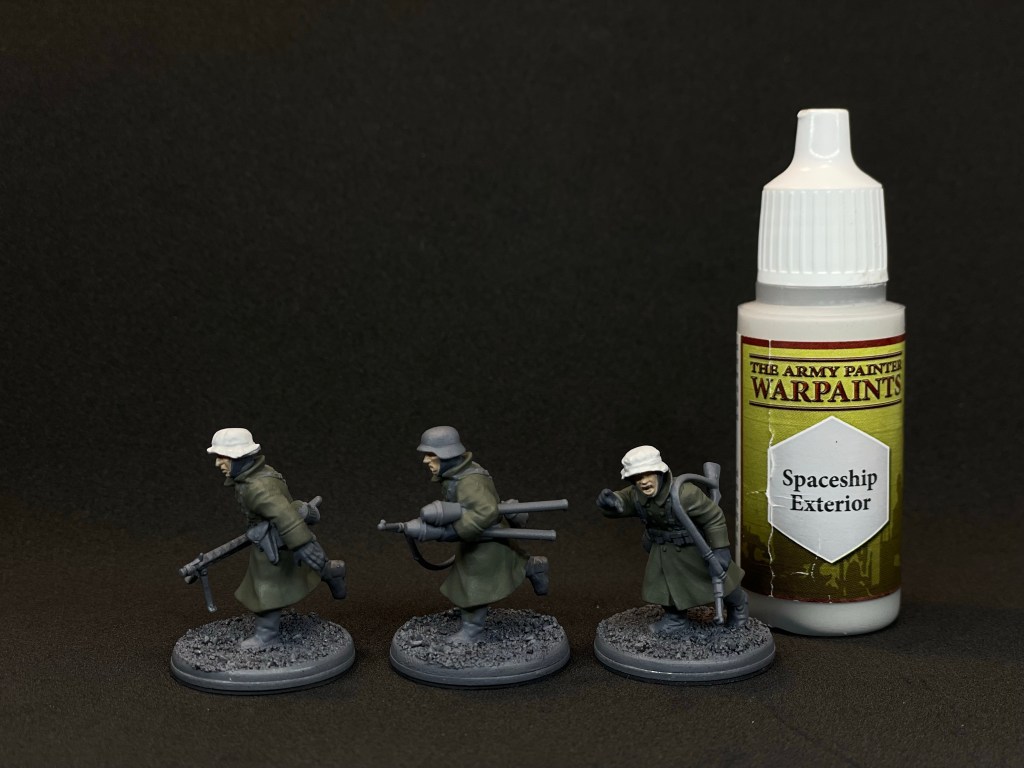
The over whites and white helmet covers are based with (AP) Spaceship Exterior. This is a nice off white that isn’t pure white which would look odd for worn uniforms. Fair warning, this paint is a pain to use but it’s worth the effort. Expect a few coats to be needed.
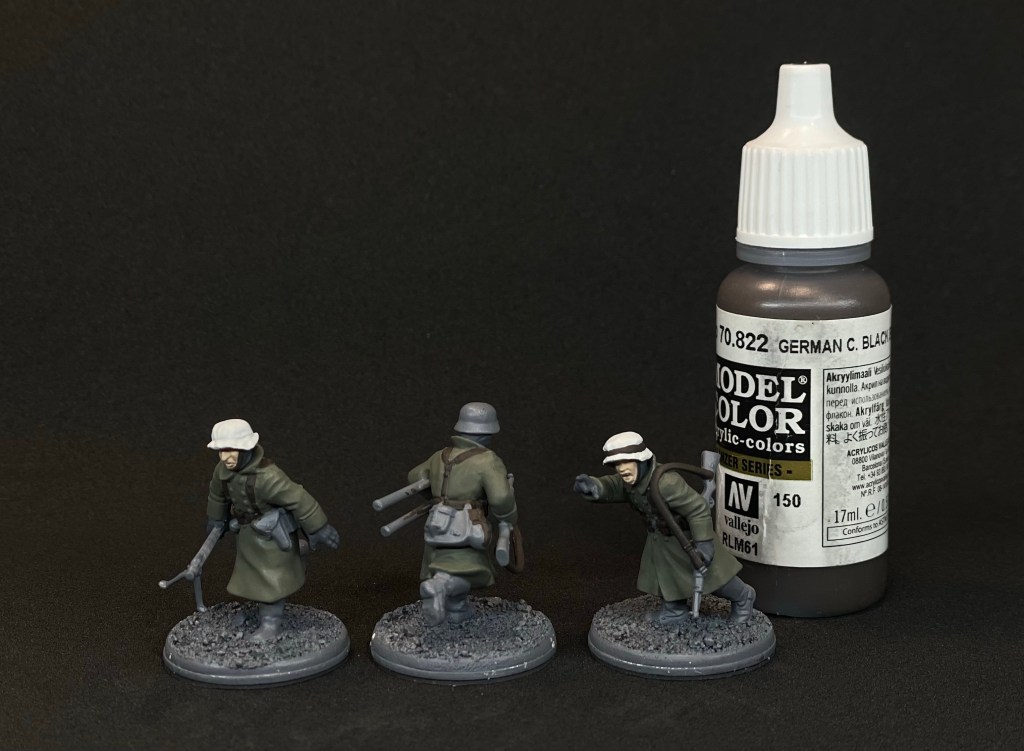
The ammo pouches, any leather bits, weapon slings, low boots, knife sheath, and flask tops are based with VMC German Camouflage Black Brown 70.822. I go back and clean up previously painted colors. Don’t worry about cleaning up paint on the primer. The other base colors will cover them up.
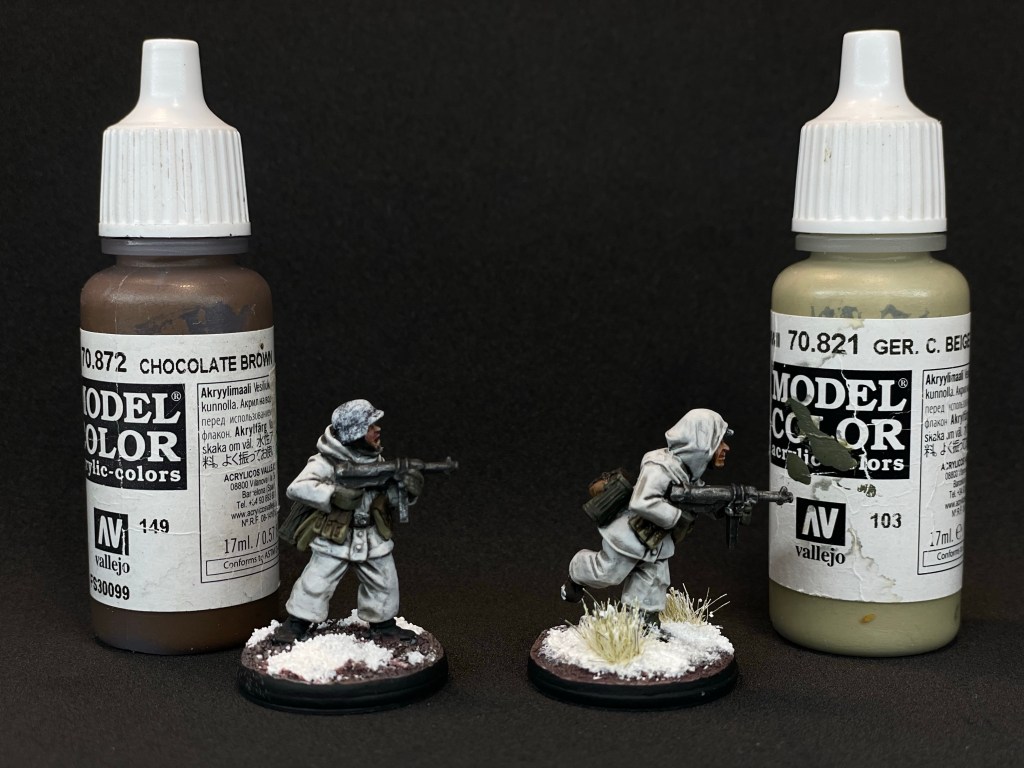
Submachine gun ammunition pouches are based in VMC German Camo Beige 70.821 and the top flaps and closure straps are based in VMC Chocolate Brown 70.872. Since these chaps don’t have submachine guns the minis pictured above are some previously finished that have the pouches. Again, there were several materials used for the magazine pouches so leather browns would work too.

The wooden weapon parts, spade handles, and flask body are based with VMC Beige Brown 70.875. I like to give a good coat over the wood and small metal pieces on the rifle. This makes it easier to pick out the metal later and not leave spots of primer. The machine gun furniture can be painted with Beige Brown or Black Grey which we will touch on later.
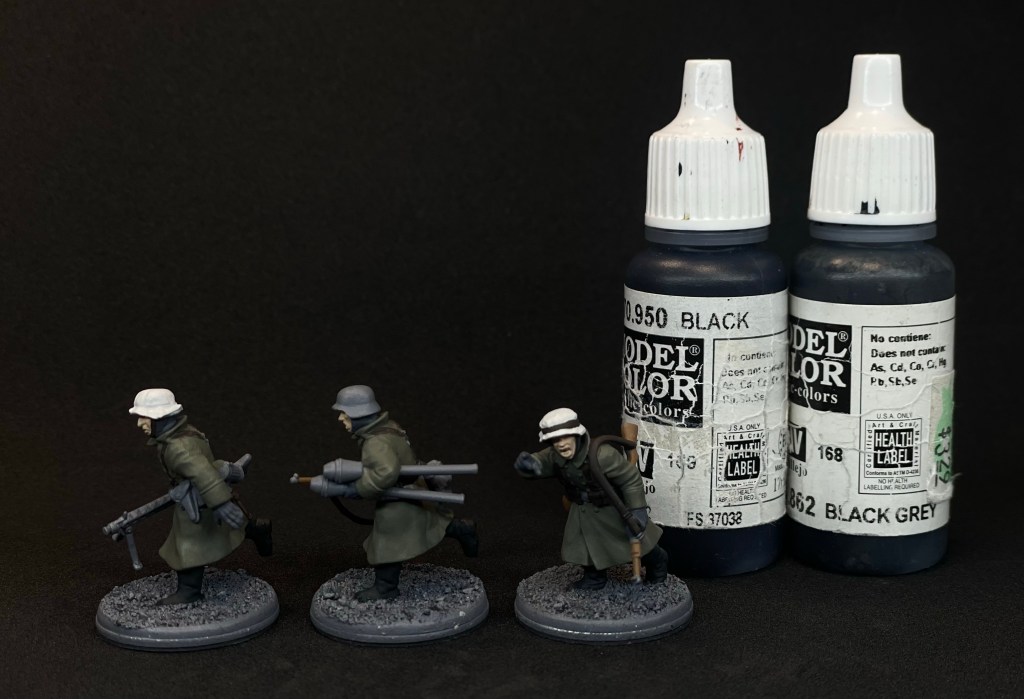
High cut boots can be based in a 2:1 mix of VMC Black 70.950 to VMC Black Grey 70.862. The Black Grey lightens the color ever so slightly from pure black and allows a slight shade/highlight effect once the black wash is applied. The mixed color is close to VMC German Grey 70.995 so that could be used instead.

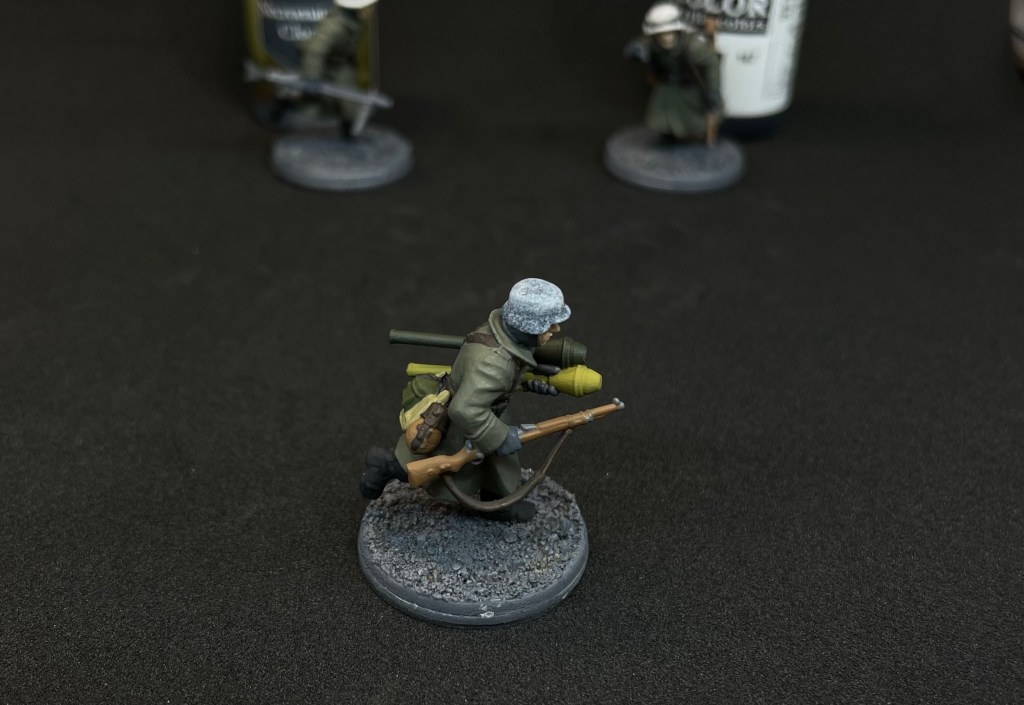
Panzerfausts were typically painted in Dunklegelb which VMC Middle Stone 70.882 is a match for. There is evidence the disposable anti-tank weapons were also painted in Dunklegrun. I think a mix of the colors leads to the more rag tag look of a Winter 1944 Volksgrenadier platoon. I used VMC German Camo Dark Green 70.979 for the Dunklegrun.

Gas mask cases, machinegun barrel cases, hand grenade heads, and ammo cans also get based in VMC German Camo Dark Green.

Mess tins and ankle gaiters are based with VMC Camo Olive Green 70.894. The closure straps for both are painted with German Camo Black Brown.

The spade holder, MP40 pistol grip, and machine gun furniture are based in VMC Black Grey.

The bread bag is based with VMC Khaki 70.988. While you have the Khaki out the gas mask cases are also lightly dry brushed with Khaki to make the ribs of the container pop.
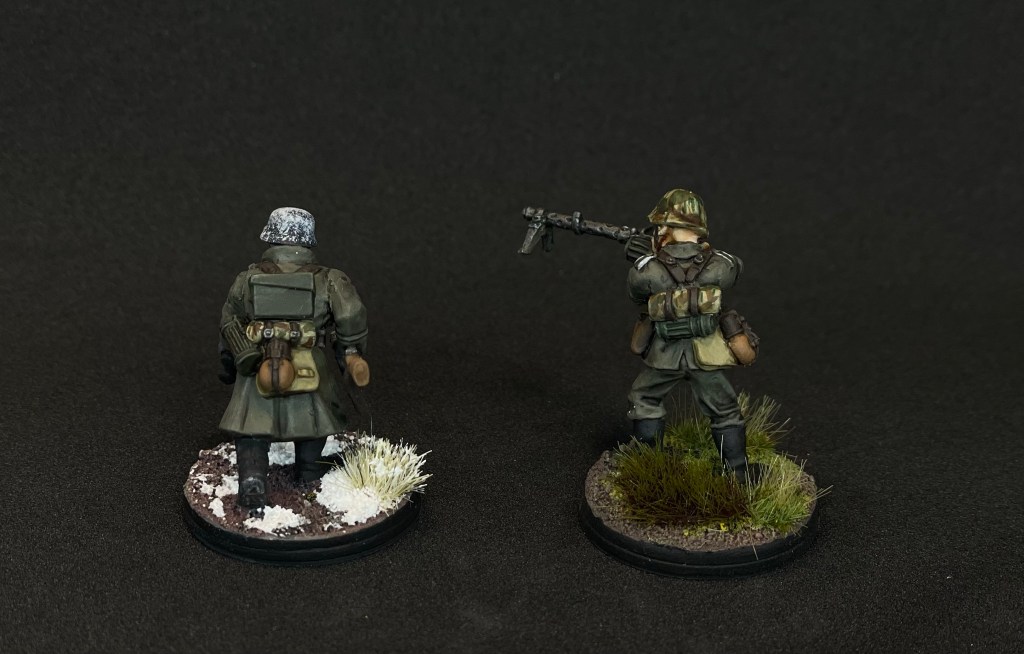
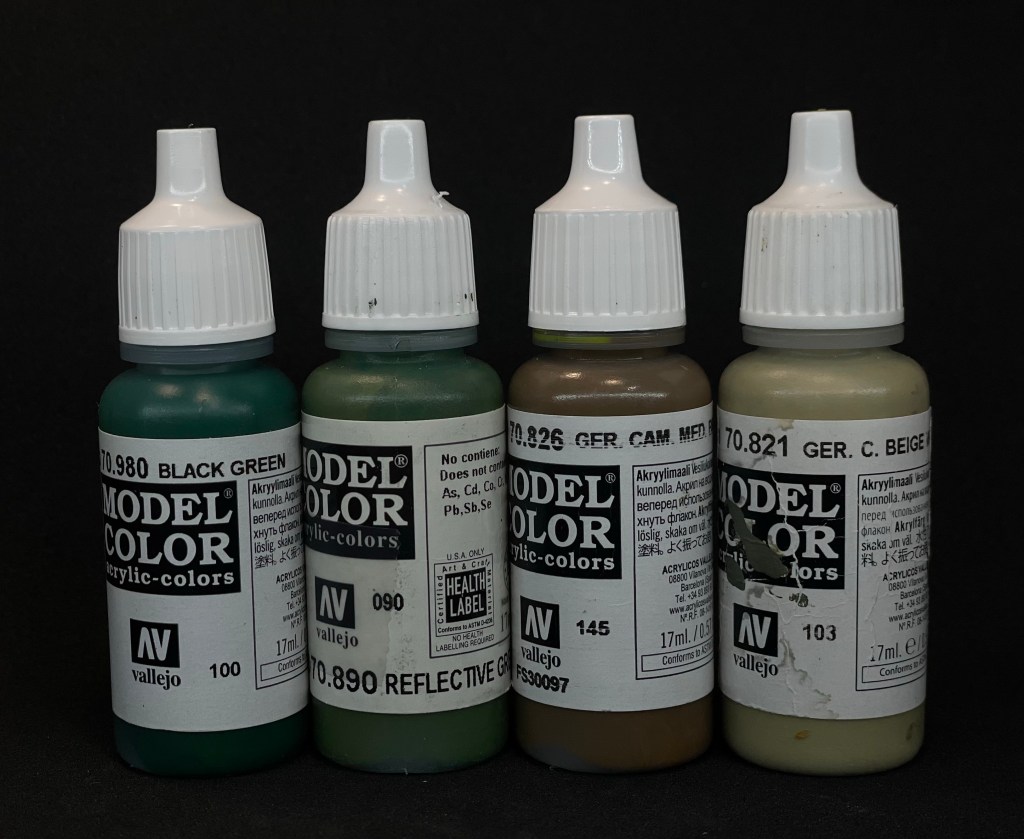
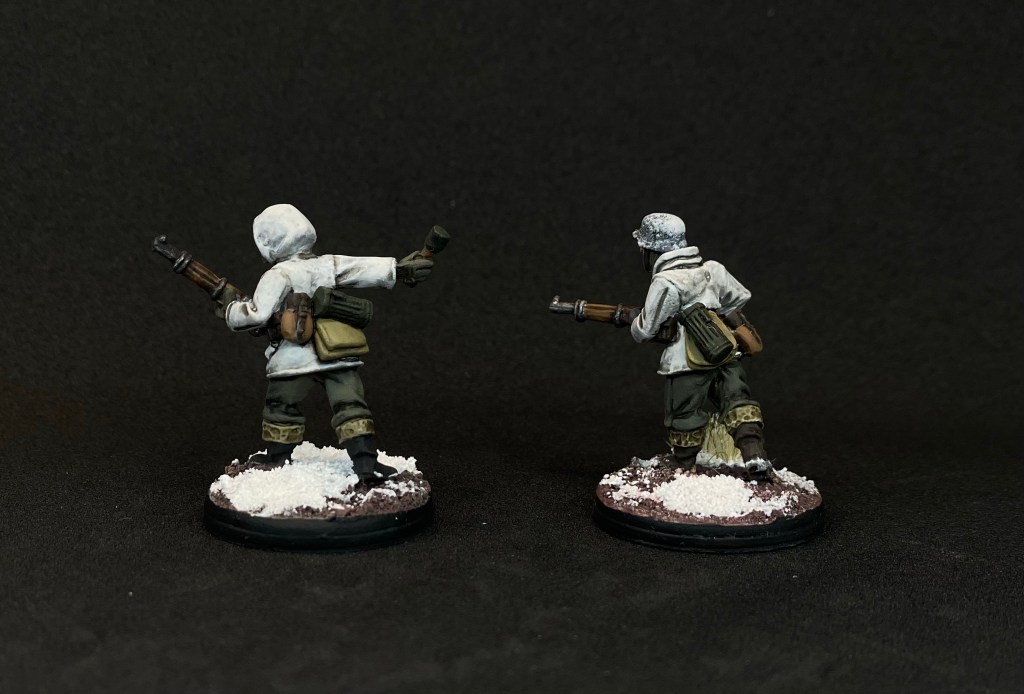
The zeltbahns are based with VMC German Camo Beige 70.821. The geometric patterns on the zeltban are VMC German Camo Medium Brown 70.826 and VMC Reflective Green 70.890. These three troopers don’t have their zeltbans as they dropped them prior to their assault. However, you can see the pattern on the above summer soldiers’ kit. The geometric shapes are straight lined shapes starting on the visible edge of the equipment. You can see my attempt at the pattern on a larger surface on the right soldat’s helmet. Soldat happens to be German for soldier. Now you can say you learned something.
As an extra pop, you can add the “rain drop” pattern on the zeltbahn with thin strokes of VMC Black Green 70.980. This is optional but I like the effect. Remember we are going for the illusion of the pattern. An exact replication of the pattern at 28mm scale would look much too busy.

Pistol holsters and equipment pouches such as the machinegun maintenance pouch are based with VMC Chocolate Brown.
The above troopers have furlined boots. I based the fur with VMC German Camo Beige.
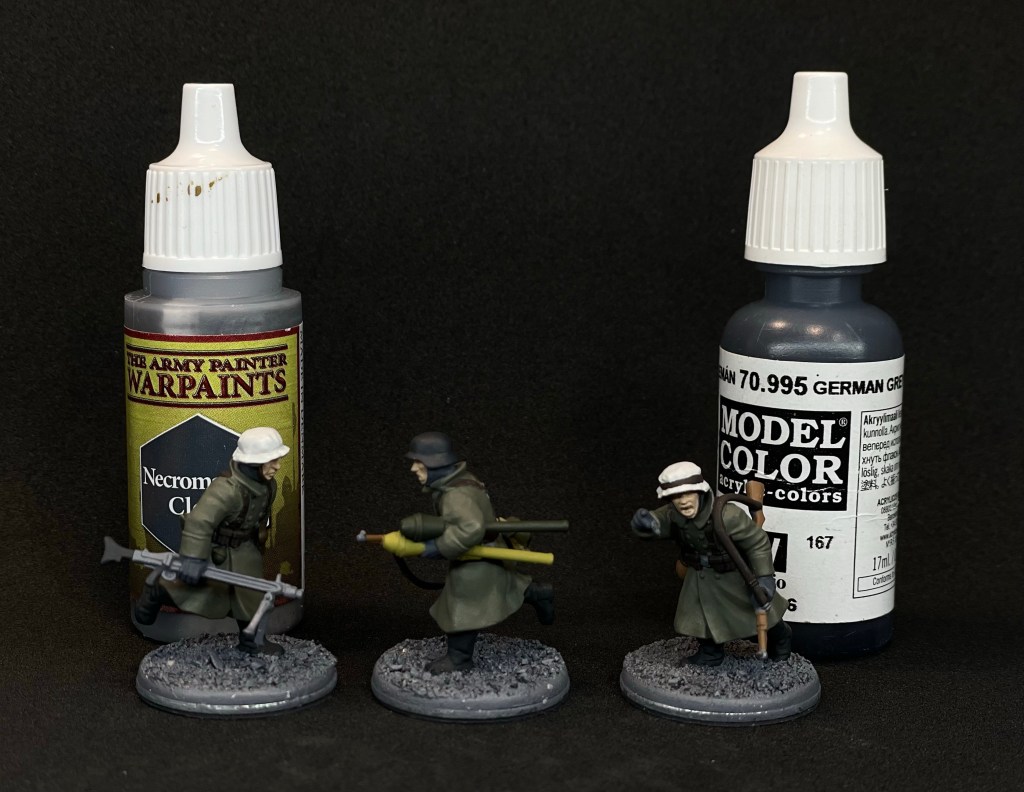
Helmets are based with AP Necromancer cloak or VMC German Grey 70.995. I used German Grey. Be sure to paint the helmet edge peeking out from under the white cover. I then wash the helmet with a 1:1 mix of AP Dark Tone to AP Quickshade Medium but you can also do it after the white stippling is added. Be sure to keep the wash from pooling. If you add the dark tone after the stippling you may need to touch up the white.

Helmet White Wash Method 1
Helmet white wash is easy to simulate by sponging several light layers of AP Spaceship Exterior until you achieve the affect you want. Make sure to tear your sponge so it leaves an irregular stipple pattern which is more natural.

Start lightly and work the white up leaving areas that would see the most wear as your helmet base color. Be sure to focus on areas that wouldn’t be worn off by use such as in the crease of the helmet. This can be finicky but the effect ends up being worth while.
Helmet White Wash Method 2
After a few sessions of doing these winter Germans I came up with a better way to make a nice chipping effect. I’ll leave the above method as some people may prefer the overall darker tone.
Once the helmets are painted German Grey grab your go to gray-white color. I’ve used Army Painter Brigade Grey for this method of whitewash.


Apply a watered down, milky, and inconsistent whitewash over the top of the helmet leaving the underside rim German Grey. Whitewash was not an exact science and water washable paint was usually used. Like vehicle camouflage paint it was thinned with what was on hand. This lead to a lot of different opaqueness levels.

Next take a sponge and German Grey again. Dab the sponge lightly in the paint and then on a paper towel to remove most of the paint to allow more control over the effect. Gently dab the rim, top, and sides of the helmet to simulate the areas of high wear. Leave white wash in the corners where the helmet angles meet.

Next you can use a small brush to add more grey chipping or add some extra milky white Brigade Gray to add variation to the effect.

Finally, the metallics are painted. Some people like the non-metallic metal look, but I go for the classic metallic look using VMC Gunmetal 70.863 or Citadel Leadbelcher. Try to avoid using your nicer brushes if possible. Metallic paints are rough on the brush fibers. Parts to paint are weapons parts, belt buckles, clothing buckles, and equipment buckles.
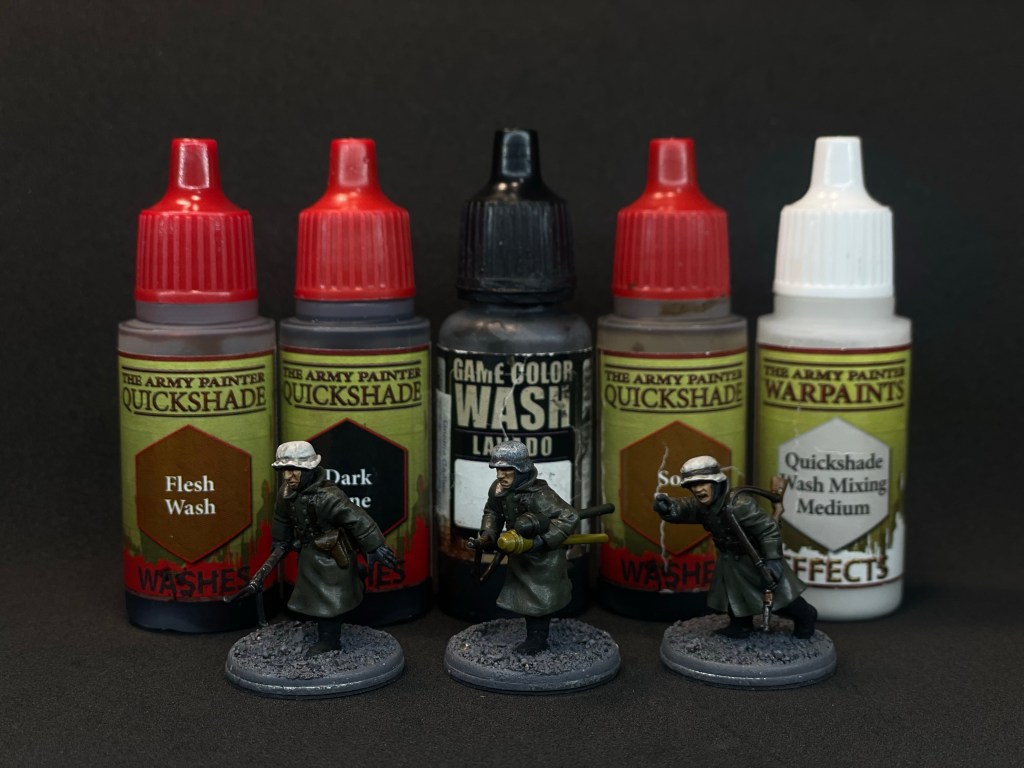
Next it is time to use the washes. Again, very importantly the Dark Wash needs to be thinned 1:1 with Army Painter Quickshade Medium. Soft Tone, Flesh Wash, and Black Wash can be used straight out of the bottle although I like to have a little mix of 1:1 wash to mix for each so I can use them to soften the shading effect if I need to.
Flesh wash is applied to the exposed flesh. Pants Field Gray coats, gloves and scarves are washed with Dark Tone. Over whites and white helmet covers are washed in Dark Tone too. Finally, green painted metal, helmets, and ankle gaiters are washed as well.
Brown items such as woods, khaki, or beige are washed with Soft Tone. Leather belts and pouches can also be washed in Soft Tone. Any camouflage patterns on pants, zeltbahns, and helmet covers are done too. Finally, the mess tin’s green and dark yellow painted equipment look better with the warm of the Soft Tone so they get done as well.
Finally, Black Wash is applied to gunmetal, brass, black weapon furniture, and black leathers like the high boots and spade holder.
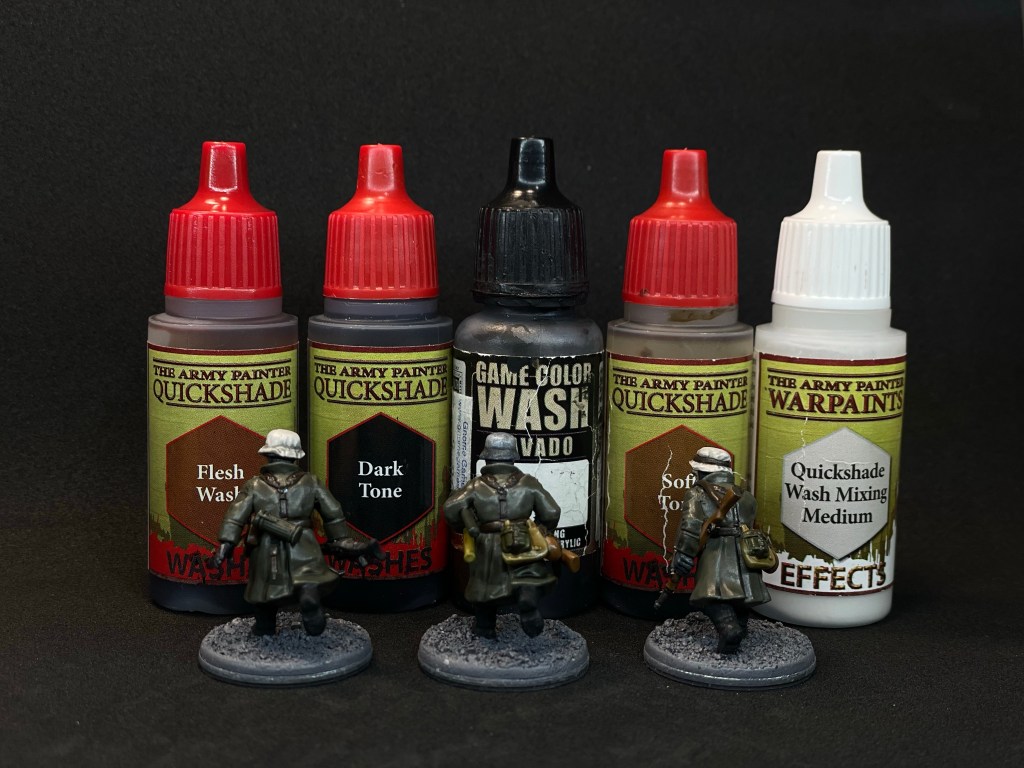
After the washes have had a chance to dry thoroughly I go back and highlight each color on the high points. I typically will glaze the original paint back on the high points of the shaded colors. I also use traditional highlights instead of glazing. As a loose rule, I glaze big areas and highlight small ones. At this point I always feel like I have wrecked the paint job…. and that is normal. When we are glazing the colors, particularly on the larger areas its going to look like crap. I believe it has something to do with the mismatch shine of the washes and the flat sheen of the paint. I promise it will all work out after we apply the finally matte varnish.
For brevity I will group several color steps together in one photo. Keep in mind some of the steps add a subtle change but they add up to make a large difference in the end.


The skin is highlighted with Kobald Skin. Aim for the nose, cheekbones, chin, and forehead. Teeth are added with a dab of watered-down Spaceship Exterior. My personal preference is to not do eyes at this scale. I find the eyes that I can accomplish are comically large and stick out, so I omit them.
The coats and pants are glaze highlighted with German Fieldgrey. The gloves and scarves are highlighted with Dark Sea Gray. And finally, the over whites are glaze highlighted with Spaceship Exterior.

AP Dead White is used to highlight the upper areas on the over whites. Focus should be paid to the very edges and top most parts of the fabric.

The ammo pouches, any leather bits, weapon slings, low boots, knife sheath, and flask tops are highlighted with German Camouflage Black Brown focusing on the tops and edges of the gear. Submachine gun ammunition pouches are highlighted in German Camo Beige and the top flaps and straps are highlighted in Chocolate Brown. The wooden weapon parts, spade handles, and flask body are highlighted with Beige Brown.
The boots get left as they are. The black shade is our highlight mechanism. The panzerfausts are highlighted with Middle Stone and German Camo Dark Green. We diverge a slight bit on the items we painted German Camo Dark Green. For those we do a light dry brush of Khaki to make the lines pop if the shade has knocked it down too much. While you have the Khaki hit the high parts of the bread bag too.
The mess tins and ankle gaiters are highlighted Camo Olive Green.
The spade holder, MP40 pistol grip, and machinegun stock are highlighted with Black Grey.
At this point you can touch up the zeltbahn. The most notable highlight here is the German Camo Beige. Make sure to only hit the highest points of the roll. If you feel the need you can touch up the geometric patterns on the zeltbahn with German Camo Medium Brown and VMC Reflective Green.
The holsters and equipment pouches are highlighted with Chocolate Brown.
Helmets can be glazed with AP Necromancer cloak or German Grey. Touch up any chipped white helmet paint at this point as well.
Give the highest parts of the metals a touch of Gunmetal to make them pop.

One of my favorite tips from Pete the Wargamer is to add facial hair and chapped skin to the faces. This really sells the “out in the elements” vibe for the minis. The facial hair is achieved with a mix of one part AP Necromancer Cloak and two parts water. This should be applied in two thin coats around the jaw and lip areas. The chapped skin is equally as easy to do with a targeted wash of AP Red Tone ink to the figure’s nose and cheeks.
I based the minis using my winter basing method I detailed in this article. Foliage and snow are added after varnish is applied to the minis and the rim of the base. This eliminates the chance of unwanted frosting on the plants.

The final step of painting the miniature is to apply a matte varnish. I prefer Vallejo Mecha Matte varnish for its color fidelity and protective nature. The matte varnish also ties the sheens, or shine, created by the washes together and makes them matte. Once cured the model looks 10 times better than the unvarnished one.
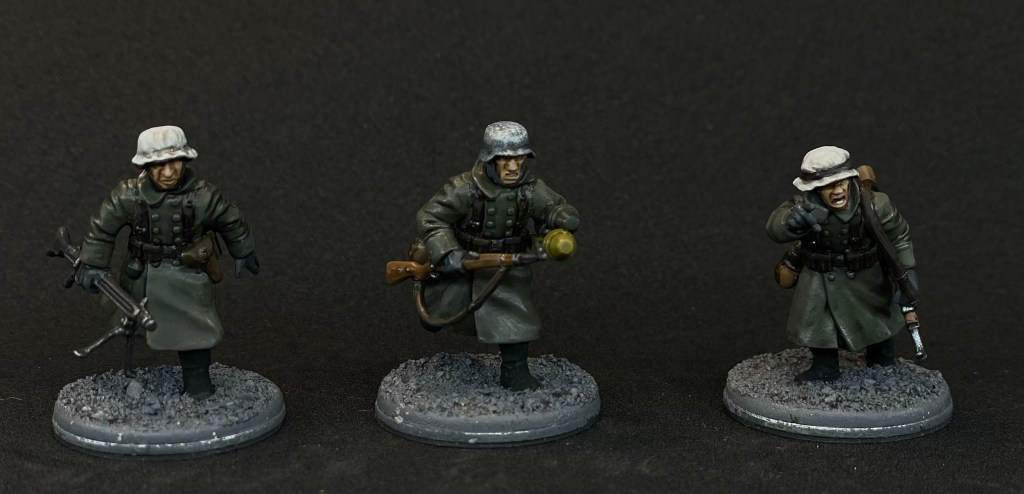
The Results
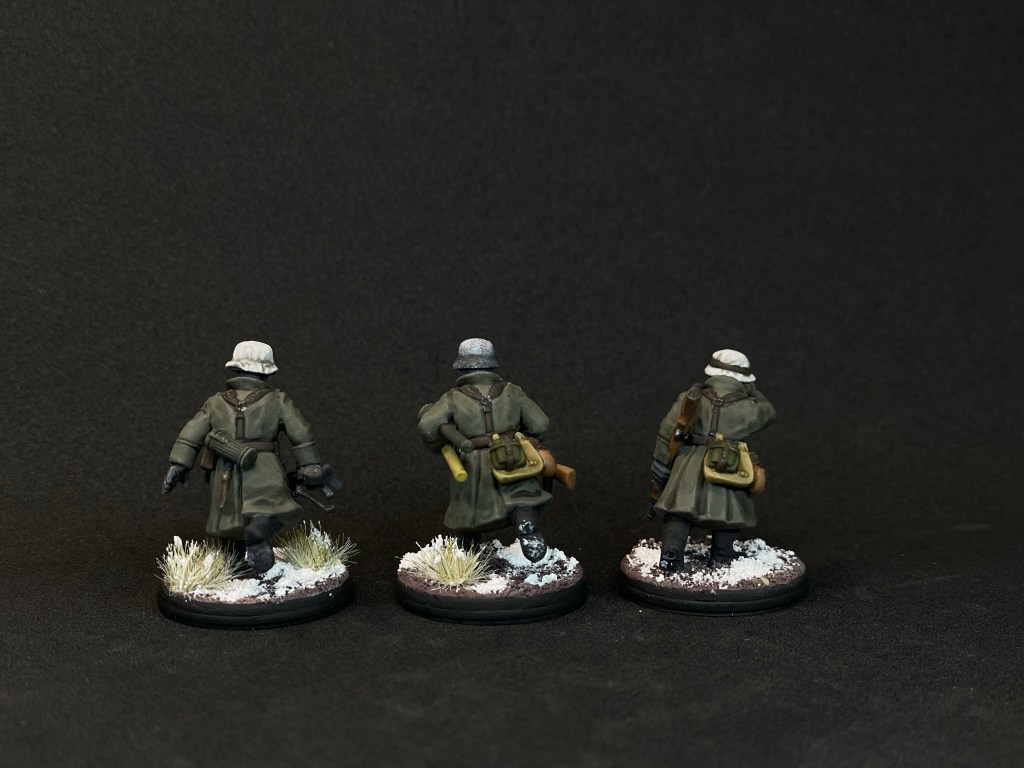
So there you have it! I find a lot of value in written painting tutorials and I hope this assisted you in some way. Below is the platoon so far. They are pretty dirty, cold, and downtrodden but they are mine. As with any project I noticed improvement after several repetitions of the techniques. If your first miniature painted isn’t your favorite just keep truckin’! German infantry are always labor intensive no matter what theater they are being painted for. In the end the effort is always worth it as they make a very striking force on the table.


Paint Listing
Vallejo Model Color
- German Field Gray spray primer 28.006
- German Field Gray 70.830
- Neutral Gray 70.992
- Dark Sea Green 70.868
- German Camouflage Black Brown 70.822
- Chocolate Brown 70.872
- German Camouflage Beige 70.821
- Beige Brown 70.875
- Black 70.950
- Black Grey 70.862
- Middle Stone 70.882
- German Camouflage Dark Green 70.979
- Camouflage Olive Green 70.894
- Khaki 70.988
- Black Green 70.980
- Reflective Green 70.890
- German Camouflage Medium Brown 70.826
- Gunmetal Grey 70.863
- German Grey 70.995
- Game Color Black Shade 73.201
- Mecha Matte Varnish 26.702
Army Painter
- Spaceship Exterior
- Brigade Grey
- Kobold Skin
- Necromancer Cloak
- Dead White
- Dark Tone Ink
- Soft Tone Ink
- Flesh Tone Ink
- Red Tone Ink
- Quickshade Medium

Cracking guide, I also enjoy the research before breaking out the brushes. I must say good idea with the paint listing at the end, very useful. Brilliant painting to boot.
LikeLiked by 1 person
I’m happy to hear you enjoyed the guide.
Gosh, yeah there is so much to dig into especially for WWII. I wish I could make a career out of it like some are fortunate enough to do.
The list at the end was shamelessly stolen from YouTube videos that put the paint list in the description. I see you did something similar with your materials needed in some of your posts. I love that as the list makes it easy to grab paints and go or to make a little shopping list.
LikeLike
Thanks for this guide – it’s been really helpful getting some Late War Winter Heer painted up. One quick note: I believe there is a mistake in the paint list at the end of the article in that Dark Sea Grey should be Dark Sea Green?
LikeLiked by 1 person
Indeed it is supposed to be Green and not Grey. Thanks for catching that! Much appreciated. I updated it.
I am happy to hear it has been of use. I can’t wait to see your Grenadiers all painted up!
LikeLiked by 1 person