Continued from Chapter 2
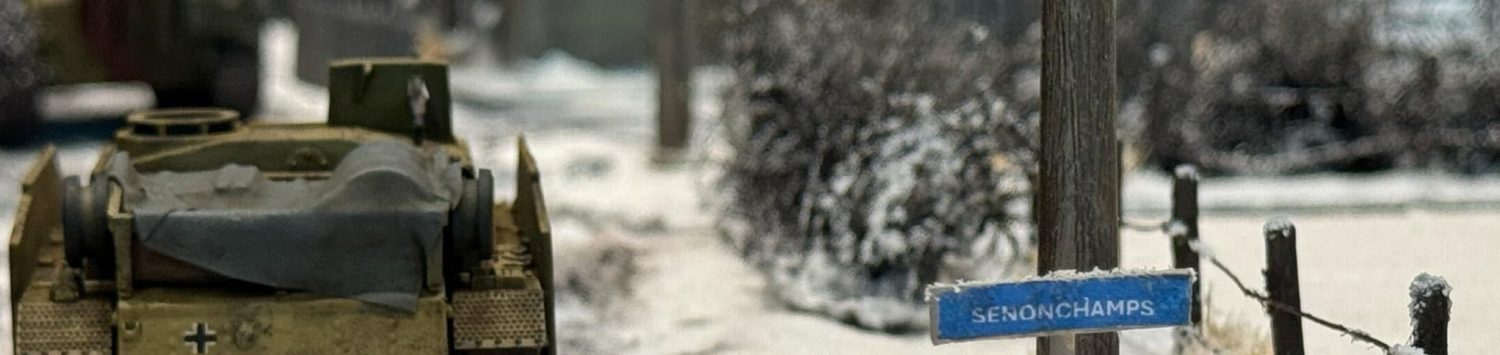
Their morale rekindled by the sight of the burning Japanese ships, the pilots of the Devastators continue their attack. However they are not all able to make it to the target. One Devastator succumbs to its damage as control surfaces fail and it wings over into the ocean. Nearby another Devastator pilot decides to drop his torpedo early, judging that his coughing and sputtering engine won’t hold out much longer. The remaining two undamaged Devastators crawl forward, their nervous crews hoping they can avoid attracting any attention. A keen-eyed Zero pilot spots them and maneuvers in on the tail of one of the bombers, dashing their hopes for a clean torpedo run as one of the Torpedo bombers is peppered with flying lead.
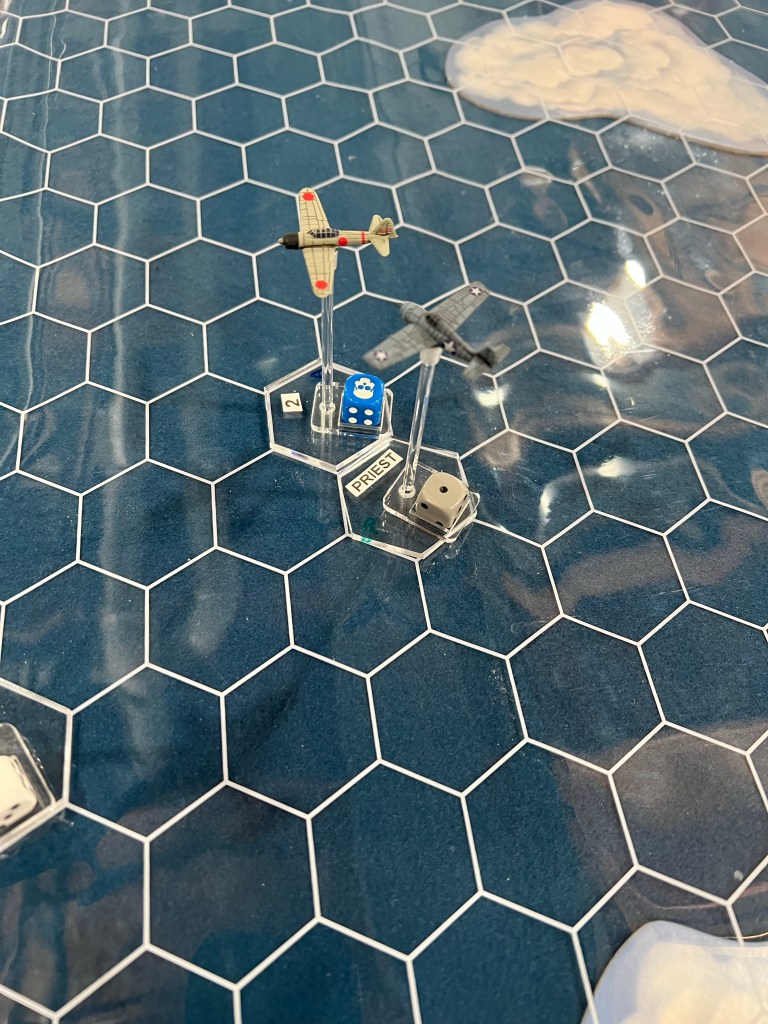
Ben, still on the tail of a Zero which he had only moments before fired at, continues the hunt as the wounded enemy seems to be turning back to the fleet. Suddenly the sounds of bullets striking his plane fill Ben’s ears. He never saw his attacker, a savvy Japanese Ace, slide in on his tail. Immediately Ben throws his plane around a little to shake the enemy fire and is rewarded when the chorus of impacts go silent. Simultaneously Ben bears down on his prey and lets loose again, adding to the damage taken by the Zero. Ben takes note that Dan has reappeared on his wing, returning to the critical wingman role.
Evan, with Charge still flying as his wingman, spots a Zero lining up on Ben. Immediately they turn and rush to the defense, lining up behind Ben’s attacker. Evan attempts a shot but is unlucky when his guns jam. Checking their status he sees that they are also out of ammo, a frustrating fact that sees Evan mutter a curse in anger. Quickly though Evan and Charge have bigger problems. Nearby a pair of stalking Japanese Veteran pilots spot Evan and Charge and take the opportunity to attack. They quickly dive in behind the two American pilots and each one lines up a shot on their own target. Evan catches a glimpse of rounds impacting Charge and immediately maneuvers defensively. Charge hears the impacts and is rewarded by the smell of gasoline filling the cockpit and a sputtering engine…
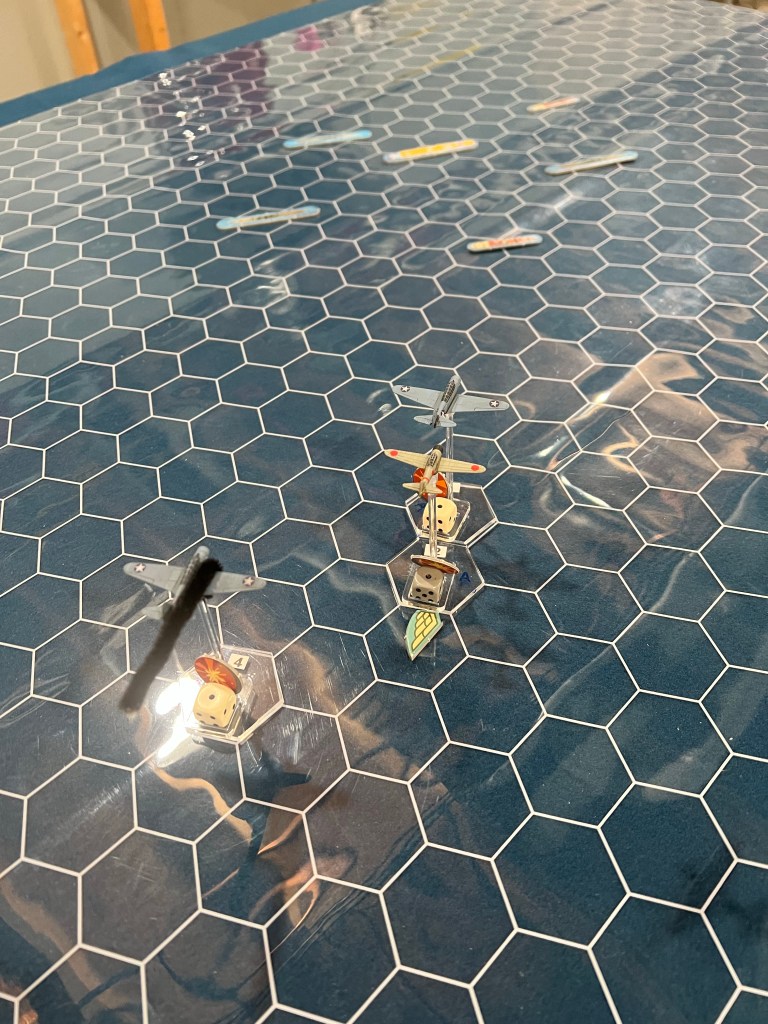
Priest, still unable to find his lost wingman, sees a chance to shoot at a Zero which happens to cross his path nearby. He streaks in for a deflection shot and is pleased when he sees visible hits appear in the Zero as he screams past. Quickly but carefully Priest turns around hoping to get another shot off.
The SBDs, their bombs expended, turn for home.


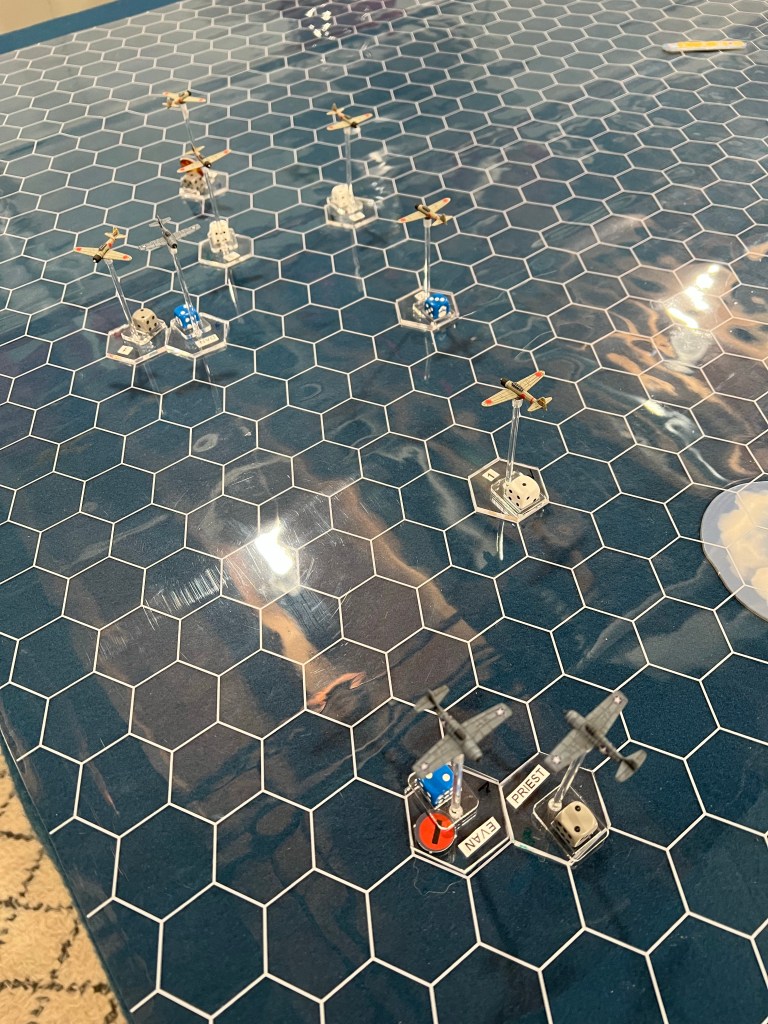
Turn six saw a quick reversal of fortune. Despite the damage to the enemy fleet the US planes suffered a hammering this turn. Evan is effectively out of action with jammed guns, as well as a pursuer. Charge took some engine damage, and the Veteran Zero pilot who caused it is still on his tail. Ben made out better, and was able to cause a temporary loss of control for his target. However Ben still ended with a Junior Ace on his tail. Dan was able to rejoin Ben but not to much effect. Priest coincidentally caused critical instrument damage to the same plane that injured his wingman Calvin earlier in the fight. The positions are not ideal for most of the fighter pilots at the end, they are still outnumbered and some of the enemy’s best pilots are on their tails.
The torpedo bombers continued their struggle. 4/2 succumbed to their damage and crashed into the sea. 4/1, struggling to stay airborne and with a Zero on its tail, opted to drop the torpedo at an extreme range. 3/2 and 3/3 continued on their attack but 3/2 takes some damage and suffers a temporary loss of control.
The Japanese side saw the ace that was injured by Evan and Charge return to a carrier, as well as some opportunistic maneuvering and decent shooting.
Ben continues to defend and attack at the same time. He sees tracers whiz by his cockpit, but doesn’t hear or feel any impacts. He focuses on the plane ahead and squeezes out a short burst. The Zero ahead of him immediately and violently rolls over and pitches down into the waves below. Ben and Dan immediately roll up and away, turning back towards the beleaguered bombers. A quick ammo check for Ben shows that his stores are dangerously low.
Evan tried his best to shake his attacker, pitching up and left in a tight chandelle. His attacker is persistent though, and stays tight with Evan. Evan continues to defend, seeing shots go by his cockpit and wondering how on earth he hasn’t been hit yet. He decides to try a snap roll and aggressively rolls his plane up and over, but is disappointed to see the Zero following his every move.
Priest rolls out of his turn and his quarry is gone, having desperately put distance between them. What Priest does see is a furball of US and Japanese fighters. He rushes towards the dogfight as fast as he can.
The SBD formation is relieved as they notice no pursuers while they continue to put distance between themselves and the enemy fleet.
The crew of the struggling SBD, having dropped their torpedo, sees no reason to stay in a metal coffin and opts to bail out while they still can. The crew barely gets their parachutes open in time to hit the water. As they float in the water the ocean quickly feels very, very large…
Not so far away the last pair of Devastators are quickly overtaken by attackers. One is shredded by hits and quickly nose dives into the sea. The final Devastator suffers a similar fate as hits from a Zero’s 20mm cannon causes the wing to separate from the fuselage. Quickly both planes disappear beneath the waves.
Charge knows he is in trouble. He can see the gas spraying into the cockpit from somewhere near the engine. His engine doesn’t sound good, and he is trying to assess the damage while also defending from a very persistent enemy. Suddenly there is a flash as his Wildcat explodes in the air! Somehow the next thing Charge sees after the flash is sky, then ocean, then sky, then ocean. He is falling through the air but he’s alive he realizes. He quickly reaches for his parachute cord and is barely able to get it pulled. The descent to the ocean below is quick and he lands with a splash. Catching his breath Charge looks at the enemy and allied planes dueling above. Slowly he realizes he is alone and a long way from friendly ships…


Turn seven was a massacre. I had had a bad feeling about how turn six ended and this validated that. First we have Evan, unable to shake a very determined attacker and with no ammo to fight back. Priest is a ways away and trying to get back to the fight. Ben was a speck of success as he claimed a kill, and his attacker chose to turn for a torpedo bomber that was unprotected instead of duel with Ben and Dan further. Then there’s Charge. Wow. When I rolled the explosion I wrote him off as dead. I consulted the charts and there’s a small chance for a pilot to be thrown free. Somehow the dice worked out and Charge survived. I was surprised but pleased that we didn’t lose a character in an instant this time. Whether or not he can survive his new enemy, the Pacific Ocean, will have to be seen in the post-game Squadron Forward rolls.
The US Devastators saw all three remaining airplanes go down. Luckily one crew was able to survive and parachute into the Pacific. The other two planes, 3/2 and 3/3, weren’t so lucky. Both took massive hits from the enemy and ended up crashing into the ocean. The SBD Dauntless flight turned and moved further, taking them decently far from the scene of the action.
Ben and Dan surge by a Zero, Ben letting loose a short burst as a parting gift. He doesn’t look back but if he had he would have seen the column of smoke emerge from the Zero’s engine. With a quick exchange on the radio Dan decides to turn back to help Evan, he turns in time to see the explosion of Charge’s plane and assumes the worst.
The torpedo launched in desperation by one of the final Devastators passes harmlessly behind the Japanese fleet. To the south the flight of SBD Dauntlesses watch as the enemy ships get ever smaller. They relax a little as it has become clear they aren’t being targeted. The pilots turn their attention to navigating back to the carriers.
Evan finally manages to shake his attacker, but only trades it for a new one as a different Zero finds his tail. Quickly, Evan decides to snap roll and quickly loses the enemy fighter with the maneuver. Spotting Priest and Dan arriving to his aid, Evan decides to fly ahead to get away from the combat area. Dan and Priest’s arrival quickly changes the decision for the few Japanese attackers, low on fuel and with limited landing options they decide it best to let the retreating American fighters go.


The above is actually a summation of turns eight, nine, and ten. These turns went pretty fast and there wasn’t a ton happening. The big action of the game was clearly over so I took the opportunity to wrap it up. Ben got a parting engine damage hit on a Zero, then Ben and the SBDs were able to clear the board edge. Evan shook off his tails while drawing them further from their allies. He was ready to leave being out of ammo. Priest and Dan came back to help and threatened the few Zeros that were left nearby. Since the Zeros were now dealing with a lot of minor damage here and there, most of them were on the way back to the carriers. I reasoned that the two chasing Evan have no way to know he was out of ammo, as such they would be facing 2:3 odds in the fight and decided to back off.
I was really thrilled with the game, it played well solo and was good fun. As of writing I haven’t played the next installment but plan to soon. I’m going to keep the size of the game down a bit to minimize the two-part after action reports from here on out.
Now we have to take care of the post-game items from Squadron Forward.
-First off is our squadron’s ‘Returning Home’ rolls. Ben, Evan, Priest and Dan all had undamaged planes so are assumed to land safely. Calvin’s wounds force him to make the landing roll though, subtracting -2 from the roll for being wounded. The D10 roll resulted in a 3, which after the modifier is 1. This result means he crashed and burned on landing. Perhaps he was light headed or barely conscious from blood loss. Luckily on a d6 roll of 1 he would be killed in the crash but Calvin rolled a 2, worsening his wounds. Charge is the last pilot who needs attention, rolling a D10 on a loose chart for ‘Returning Home’ after a crash and under the ‘At Sea’ column for where he was shot down. A result of 8 gets Charge the ‘Gets Home’ result. Charge lucked out that a nearby US submarine saw his parachutes and mounted a rescue attempt when they could. I decided it would be an All-Knowing Odds Table roll of ‘Possible’ (5 or less) that the nearby Devastator crew would also be recovered. Unfortunately they were not (I rolled a 7).
| Odds | D10 |
|---|---|
| Very Likely | 9 or less |
| Likely | 7 or less |
| Possible | 5 or less |
| Unlikely | 3 or less |
| Very Unlikely | 1 |
-Next we have our Squadron’s Reputation, which is handled by something called Glory Points. The rules cover the way to access the squadron’s performance and their chance at a glory point. It also provides guidelines to modify the roll based on current Glory Points. There are high expectations for well-performing units after all… Anyways the squadron have 0 currently, which gives us a modifier of 0. I’m going to roll the squadron as “Possible” to gain one point. It wasn’t their best show but Ben did make a kill, and the squadron did their best on a nearly suicidal mission. I rolled a 9, so no glory for our pilots today.
-Repairs are the next item, or they would be if we had anything major to repair. We do not this time.
-Calvin was wounded so we have to do the next step “Patching-Up Pilots”. On a D6 roll of 5 or 6, he can return to duty. Calvin rolled a 1 and so will have to re-roll next time we hit this step, gaining a +1 modifier for each time he fails the roll.
-Replacements for both pilots and aircraft are next. I started the squadron with eight pilots and aircraft. Currently we are going to use this to see if Charge turns up quickly or not. Same as with the wound roll on a 5 or 6 he does, but a roll result of 4 means we won’t see Charge next time. As for aircraft we are down two, Charge’s and Calvin’s planes. We are unable to procure anymore (so what if we’re under way on a carrier in the middle of a larger battle? We need new planes!) so we are operating with six planes and six available pilots next time.
-Finally, we have to do some character management, as well as our fixed event (we have to roll for what this random event is, in our case it is Ben gaining a skill). Lets start with Ben who I figured with another kill under his belt it would be “Likely” for him to upgrade skill to Veteran. A roll of 3 makes that a reality. He also develops a skill, in this case ‘Ironman’ which makes him ignore the first Pilot Wounded result in future combats. Next Vincent Priest the Rookie seemed ‘Likely’ to no longer be a Rookie. He hit an enemy plane and survived a brutal fight after all. With a roll of 7 Priest is upgraded to Regular or Average pilot skill. Charge I opted to just outright give the “Rabbit’s Foot” trait to. It lets him reroll a roll once per game, and he seems like a lucky chap.
There is one more section which is NPCs, but as I’m easing into the ruleset I plan to attend to that after we conclude Midway.
Thanks for reading and if you have a good idea for a Squadron nickname drop it in the comments, I need other words to type for our group of motley fliers. Come back soon to read Chapter 4!
Previous Articles
Prep: The Pilots
Prep: The Setting
Prep: Materials
Battle of Midway Chapter 1
Battle of Midway Chapter 2

Great stuff! I am very much enjoying the game. I did Midway back in 2020 (the pandemic gave me lots of time) and it was wonderful fun.
The name of my squadron was the Sure Shots, flying off of USS Concord, CV4 (no Ranger in this universe, Concord is a sister of Lexington). Fighting 4 and the SBDs did quite well, but oh those Devastators!
LikeLike
Thanks Pat! Sounds like a blast too. Those Devastators indeed! They don’t hold up very well, and make for easy prey. A testament to the rules writers making them accurate to their actual performance.
The next segment here will deal with fending off the Japanese counter strike!
LikeLike