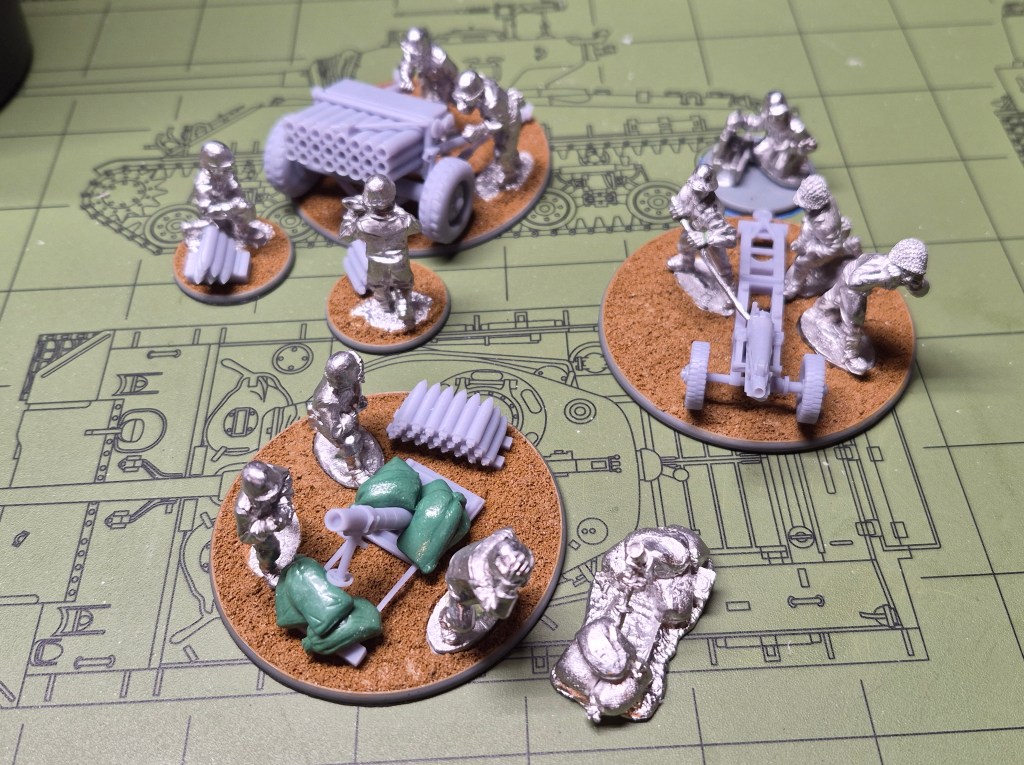
I finished building my side quest models mentioned in part four and it took a turn I did not see coming but glad it did. I was very unhappy with the metal US Army chemical mortar cast but it looked a lot cooler than the 3d printed one as it had some sandbags on the base plates. At first I thought I could file/Dremel out the metal mortar and place the now liberated sandbag bits on my printed mortar but that seemed like a lot of work. I did find this cracking sandbag tutorial on YouTube from The Cult of Crafting and I decided sculpting some sandbag out of green stuff was the way to go. I did find Hirst Arts (maker of fine hobby molds) made a sandbag mold, and I being fairly lazy thought this may be a better starting point. Fortunately for me Hansome Ben (editor comment: you need new glasses) was in possession of said mold, and a few days later I was cramming green stuff into it.
Using the silicone mold as a press mold the green stuff came out nicely and I was able to use a rubber clay shaper (sometimes referred to as a rubber brush) to shape the sandbag so it was able to conform to the contours of baseplate and basing or when double stacked drooping over other sandbags without loosing detail.
In the end I was very happy with the result and ended up ordering one of the molds for myself as I think I will be using it quite often in the future.
