
Continued from Chapter 5
Preface and Scenario
Welcome back to another installment of my first Bag the Hun campaign. If this is the first time you’re reading about it, I recommend going back and catching up here if you want the full story. Today we see our protagonists of the fictional VF-2 fly a protection mission for the US landings at Guadalcanal.
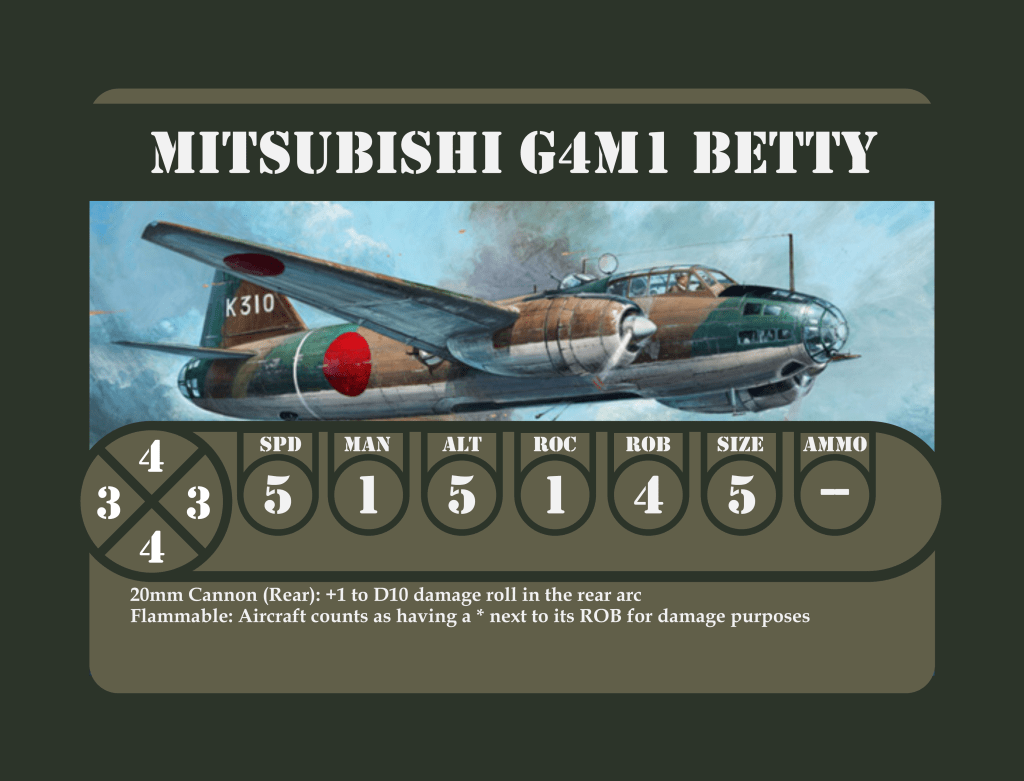
On August 7th, 1942 United States forces made landings on Guadalcanal, Tulagi, and the Florida Islands in the first major offensive operation against Imperial Japan. One of the ways the Japanese forces sought to counter the landings were a series of air attacks deployed from their large air base at Rabaul on the island of New Britain. Roughly 650 miles from Guadalcanal, the flight from Rabaul was achievable by the land based G4M1 Betty bomber of the Japanese Navy. The bombers had been loaded with bombs for a different mission that morning but were hastily redirected to Guadalcanal without rearming them with the preferred torpedoes. The result was a lackluster bombing attack on the 7th.
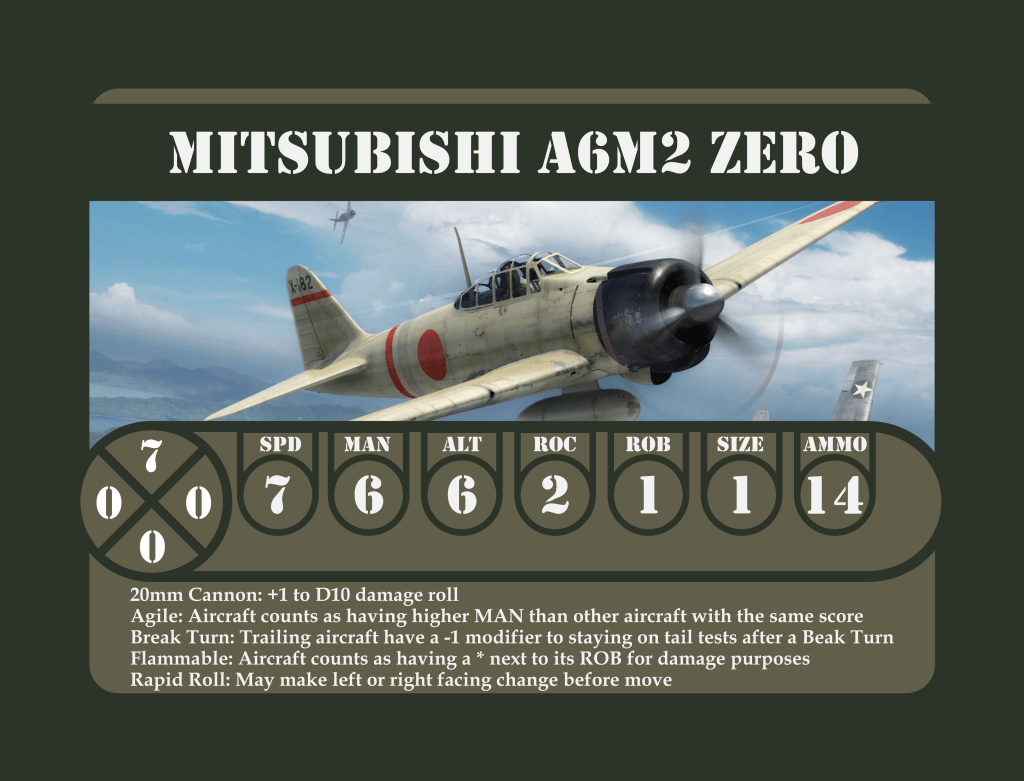
The bombers were escorted by A6M2 Zeros, however these Zeros needed to utilize external fuel tanks (drop tanks) to make the trip. A large disadvantage for the Zero pilots was that they needed these fuel tanks to make the complete trip meaning they could not jettison them for combat. Luckily for us, Bag the Hun has rules to simulate this. Aircraft with external fuel tanks take a -1 penalty to their Speed stat, and a -2 penalty to their Maneuver stat. Ouch.
A pro for the Japanese in this scenario is that the attacking forces were some of Japan’s best and most experienced pilots. For rules purposes today Japan is sporting four aces among their nine fighters, along with another two ace level pilots in the bomber force.
The scenario begins on the afternoon of August 7th, 1942. The Japanese G4M1 Bettys have already made their ineffective bombing attacks on the US landings and have turned for home. The pilots of VF-2 have arrived with other plans for them. The bombers need leave the opposite board edge to escape the battle. Their disadvantaged Zero escorts are ready to strike at the US fighters. The lead plane of both the Zeros and the Bettys is a named character, both are fictitious. Kazato Toshiki is one of Japan’s deadliest fighter pilots, a Top Ace with years of experience fighting in Papua New Guinea, the Java Sea, and China. Izumi Kosaku is a veteran bomber pilot who has been flying continuously for several years. With 30 aircraft on the table this is the biggest game of Bag the Hun I’ve played yet.
Order of Battle
VF-2
Flight One
Lt. Evan Richards / Veteran / F4F-4 Wildcat
Ens. Casey Palmer / Regular / F4F-4 Wildcat
Ens. Mike Charge / Regular / F4F-4 Wildcat
Ens. Owen Murphy / Regular / F4F-4 Wildcat
Flight Two
Lt. Ben Wilson / Junior Ace / F4F-4 Wildcat
Ens. Anthony Stewart / Veteran/ F4F-4 Wildcat
Ens. Calvin Digty / Regular / F4F-4 Wildcat
Ens. Archie Marsh / Regular / F4F-4 Wildcat
Flight Three “Dan’s Devils”
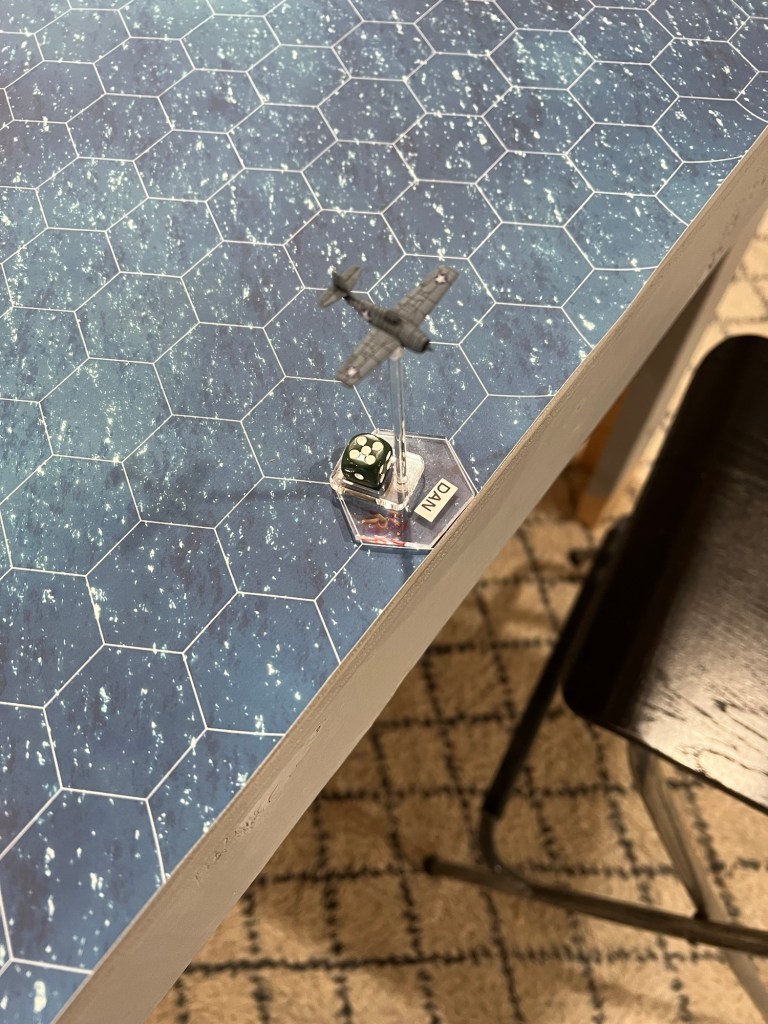
Lt. Dan Fletcher / Junior Ace / F4F-4 Wildcat
Ens. Dick “Bastard” Blanchard / Regular / F4F-4 Wildcat
Ens. Vincent Priest / Regular / F4F-4 Wildcat
Ens. Gunnar Shaw / Rookie / F4F-4 Wildcat
IJNAS Fighters
First Fighter Shotai
Zero One- Kazato Toshiki / Top Ace / A6M2 Zero
Zero Two / Junior Ace / A6M2 Zero
Zero Three / Veteran / A6M2 Zero
Second Shotai
Zero Four / Junior Ace / A6M2 Zero
Zero Five / Veteran/ A6M2 Zero
Zero Six / Veteran / A6M2 Zero
Third Shotai
Zero Seven / Junior Ace / A6M2 Zero
Zero Eight / Veteran / A6M2 Zero
Zero Nine / Average / A6M2 Zero
IJNAS Bombers
First Bomber Shotai, 4th Kokutai
Betty One- Izumi Kosaku / Junior Ace / G4M1 Betty
Betty Two / Rookie / G4M1 Betty
Betty Three / Junior Ace / G4M1 Betty
Second Bomber Shotai
Betty Four / Veteran / G4M1 Betty
Betty Five / Veteran / G4M1 Betty
Betty Six / Average / G4M1 Betty
Three Bomber Shotai
Betty Seven / Veteran / G4M1 Betty
Betty Eight / Average / G4M1 Betty
Betty Nine / Average / G4M1 Betty

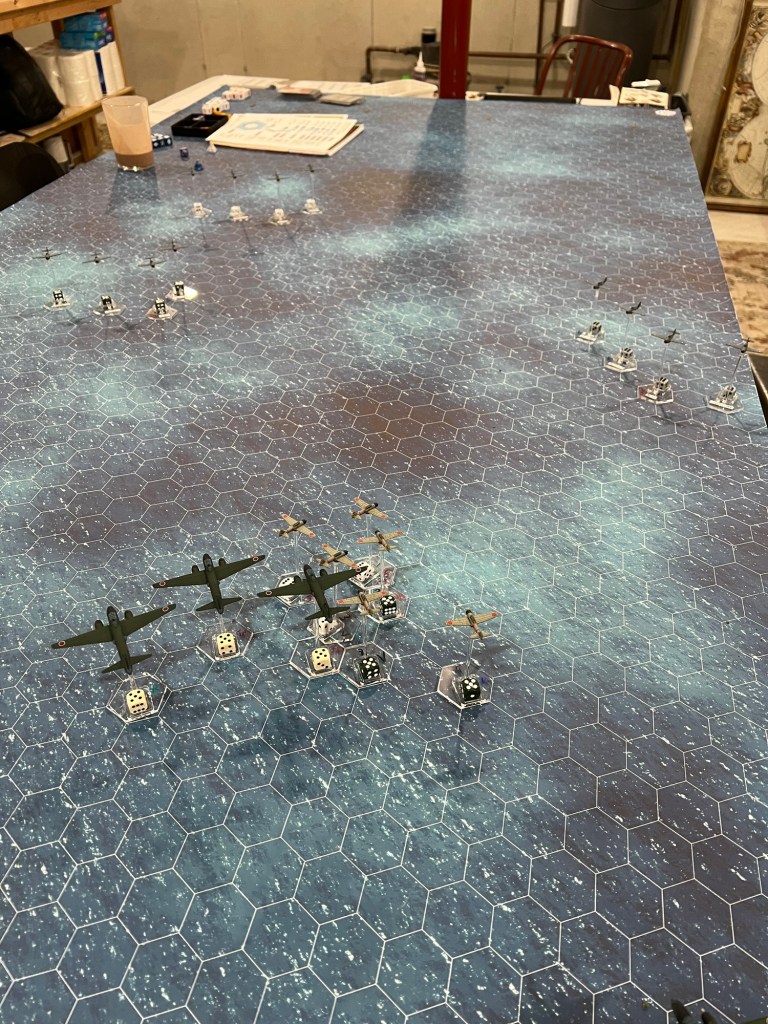
TURN ONE
The pilots of VF-2 anxiously await combat. For some today is their first taste of combat, for others it has been only two short months since they last danced with Japanese pilots in the skies near Midway. Hands check and recheck equipment, eyes scan the skies ahead and around their F4F-4 Wildcats. Word had come only moments before that the Japanese G4M bombers had departed the area of the landings headed north. Suddenly a voice reports bogeys, soon confirmed by others to be a flight of bombers escorted by fighters.
Ben sees the closest bombers to him are the end of the formation. He advances his throttle and leads his formation Anthony, Calvin and Archie in a climbing turn to set up an attack on the bombers. Ben instructs Calvin and Archie to split off as a pair for their own attack while he and Anthony make their own. A trio of Zeros flashes by and moments later Ben sees tracers flash by Anthony, but none seem to hit him.
Nearby in the cockpit of an A6M2 Zero, ace pilot Kazato Toshiki watches his rounds miss the American Wildcat just ahead. He grunts in frustration, fires again, and misses again. The American plane slips out of his sights a moment later, revealing another pair of the stubby American fighters ahead. Toshiki advances his throttle and leads his two wingmen in pursuit of these new planes. Perhaps he will have better luck there.
Dan and his devils see the bomber formation dead ahead of them. They plan a head on pass, and Dan orders his flight members into pairs. He and Bastard stick together while Priest and Gunnar fly as the other pair. Priest and Gunnar open up their throttles and surge ahead as Dan and Bastard line up on the rapidly closing bombers.
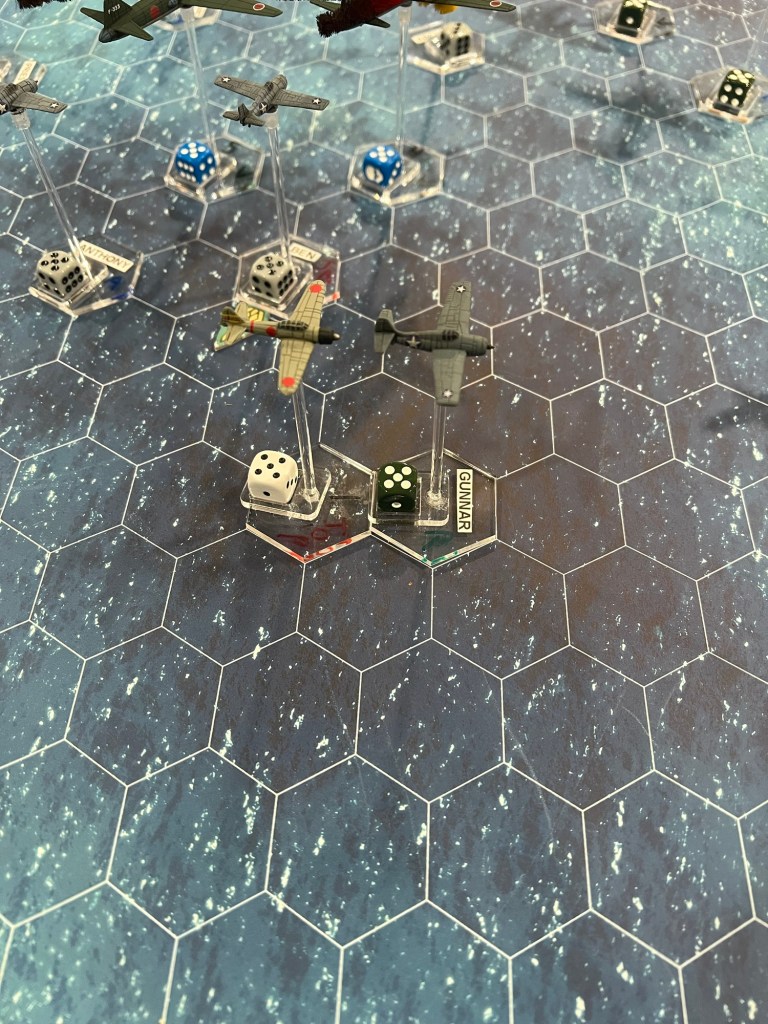
Gunnar’s first mission is off to a good start. He smiles seeing the bombers ahead and checks to make sure his guns are ready. His mood is ruined an instant later as he catches sight of three Zeros closing rapidly from his two o’clock. Before he can react he hears a series of metal on metal pings and thuds as rounds impact his Wildcat. He looks out and is surprised to see several large holes in his wing, the result of the attacker’s 20mm cannon no doubt. Suddenly tracers erupt around him from a different direction. He looks to see the noses of the Bettys ahead twinkling as their nose gunners open up on Priest.
Evan discusses a plan with Charge over the radio. Their flight is further from the action and they are able to watch as the Zeros emerge from around the bombers like a swarm of angry hornets. They spot some fighters coming in low between Dan and Ben’s flights. Seeing these enemy fighters begin to turn towards Dan’s planes Evan decides this flight is their first target, then they will split into pairs, focusing on the fighters so the other flights can work on the bombers.
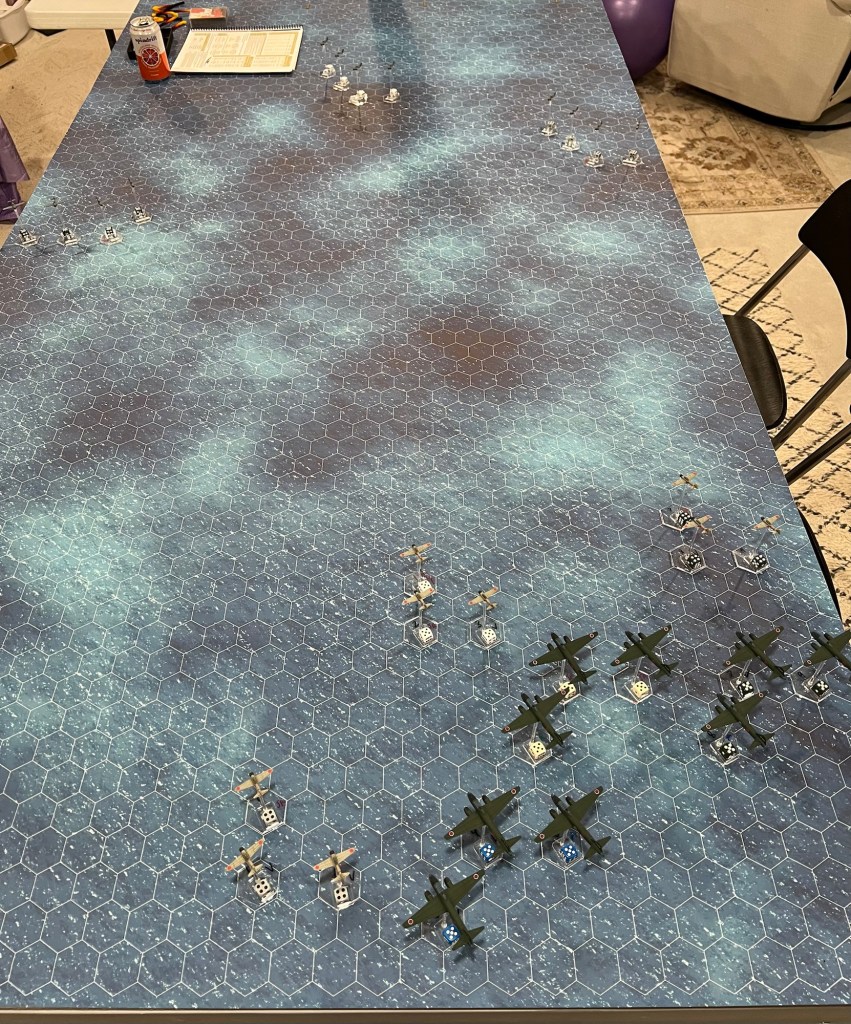

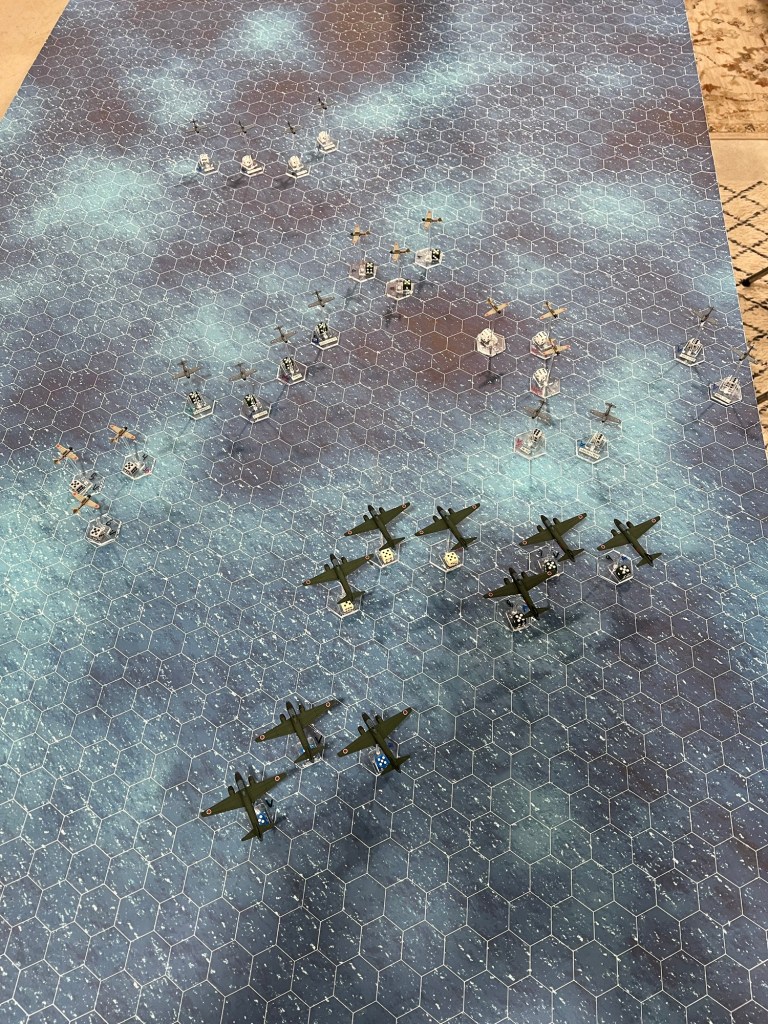


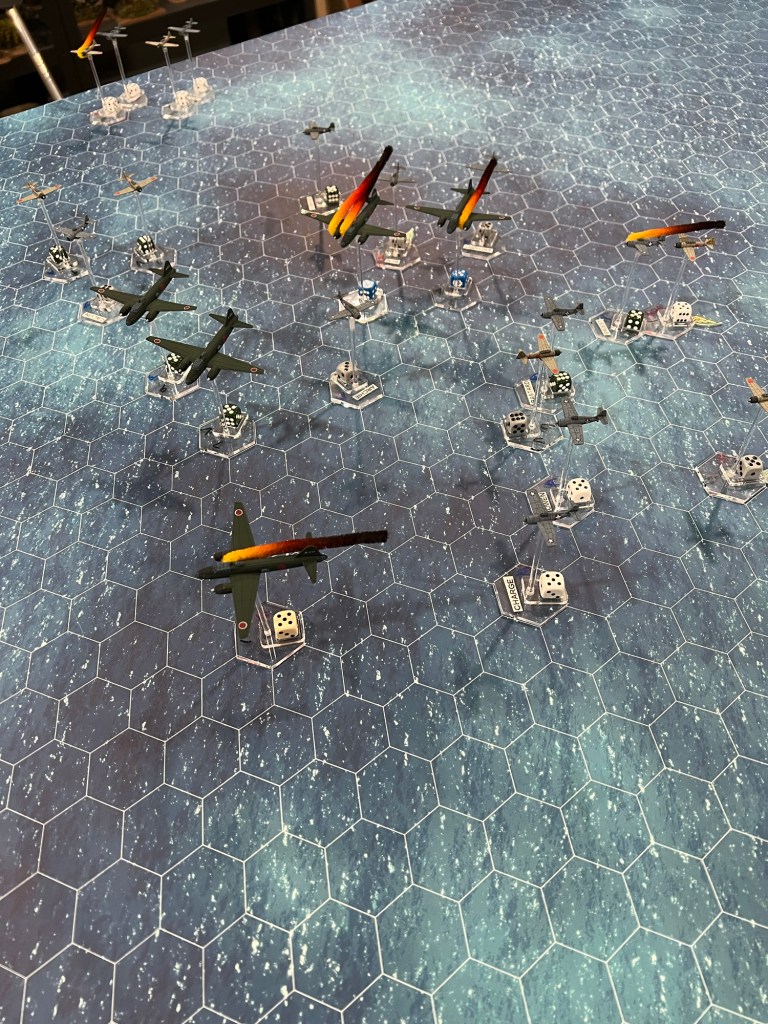
As usual most of turn one was spent on maneuvering planes into good positions to attack. The American side is sporting 12 planes this time, giving them an advantage in numbers vs the nine Japanese fighters. However with an addition nine G4M1 Betty bombers as their objective the US pilots find themselves outnumbered overall. 18 vs 12 planes means some decisions have to be made about target priority. Naturally the goal of the mission is killing bombers, but the escorting Zero fighters can’t just be ignored either.
About halfway through the turn a bonus card let the Japanese Top Ace slide into a good spot for a deflection shot on Anthony. Despite multiple rounds of shooting from this position the ace was unable to land hits. Subsequently a pair of movement card draws resulted in Ben and Anthony moving away, leaving the Zero flight with two options: follow Ben and Anthony and get on the tail, leaving their own tail open for Calvin and Archie to easily lock on to, or turn into Calvin and Archie in a three versus two fight knowing the Ben and Anthony are already headed away. The choice seemed decently clear to me so off to fight Calvin and Archie they went.
Late in the turn Dan’s flight got moving, but unlucky Rookie (Sprog) Gunnar was the first US pilot to take damage from enemy fighters. Using a formation bonus card, then a section move card the Zero flight was able to essentially appear from thin air at Gunnar’s two o’clock. Unlucky for Gunnar the very next card was a Junior Ace Bonus Card, allowing the Junior Ace leading Zero to fire on Gunnar with the card. Gunnar suffered Aileron/Wing Damage.

Gunnar is a Rookie (Sprog) so his luck modifier is a -1. Without the ability to climb, and with a reduced Maneuver score and a 1-in-6 chance to lose altitude every turn Gunnar will not be able to contribute much to the fight. The question remains if he can escape the fight in a timely manner.
TURN TWO
Ben and Anthony begin a turn for their attack from above the bombers. Diving from above the bombers Ben selects a Betty as his target. As he closes he lets loose a short burst into the Japanese bomber and is rewarded with flames almost immediately, the bombers instantly begins a slow roll to the left, pieces of its wing coming off in the process. Ben and Anthony streak by the dying plane before pulling out of their attack to see more Bettys ahead.
Toshiki sees the two Wildcats ahead turn into his attack. They are too late though and he expertly slides in behind one of them, easily settling onto its tail. He lines up his gunsight and fires only to miss again. Toshiki doesn’t realized in the moment that he left his wingmen behind with his aggressive maneuver.
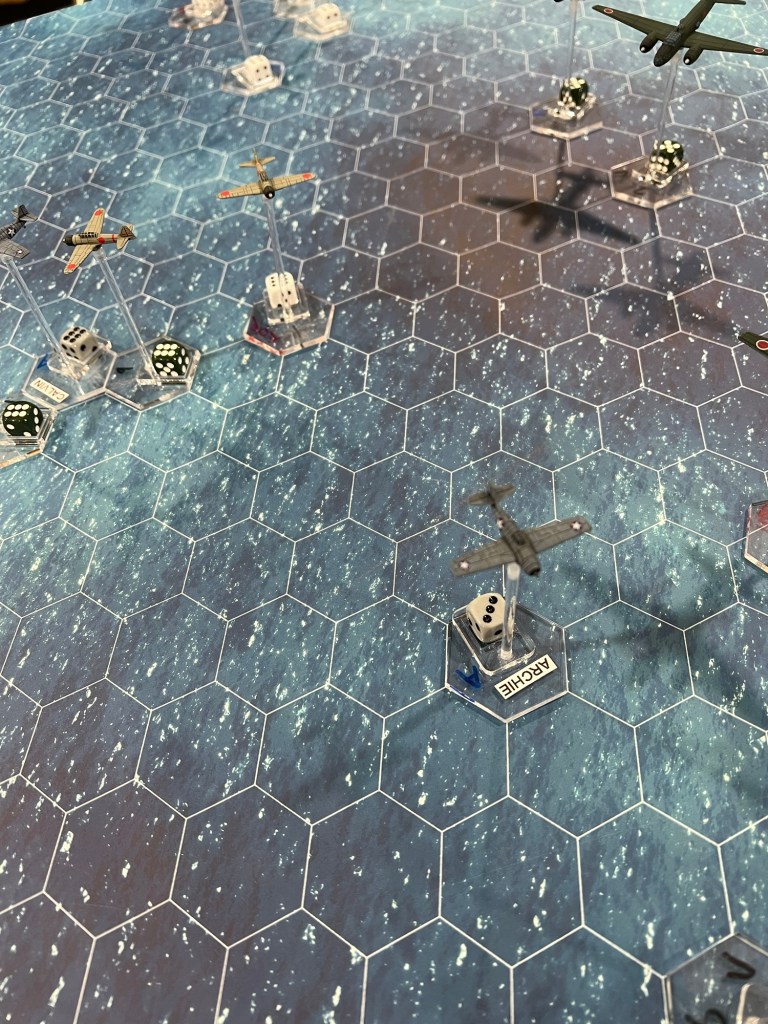
Archie sees tracers flash around his cockpit and realizes there is a Zero behind him. It is his first combat and he can only think to dive away. He abruptly pushes his stick forward…
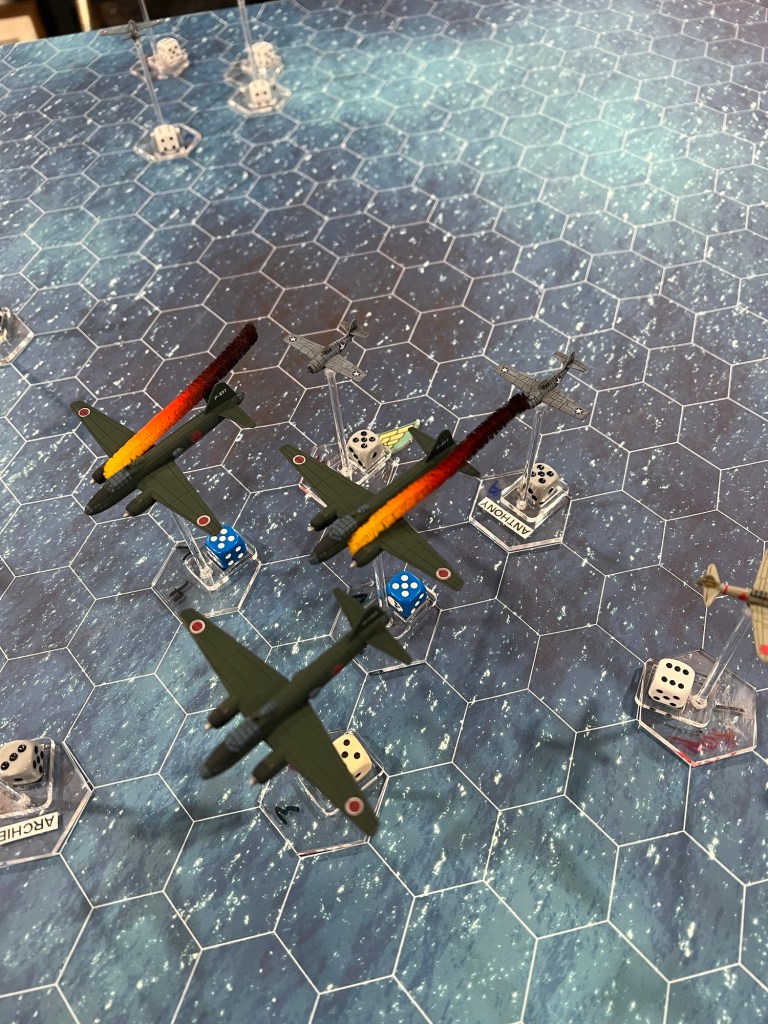
Dan and Bastard climb above the bombers together, then roll onto their backs to attack the bombers in a dive from the side. Below, in the cockpit of the lead G4M1 Betty, veteran bomber pilot Izumi Kosaku sees the fighters above rolling over for an attack. He leads his flight of bombers in a sudden and sharp turn to the left, hoping to throw off the fighter attack. Above the bombers Dan sees the bombers bank to their left, carrying them away. Undeterred, Dan pulls through a split-S maneuver and ends up with a firing angle on the lead bomber. Dan lets loose a long burst, showering the Betty with tracers, but suddenly his guns seize up with a jam. Kosaku sees the tracers around his bomber and yanks it back to the right to evade.
Priest and Gunnar fly forward through a storm of steel from the Betty nosegunners. Priest breaks right to go after the Bettys Dan is attacking but Gunnar can’t risk that turn with his damage. He is forced to continue forward through the formation of firing Bettys.
Evan leads his flight on the attack. He carefully lines up a Zero as they close on the enemy fighters. With a quick burst the Zero erupts into a fireball and falls from the sky. Charge and Owen break right and go head to head with another flight of Zeros, but neither group can line up a shot before they pass through each other’s formation at high speed. Evan and Casey turn through the Zeros they just attacked, weighing their next options.


Turn two was a high energy turn for the VF-2 fighters. Ben and Evan immediately scored kills and for a second it looked like Dan and Charge might have a shot at it too, but theirs didn’t work out. Dan’s luck was especially foul as he rolled more 1’s than combined 5’s and 6’s during his attack on the Betty. The result is Gun Jam condition. The only way to clear a jam is to spend a whole move card flying straight ahead while rolling a dice to clear it. The roll needed to clear varies a bit with pilot skill level but for Dan, a Junior Ace, it is a 3 or better on a D6.
Another notable highlight of the turn was the continued failure of the Japanese Top Ace to land a hit, this time in a textbook perfect firing position. I also started to really notice the drop tank penalties on the Zeros this turn. The -1 Speed means they move at 6+D4 (the same as a Wildcat) instead of 7+d4 and this made a bigger difference than I thought it would when actually flying them around the table. Additionally -2 to the Maneuver stat hurts when trying to get on the tail of an enemy. Usually against the Wildcat the Zero benefits from having higher maneuverability, and therefore receives a +1 bonus to the roll to “get on the tail”. Now the Zero has a MAN of 4 to the Wildcat’s MAN 6. This means instead of +1 the Zero has -2 on the roll…ouch! To make it worse for the Japanese pilots the Wildcats will now get a +2 instead of a -1 to test for getting on a Zero’s tail. The best way to counter this? Don’t try to get on the tail, and instead try to line up deflection shots when able.
TURN THREE
As Ben and Anthony pull out of their successful attack they are faced with the sight of more Betty bombers dead ahead. Ben expertly lays into the closest one, sending it down in flames. He and Anthony avoid the burning debris of the bomber and emerge directly behind another pair of G4Ms. They quickly decide that they should each take one this time to maximize their attack. The deadly 20mm tail guns of the Bettys exchange fire with the two Wildcats when first Anthony’s target, then Ben’s burst into flame. Moments later more fire erupts from Ben’s target. The tail gun in the Betty ahead of Anthony abruptly stops firing amongst the chaos, the gunner killed or disabled.
Nearby Dan and Priest are also attacking their own Bettys. Dan’s guns are jammed and before he has the opportunity to clear them his Wildcat shudders as it comes under withering fire from the gunners in the Bettys. Looking at his damaged plane Dan abandons his attack and decides it best to head for home. He radios out his intention and break away from the fight, frustrated and disappointed at being forced out. Priest’s first attack overshoots a Betty and he turns right to come around again when he is pleasantly surprised to find a different Betty filling up his windscreen just ahead. Priest gives the Betty a burst of fire which immediately explodes into a cloud of debris. Priest lets out a whoop of victory.
Toshiki is surprised when the Wildcat ahead of him rapidly noses over into a dive. Toshiki begins to push over to follow but is forces to rapidly abandon his pursuit to avoid colliding with Evan’s Wildcat as it flashes by. Nearby he notices a Betty explode, noting the Wildcat that did the shooting is all alone. Toshiki breaks towards the Wildcat and smoothly rolls on to Priests tail…
Charge and Owen had turned to go head to head with some Zeros, but quickly find themselves in trouble as the Zeros get around behind them. Charge is able to evade a Zero trying to get behind him but Owen is less fortunate. An experienced Zero pilot grabs on to Owen’s tail and won’t let go. Metallic pings and thuds sound inside Owens cockpit as his aircraft takes hits from his pursuer. The smell of fuel fills the cockpit a moment later…
Archie looks around and doesn’t see the Zero behind him anymore. He breathes a sigh of relief but quickly remembers he is now alone in this aerial melee as Calvin is nowhere to be seen.
Calvin sees Archie dive for the deck ahead, shaking his attacker. Calvin also sees several Zeros ahead and decides to make a run on them before returning to Archie.

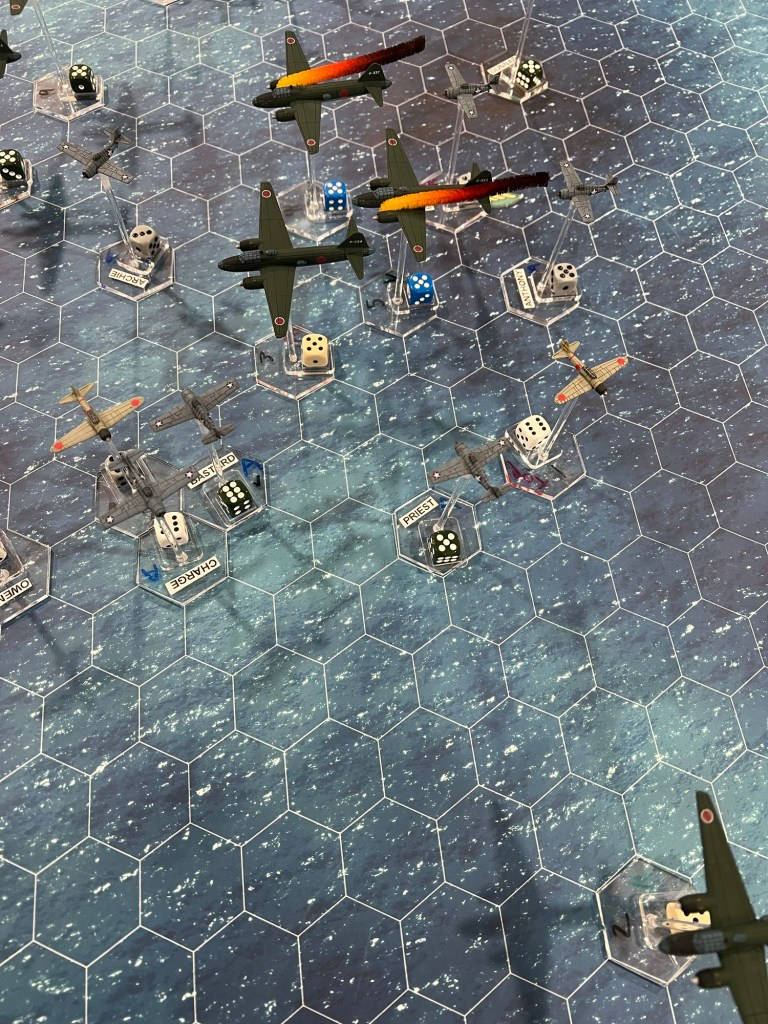

Turn three saw some great success for the VF-2 pilots. Collectively they destroyed two G4M1 Bettys and left two more with a Fire and Serious Fire.
I really like how fires are handled in Bag the Hun. Fires are subdivided into three levels: Fire, Serious Fire, and Very Serious Fire. Most of the time some sort of damage will drive you to a “Fire” result, though there are a few cases where you can start with another level of fire. Flammable aircraft (The Zero and Betty are both considered flammable) are more prone to catching fire and many damage items will make them ignite or test to see if they are on fire. Once on fire, each turn your aircraft/pilot will need to test for fire to see what happens by consulting this chart:

The only results are essentially that the fire gets better, worse, or stays the same. You have the option of performing a Hard Dive maneuver to help extinguish the fire, but that’s all you can do other than hope it gets better.
Now back to the game. Beyond the exploding Betty show the turn really didn’t have much happen. Dan was forced out of combat, which means VF-2 lost one of its two ace pilots available. That’s unfortunate for the Americans as this scenario really needs all hands on deck to help even the odds. The turn ended with Owen and Priest both having Zeros on their tail. Owen has a Junior Ace on his while Priest has Toshiki, the Top Ace who can’t land a shot so far, on his.
TURN FOUR
Kazato Toshiki depresses the firing button and watches as his first rounds miss the Wildcat ahead of him. He takes aim again and fires once more. This time Toshiki watches as 7.7mm and 20mm rounds impact the wing root of the F4F. He is rewarded as the American plane’s wing detaches and the Wildcat enters a wild spin downwards.
Priest barely has time to react, fresh off his kill he sees tracers zip by his canopy. A moment later his Wildcat jerks violently and tumbles. Priest realizes his aircraft has been hit and begins to struggle with the canopy to bail out. Priest manages to push the canopy open and throws himself from the wrecked aircraft. Vincent Priest looks down at the ocean as he free falls and struggles to find his parachute ripcord.
Toshiki pulls up to avoid Priest’s wrecked plane and as he turns right to find another target he spots a lone American headed away from the fight. He pushes his throttle forward and rapidly closes the distance. When he gets close he fires on Gunnar and is rewarded with an explosion as the American plane disintegrates in mid air. Gunnar Shaw never even knows he is under attack in his last seconds. The Japanese ace pulls up and around after his second kill in as many minutes. He turns back to the fight and sees a pair of Americans ahead. Toshiki picks the flight leader and aggressively drops in on Ben’s tail.
Ben Wilson looks at the burning Betty ahead of him. He fires on it one more time and is rewarded with a kill as even more fire consumes the Betty, which rolls over onto its back and pitches down towards the sea. Ben and Anthony dodge the burning wreck and begin looking for more targets. The Betty Anthony lit on fire is nearby and seems an easy target. Anthony suddenly alerts Ben that there is a Zero on his tail. Ben snap rolls to the right and shakes the Zero with his violent evasive maneuver.
Calvin closes on some Zeros, but misjudges his attack. Moments later he hears impacts as he comes under attack by an unknown assailant. He doesn’t have time to start evading before there is a bright flash and a thunderous roar. Suddenly Calvin finds himself free falling above the Pacific, the plane he was flying moments ago nowhere to be seen beyond some burning debris falling nearby.
Evan and Casey spot a pair of Zeros and go on the attack. They make a hard turn to try to get behind the Zeros but Casey loses altitude and ends up below the target. Evan has a chance to fire on the Zero ahead of him and the Zero produces a streak of flame after only a few hits. Evan’s hopes are soon dashed though as the Zero’s fire stops burning abruptly almost as soon as it started. The Zero ahead of Casey performs a Split-S to attack Casey head to head.
Mike Charge looks over at his wingman Owen Murphy who’s just been hit by a Zero which is staying tight on his tail. Charge is just about to suggest a maneuver to shake the Zero when to his surprise Owen’s plane disappears in a ball of fire. Charge curses and breaks hard to the left to get away from the Zeros that just claimed Owen’s life. As he turns he sees a Betty ahead. The distance is extreme for a shot, but Charge is angry at the loss of his wingman and decides to open fire anyways.
Expert G4M pilot Izumi Kosaku breathes a sigh of relief as he hears the Wildcat chasing them has broken away. He turns his bomber back northwest towards Rabaul. A few minutes later he is told there is an American fighter behind them. Moments later the aircraft erupts into chaos as the American bullets slam into the Betty, sparking a fire. Kosaku’s crew struggles to fight the fire but it quickly spreads and transforms into a dire threat to the crew.


Turn four was deadly for the American flyers. Right off the bat Toshiki made up for his earlier failures as he dispatched both Priest and Gunnar immediately. Priest received Catastrophic Structural Damage and was able to bail out on the Bail Out! card drawn later in the round. Gunnar’s aircraft exploded. As we saw in an earlier article with Mike Charge, and in this same round with Calvin, a pilot can survive an explosion. On a modified roll of 6 on a D6 the pilot is miraculously thrown free of his plane. Gunnar, being a Sprog/Rookie, has a -1 modifier for this roll which makes it impossible for him to survive. Calvin and Owen both also fell to explosions this round. Calvin managed to be thrown clear but Owen was less fortunate. Overall VF-2 lost four aircraft and two pilots in a single round, which was a stinging defeat.
The good points for VF-2 this turn were Ben claiming a third Betty kill of the game and Charge making a long-shot attack on Betty #1, leaving it with a Serious Fire that soon become a Very Serious Fire.
This article is getting long in the tooth so I’m going to split it into two parts from this point. Check back next week to see if the pilots of VF-2 can salvage the mission after a turn of devastating losses. Can Calvin and Priest get their chutes open, and will they make it home? Will Izumi Kosaku’s Betty survive or will it become a burning coffin for the crew? Thanks for reading!
-Evan

Awesome write up again. Never been ab
LikeLiked by 1 person
A lot of action there! Enjoyed reading it! 🙂 I’ve seen photos of Bettys attacking shipping off Guadalcanal and basically flying at wavetop height!
LikeLike
Thanks John! I’m familiar with the exact photos you’re describing and it always looks like a spot I’d rather not find myself in when I see it!
LikeLiked by 1 person
I can remember doing a double-take when I first saw one of the pictures – you instinctively look at higher areas of sky on a photo for a bomber, not for something literally wave-hopping! Credit to the nerves of a pilot of any nation flying like that I think!
LikeLiked by 1 person