So I’ve received requests now and again for how I do my bases. I figured this would be a good place to write it down and share it. First though I can’t take credit for this method, it’s nothing new and plenty of people have covered it before. What I hope to do is share my version of the method which is quick and dirty, then highlight how versatile of a canvas it is to work from.
I used to work pretty hard on basing, especially on the larger bases you tend to use a lot with GW style bases and games. However as time becomes the limited resource I found this method to be a lot quicker to get minis on the table.
Supplies
-Base of your choice
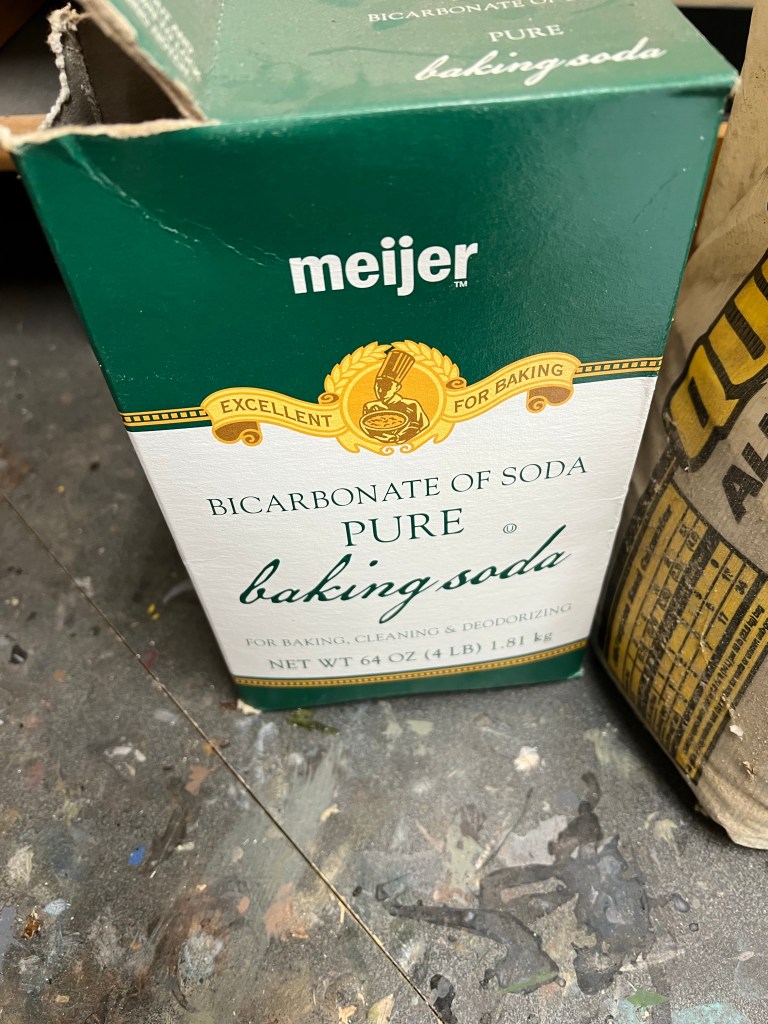
-CA Glue of some sorts, I like Bob Smith Industries because its easy to find
-Baking Soda
-Sand
-Paints for whatever color you need
-Basing extras, I like GamersGrass Tufts or Ableitung 502 Pigments
Step One: Basing Material Application
The basing mix that’s become my go to is roughly a 50:50 mix of baking soda and sand. I simply have a small dish I use to mix up a batch. I mix it with my fingers and crush any chunks of baking soda along the way.


Next I grab a base and put on a smallish blob of CA glue. I spread the glue around with a toothpick or similar until it coats the whole base (If a mini is already on the base I use the toothpick to distribute it around them as I desire). Once this is accomplished I simply take a handful of the basing mix and pour it over the glue gently. If you like a rockier base simply take some of the bigger sand parts floating around in the mix and sprinkle them on before pouring the rest of the mix over it. I let that sit up for a few seconds before I pour off the excess, then I usually blow off the extra baking soda (I treat it like a Nintendo 64 cartridge, if you know you know). That’s it, I’m no chemist but somehow the baking soda reacts with the glue and you quickly have a solid base.


Step Two: Paint
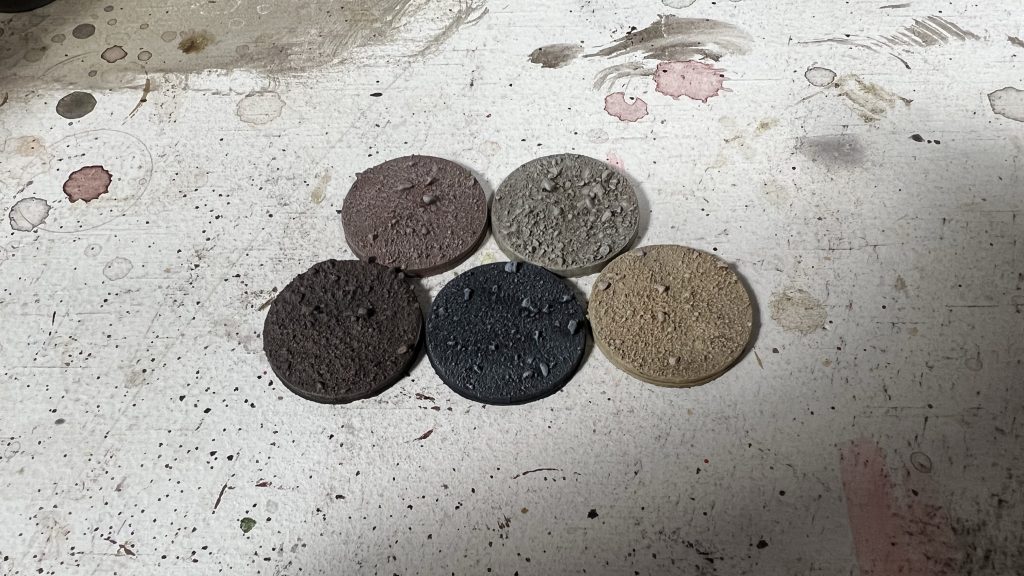
Painting these I follow a pretty standard structure. I prime them (forgot to get a photo) usually via airbrush or spray paint can. Then I basecoat them, give them a wash, and two layers of drybrushing. The first drybrush layer is closer to or just the original color. The second layer is a brighter color to make the texture pop more. For this guide I’m going to whip up five different base themes to show how versatile this method will be. First is a darker soil with grass and shrubs similar to what I’ve been using for my WW2 Battle of France minis. Second is a dry, tan, rocky desert. Third is a quicker variant of my Africa-ish bases I put my ultramoderns on(I use a foliage-lacking version of it for the sci-fi Killwager minis). Fourth is a grey dusty base I envision being decent for urban rubble or maybe some sci-fi applications. Finally I’ll do a yellower desert base.


Step Three: Extras
The bases look fine after being painted, but what I’ll cover here is some of my go-to “quick” methods to add a little extra to the bases. I’ll cover each base in its own section this time as the steps are not universal. For reference here they are completed:

The “Europe” and “Africa” bases
These ones I forgot to take photos for the process of, so my apologies. However they are pretty simple. I used PVA glue and a cotton swab to apply random splotches on the base, then I apply a relevant flock. In this case both are Woodland Scenics. Europe is “Blended Turf” and Africa is “Burnt Grass”. Then I add some shrubs/tufts, in this case Europe received Army Painter Lowland Shrubs and Africa got GamersGrass tufts that come from the Marshland Set. That’s it!
Rocky Desert
The rocky desert base was a bit plain, so I added a single brown shrub from the Marshland Set I mentioned above (I’ve found this set very versatile). Then I still wanted a little more definition so I gave it one of my go to tools: an AK enamel wash. This time I used their DAK wash. I apply it heavily and use a cotton dabber which is damp with mineral spirits to remove excess until I’m happy. That’s it for that base.

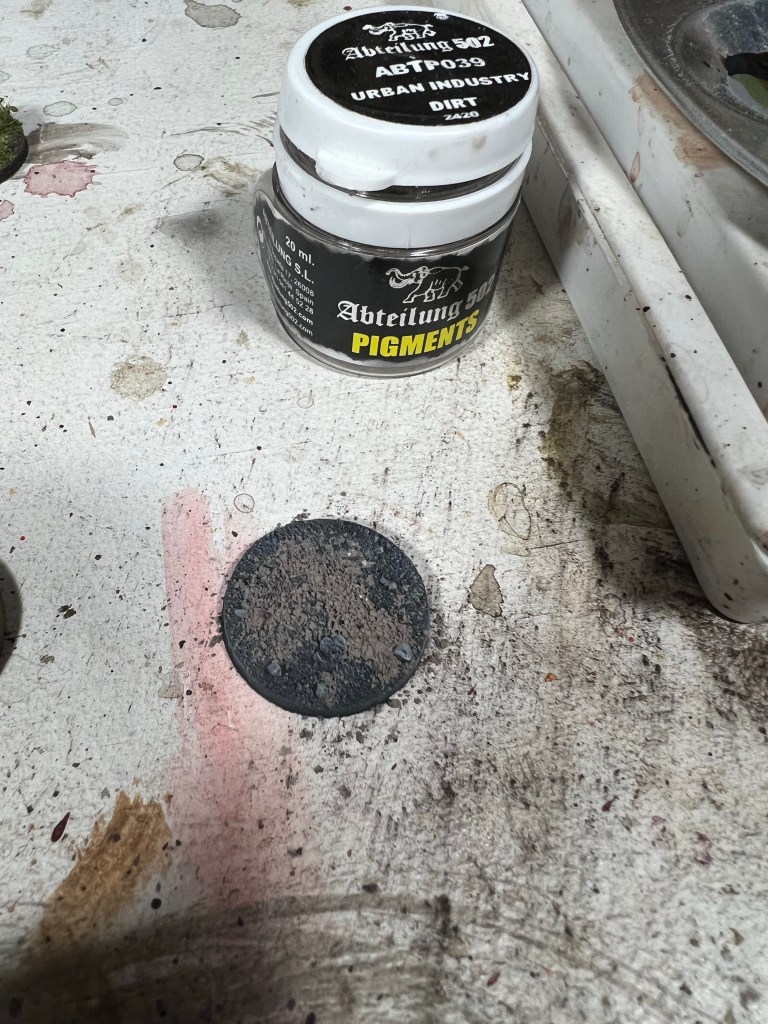
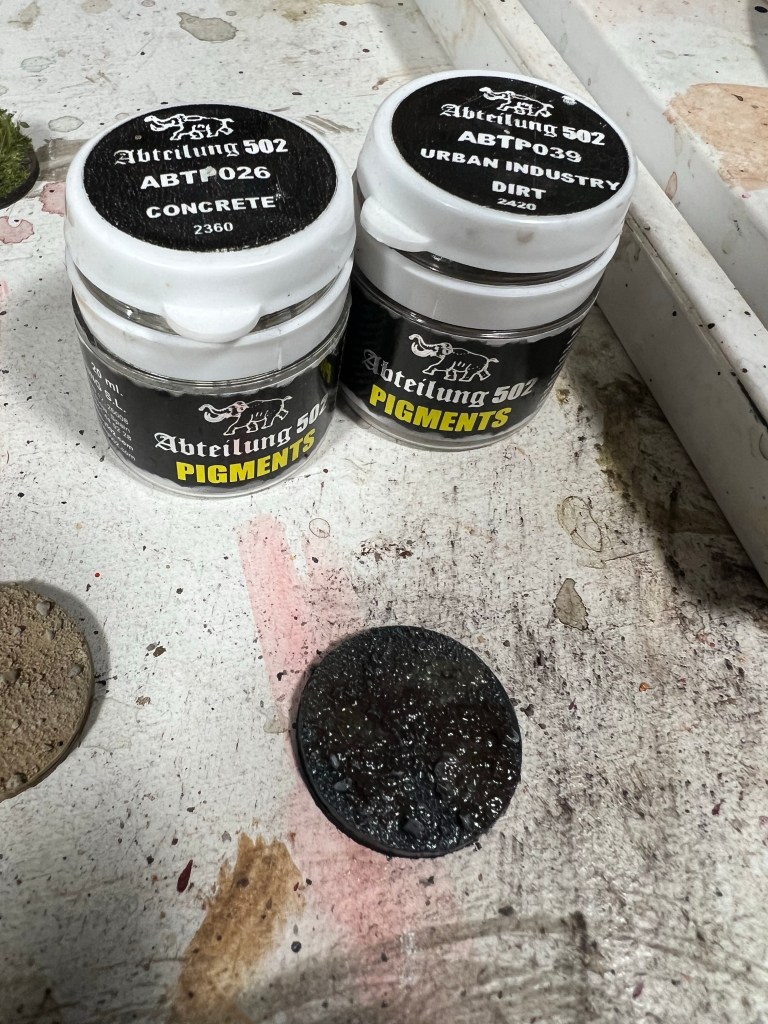
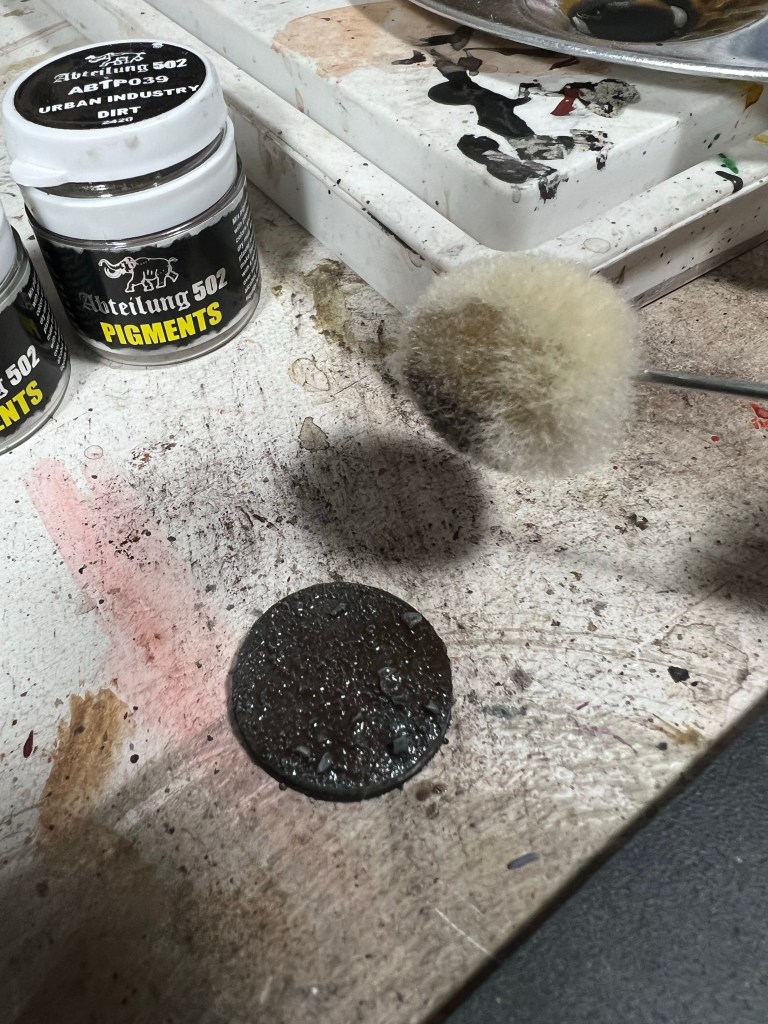
The Urban/Sci-Fi Base
This one I opted to use pigments to get it dusty looking. My pigments of choice this time were Ableitung 502 Urban Industry Dirt and Concrete. I just put (a little too much to be honest) a pile of each where I wanted it on the base. I fix it with mineral spirits then dab away excess like I mentioned above. This also lets you work the pigment around a bit. This step can be repeated to reduce the effect and a clear coat also subdues it a bit. I had to make two passes on this base because it was a little heavy the first time.
The Yellow Desert Base
This might be the simplest and quickest of all of these. I simply added more acrylic wash. I washed the whole base in a 5:1 mix of Medium to Soft Tone. Then while it was wet I used a brush with full-strength Soft Tone on it to add and work in some splotches to add some coloration.


The Final Product

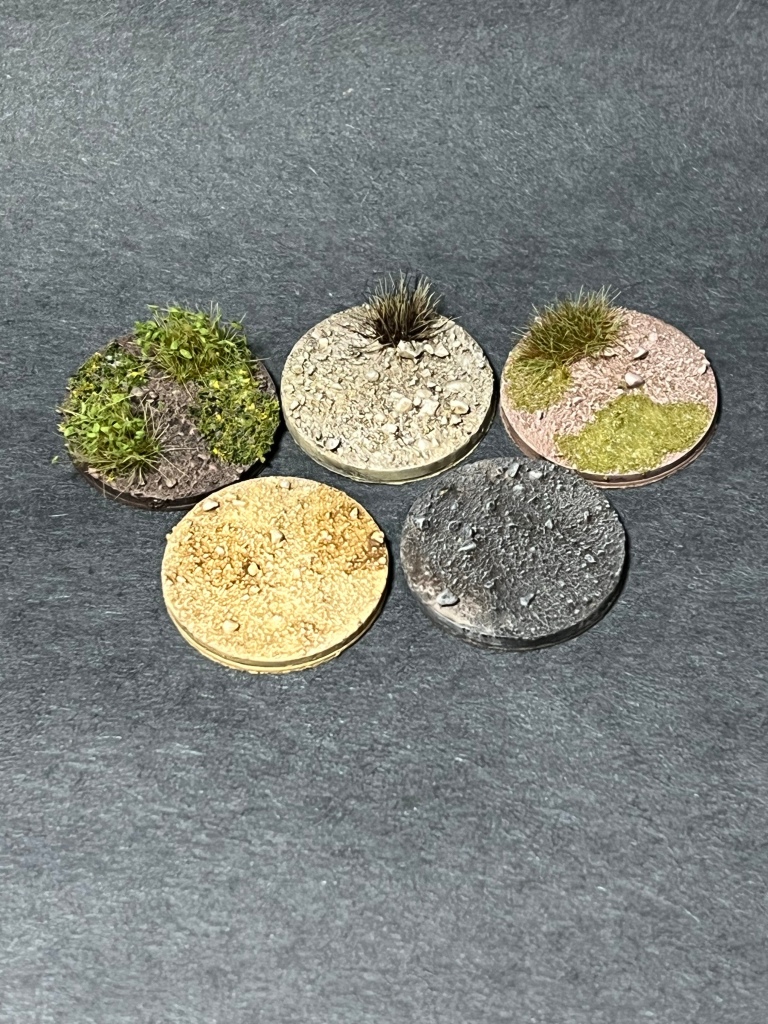

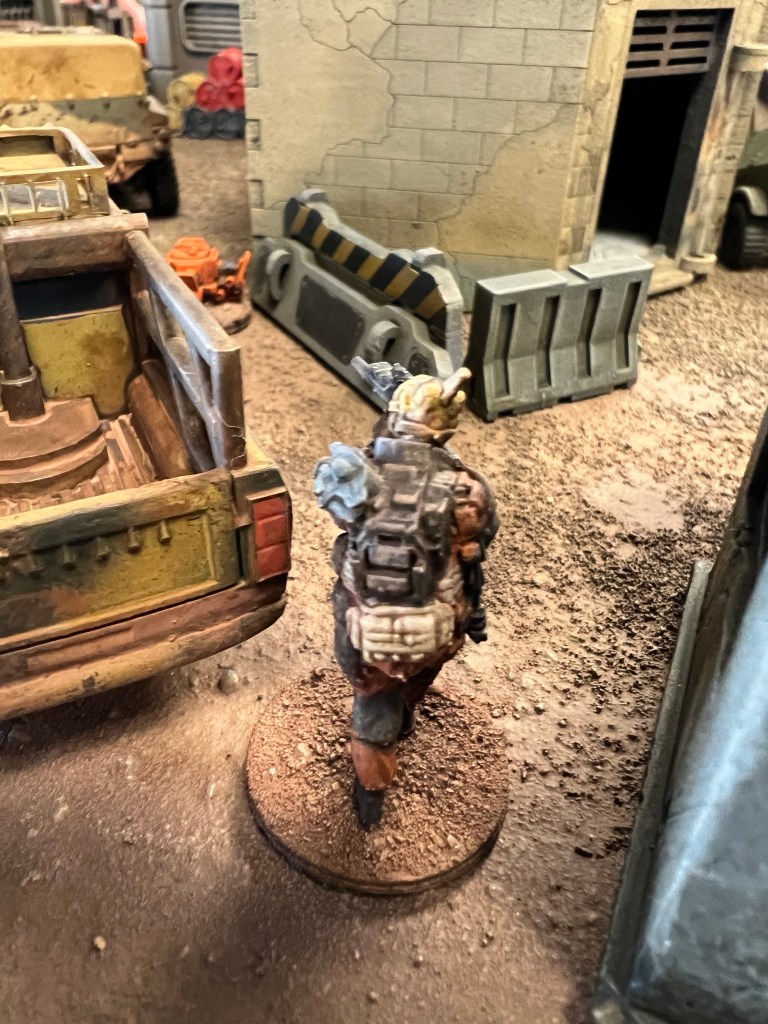
That’s all. It’s very simple, quick, and forgiving. Despite that I quite like the result. Below are some of my minis that used the same recipe as a base. It works well on larger bases too.