
After my short warm up in Chapter 1 I dove off the deep end. Here we will follow six of our characters as they embark on an effort to strike at the Japanese fleet. Just as in history the Japanese have already struck a blow at the US base on Midway Atoll the morning of June 4th. Though I didn’t play through it in this campaign I have earmarked the desperate and ultimately doomed defense of Midway by USMC fliers of VMF-221 for a future BtH scenario. Now our characters are thrown into combat as they partake in Admiral Raymond Spruance’s morning strike against the Japanese fleet. This attack was launched piecemeal with flights of aircraft departing as soon as they were airborne. Inspiration for this scenario came from the account of then-Lieutenant Commander Jimmie Thach who flew during the Battle of Midway. The game continued for a whopping ten turns, and took me about five hours over two days to play through. A single article containing all of that would be far too long for my taste, so here you will find turns 1-5 with turns 6-10 and the post action Squadron Forward items appearing in Chapter 3.
The organization of the forces for this scenario were as follows:
United States Navy
1st Flight- 4x Wildcats – Evan Richards(Veteran) , Mike Charge (Average), Ben Wilson (Average), Dan Fletcher (Average)
2nd Flight- 2x Wildcats – Calvin Digty (Average) and Vincent Priest (Rookie)
3rd Flight- 3x TBD Devastators (Veteran, Rookie, Average)
4th Flight- 3x TBD Devastators (Average, Average, Rookie)
Imperial Japanese Navy
1st Shotai- 3x A6M2 Zeros (Jr Ace, Average, Rookie)
2nd Shotai- 3x A6M2 Zeros (Jr Ace, Average, Average)
1st Shotai- 3x A6M2 Zeros (Veteran, Veteran, Rookie)
June 4, 1942 – Approximately 1000 hours local time- Somewhere Northwest of Midway Atoll
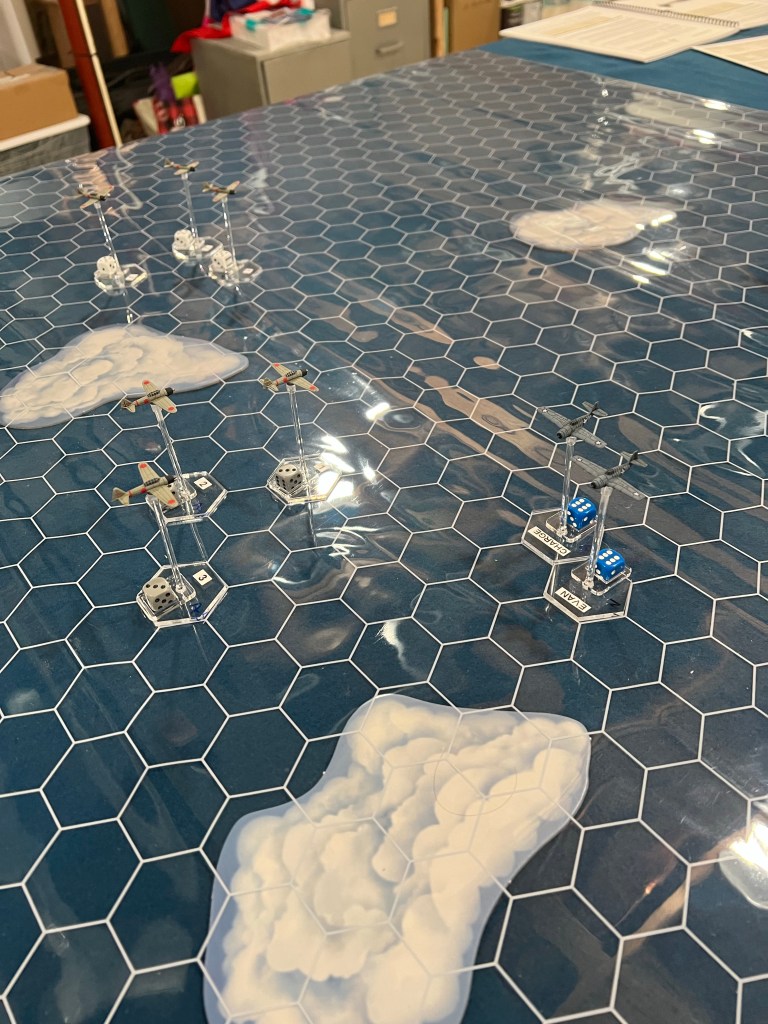
It was difficult to stay with the slow TBD Devastator torpedo bombers. Evan, Charge, Ben, Dan, Calvin, and Priest were flying turns to keep from pulling ahead of them. Calvin and Priest flew as a pair, while Evan led the rest of the Wildcats in a four plane flight. The Japanese fleet had just come into sight a few minutes earlier, but the progress of the allied strike package was painfully slow. Suddenly the pilots spotted Japanese fighters coming towards them. The enemy planes started as specks but rapidly grew in size as both forces closed the distance. The pilots saw glimpse of more enemy planes to the Northeast before they disappeared behind some clouds.
Calvin and Priest had just finished climbing to a higher altitude when two Japanese A6M2 “Zero” fighters streaked by them low and to their right. A third Zero also passed by at the same altitude. Calvin, his desire for revenge taking over, cranks his Wildcat around to pursue the lone Zero. He never signals to Priest who breaks formation and continues ahead. Calvin’s overzealous action causes him to lose focus on flying for a moment and he ends up below the enemy Zero. The enemy combatants are clearly headed straight for the bombers. The bombers take what little evasive action they can ahead of the oncoming enemies. It bears some fruit when the attacking fighters break formation during their maneuvers to get on the tail of the torpedo bombers. Yet the lead Devastator ends up in a dire situation as a Zero slides in behind him.


This was the first turn of the game. It was rather uneventful other than the lucky draws of the Japanese 1st Shotai. This flight of three planes (Jr Ace, Average, and Rookie/Sprog) managed to move on the Altitude Bonus Card, Formation Bonus Card, and their own Section Move Card. Combined with a Hard Dive maneuver (this left the Rookie behind) the attackers were able to streak in on the bombers way quicker than I thought they would. I moved the bombers with an Easy Turn to avoid a potential head on shot or overhead attack from the Zeros, yet with some tricky maneuvering the Jr Ace alone was able to get into position anyways. To achieve this he paid for it by losing his wingman who was unable to pass the Maneuver Check needed to keep up.
Beyond that action we saw Calvin attempt to turn in on the Rookie from the 1st Shotai. This was somewhat desperate as it carried a risk of lost altitude and of losing his own Rookie wingman: Vincent Priest. Unfortunately for Calvin that’s exactly what happened, costing him both protection from a wingman as well as his chance at a shot.
Everything else in this turn was various movements. The Japanese fighters of the 2nd Shotai and 3rd Shotai both closed the distance, with the 3rd Shotai staying wide to hopefully approach from the flank of the US force.
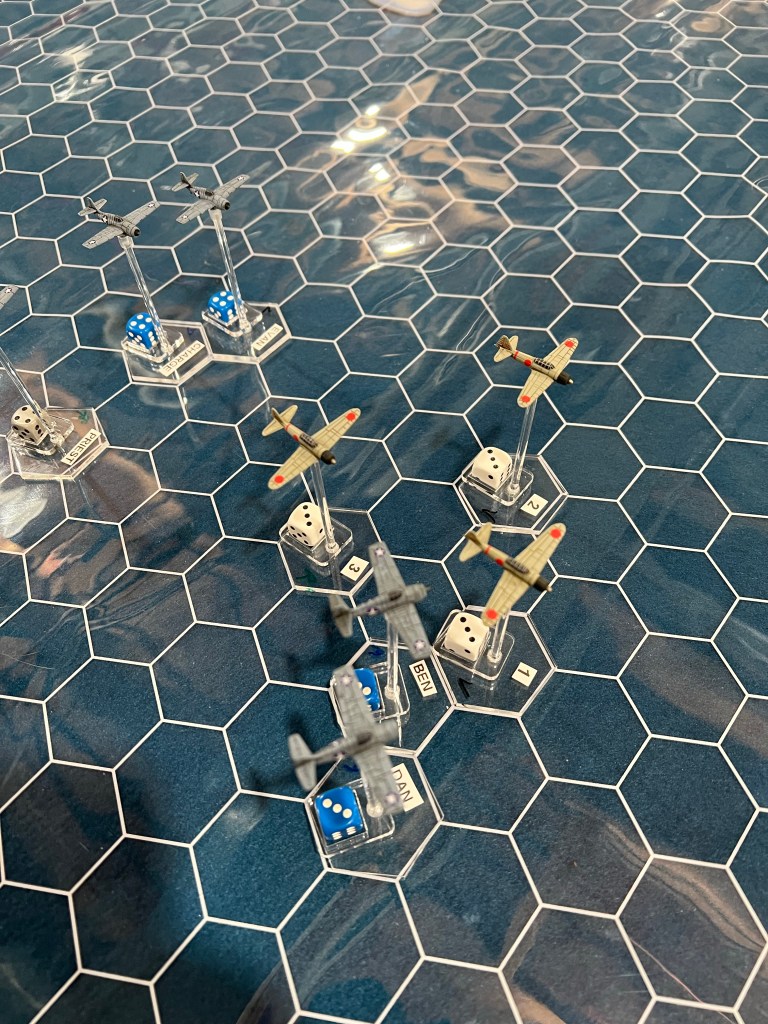
Desperately the tail gunner of the pursued Devastator opens fire on the enemy but he fails to score a hit. Ben, having observed the fighters start their attack, decides to turn back in pursuit while Evan and Charge continue ahead to intercept another flight of three Zeros. Ben and Dan make their turn but are not fast enough to rescue the Devastator. The Zero unloads a burst into the bomber, killing the rear gunner and causing damage in the cockpit. A few moments later his wingman also slides into position behind another Devastator and both open fire, damaging their intended targets. The torpedo plane pilots struggle to control their aircraft as the damage mounts.
Meanwhile Calvin, passing harmlessly under his intended target sees the bombers manuevering to attempt avoid incoming fighters. He spots more fighters approaching and decides to turn into those, hoping to find Priest again amidst the chaos. Seeing Calvin’s Wildcat zoom by below him the Zero pilot which had been Calvin’s target turns in pursuit. He quickly latches on to Calvin’s tail and lets loose with everything he can, the junior pilot excited to score his first kill. Calvin’s first indication of an attack is the sound of bullets impacting his plane and suddenly he has been hit too. He looks down and sees blood on his shirt. He’s not sure where it came from but he knows its not a good sign. At the same time Priest, still a rookie pilot who likes to go as fast as he can, gently nudges his Wildcat back towards the developing furball. He takes his time trying to spot his wingman amidst the melee when he sees the Zero dive in on the tail of a lone Wildcat.
The other group of three Devastators sees inbound enemy planes and turn left to try to put allied fighters between them and the attackers. This ploy fails as the flight of three enemy planes surges in towards the bombers, two of them taking up positions on the tails of the slow, unwieldy US planes.


The second turn of the game saw some quick and interesting developments. Again the 1st Shotai of the Japanese stole the show. US air gunners fired early in the round, and the one valid Devastator that could shoot failed to land a hit. This was followed by the US 1st Flight movement card which allowed Ben and Dan to split off as their own pair and turn back to tangle with the 1st Shotai fighters. For their part the first Shotai fighters lucked out and drew an early Jr Ace card allowing the Jr Ace to knock out the rear gunner of his target. On their move card the 1/2 (First Shotai / Second Plane) Zero was able to turn back and also line up on the tail of a torpedo bomber. He was unable to officially “get on the tail” to claim the bonus though. Some previous move cards had left Calvin a juicy target for the 1/3 Zero which was able to get on his tail. The final draw of the turn saw the 1st Shotai Fire Card drawn, and all three planes were in a position to fire, which they all did. The two Devastator targets (3/1 and 3/2) got the same result of a “temporary loss of control” which they would have to test for on their net move card. Calvin was the third target and got a wounded pilot result, which by the rules forces him to turn for home. You’ll have to read on to see if he makes it out alive though.
The other development worth noting here was that an attempt by the US 4th Flight to put Evan and Charge between it and the approaching 2nd Shotai failed when the 2nd Shotai easily maneuvered in on the tail of the bombers (at the cost of losing their rookie 2/3 plane in the process).
After firing its shots at the Devastator and seeing it lurch violently and dive left the pilot of the attacking Zero pulls left and over his wingman and flight leader, taking up a position on the left. The lead Zero stayed on his target, firing yet again and seeing a wing separate from the fuselage of the doomed torpedo plane. As it spiraled down the pilot notices his guns have jammed and that some US fighters have arrived behind him. Those fighters are Ben and Dan. They’ve maneuvered around to try to get on the tail of this Zero or at least drive it off however they are unable to get on the slippery pilot’s tail. The last Devastator of the beleaguered flight dives straight ahead to put distance between his plane and the attackers, but it costs precious altitude.
The other flight of US TBD Devastators also dives ahead trying to close on the Japanese fleet as fast as possible. They just saw the fate of the lead bomber plane and don’t want to suffer the same. Unfortunately for them a skilled Japanese pilot lands a destructive hit on one of their planes and it explodes into a fireball.
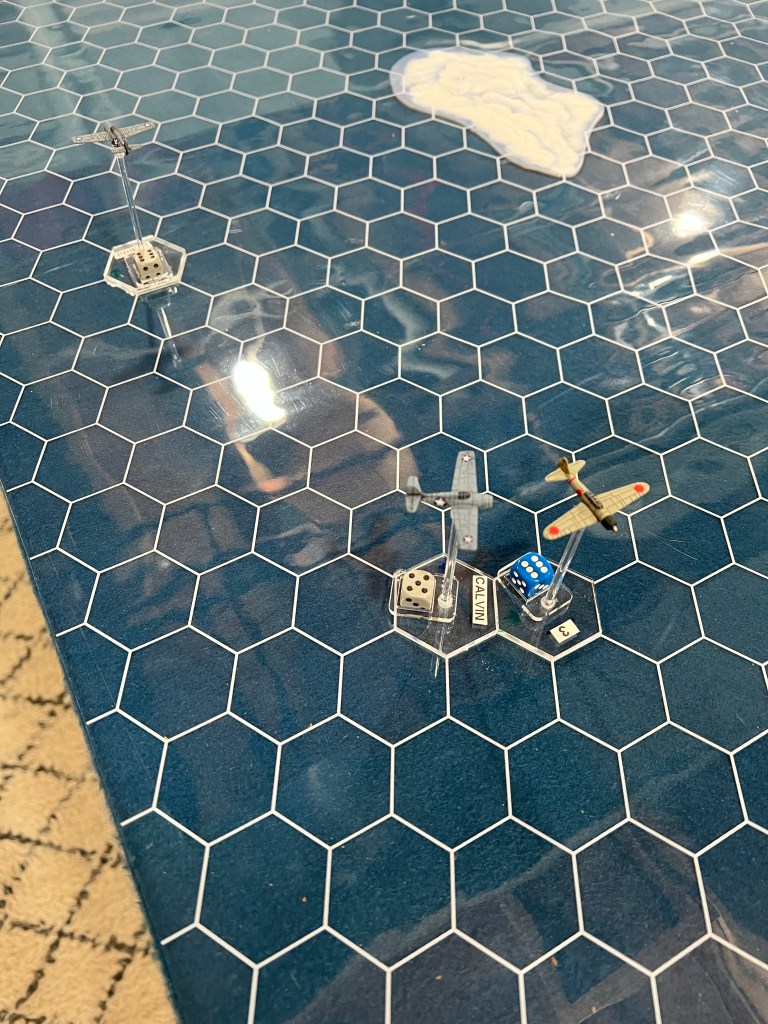
Calvin, bleeding and wounded, makes a desperate break turn to attempt to throw his pursuer. He sighs a breath of relief as he sees the Zero coast by his left wing, his turn apparently foiling the enemy pilot. Calvin begins a climb as he flies towards his carrier hoping no other enemy planes spot his exit. Priest sees a Devastator explode below him as he decides to find a target to pursue. Calvin is nowhere to be seen, and that worry needs to be set aside until they win the fight.


Turn three certainly did not go the way our protagonists would have liked. The Devastator(3/1) from Turn 2, pursued by the Japanese Junior Ace, saw itself take another round of damage which resulted in catastrophic damage. This caused the plane to descend two altitude bands per turn, in place, until altitude 0 when it crashes into the ground(water in this case). The American 4th Flight Devastators, now being tailed and with no altitude to spare, Jinked. This made them marginally harder to be hit when shot at. When the Japanese 2/1 Jr Ace opened up on his bonus card he managed to only land a single hit, yet this sole impact was critical as the damage roll for it resulted in the target plane exploding…what a shot. Attacking the bombers kept the Japanese 1st and 2nd Shotais busy for the most part. The 1/3 Rookie from first Shotai did manage to fail a test to stay with his damaged prey (Calvin). 3rd Shotai used the turn to get into the furball but found themselves quickly assailed by allied planes.
Calvin for his part managed to shake his tail and escape the battle alive. However, one of six allied fighters being out of the fight so early, with nine Zeros bearing down was not looking good. Priest turned around in the fight trying to find a good target to get a shot on. Evan and Charge tried to line up an early shot on Calvin’s attacker (Japanese 1/3) however it just doesn’t work out.
A third flight a zeros dives into the fray and quickly find themselves pursued by Evan and Charge, who have turned into the fight to chase these enemy fighters away from the bombers. Evan and Charge’s first attempt to line up a shot on one of these Zeros comes to no fruition as the Zeros break formation and scatter to throw the attackers. Evan mutters a curse under his breath but quickly sees an opening on one of the enemy planes, making sure Charge is still tight on his wing he turns around to pursue this new prey. At the same time Ben and Dan turn in to attack the same group of Zeros from a different angle, but the attack is ruined when Evan and Charge scare off the Zeros which turn hard into Ben and Dan, flying by in the opposite direction. Ben makes a signal to Dan for a left break and goes around to catch these planes from a new angle. Dan never sees the signal. He wants in the fight right now, and in a foolhardy maneuver he turns right to follow the Zeros. Ben comes out of the turn without a wingman and looks around spotting Dan low and on the wrong side going into the melee alone.
The lead Devastator’s pieces tumble towards the ocean, spinning wildly. The pilot and radioman struggle to get out but the canopy is jammed by damage from their attacker. Meanwhile the plane responsible for the damage surges overhead, seeing a lone Devastator ahead trying to escape. He never sees the remains of his last target splash into the water behind him, and no one sees any parachutes…
Another injured Devastator, manned by a new pilot, is spinning and out of control. The pilot struggles to get the plane under control as the ocean gets ever closer. More Devastators, having just seen one of their flight explode in mid-air, desperately try to close distance with the Japanese fleet. One of their gunners manages to land a hit on the tailing enemy plane, which fires back in turn. As the cannon shells rip into the bomber the rear gunner is killed and the plane lurches. The pilot considers the condition of the plane, any other time he might turn for home but right now they are so close and he has a torpedo to deliver. He decides the Zeros will probably get him either way and opts to continue his mission. His remaining wingman is in dire straights as a Zero does a Split-S and slides in behind the bomber.
Dan sees his chance and rolls in behind a Zero, but the Zero throws him immediately when it performs an Immelmann and comes out on top ready for a deflection shot on Ben. Priest tries to line up a shot but he overshoots only to have an enemy plane appear on his tail. Evan lets out a deflection shot on his new target and manages some light damage.
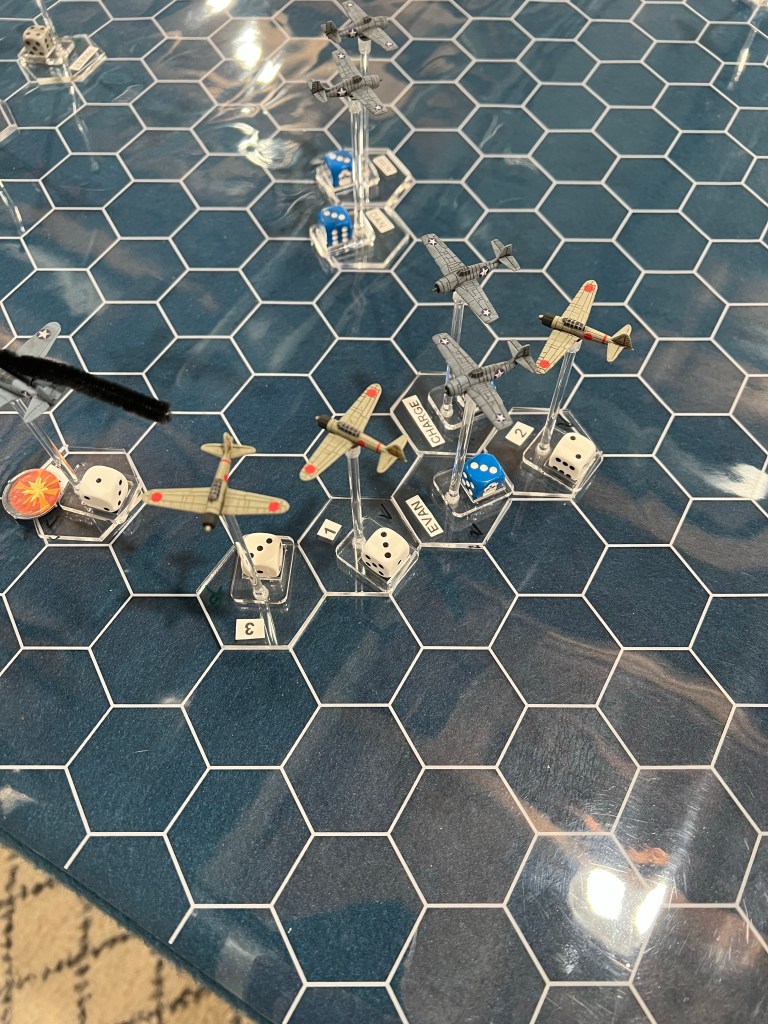

This turn was a mess plain and simple. It was hard to keep track of things as the furball of fighters and bombers really got developed here. Everyone had a lot of options to move on. This was a great chance for Dan’s narrative elements to come out. He’s got a Foolhardy personality which makes him a bad wingman per the Squadron Forward rules. The chance for him to turn to his right to get around on some Zeros seemed tempting and I rolled on Squadron Forward’s ‘All Knowing Odds Table’ under “Likely” for Dan breaking off and sure enough, he did.
The Zeros really did a number on the bombers again. The 3/1 Devastator crashed into the ocean after an unsuccessful bailout. 3/2 was struggling to regain control and failed their check, losing more altitude and leaving them still out of control but now at Altitude 1. 3/3 tried to escape but was pursued. Luckily Dan’s little jaunt scared off the attacking Zero. 4/1 ended up with the Japanese Jr Ace on his tail, and 4/2 exchanged fire with its attacker, both taking damage in the process.
Evan and Charge had a good shot lined up but their targets got to move first, which also ruined Ben and Dans early round attack. Evan and Charge went on to maneuver some more and get a shot off anyways though it didn’t do much. At the end of the turn my thought was “man the US Navy sure hasn’t gotten much done” and it was true. The count up to this point was two Zeros damaged for one Wildcat out of action, and two Devastators down with two more damaged.
Ben makes a last second adjustment as he sees the twinkling of his attacker’s guns, avoiding any damage. He pushes his nose over and dives, happening to see a Zero below him. Ben steels himself and lines up for a shot, easily sliding on to the tail of the enemy plane. Ben squeezes his trigger and watches as his target’s plane takes some hits and shudders.
Ben’s attacker slams his fist on his instrument panel as his guns jam. He watches as his target dives out of sight as he turns his attention to clearing his guns. His attention diverted doesn’t notice the Wildcats coming in from the side until the rounds start peppering his airplane. Assessing the damage he decides he cannot continue to fight and makes a turn towards the fleet.
Evan and Charge pull up from their last attack to see a Zero ahead flying straight and level. They turn and dive in on the target. Evan lets a burst loose as is rewarded as he shreds a portion of the Zero’s fuselage.
Priest never notices the attacker on his tail until he hears the rounds impact his cockpit. Luckily he is unhit but the glass of the cockpit is spiderwebbed with cracks and will make fighting harder. Yelling in anger Priest does a rapid barrel roll, surprising his attacker who blows by Priest.
The Devastators are still under siege. The pilots struggle to control their planes as they turn them towards the enemy fleet. Their targets, the carriers are growing ever larger on the sea below. The flight lead’s plane takes a beating. The gunner is unresponsive and the engine begins to cough and sputter. More enemy fire bears down on the plane damaging control surfaces and making the pilots job even harder. On his right wing his fellow pilot is doing no better, also suffering considerable damage to his wing from his own attacker. “Where are the damn fighters!” he thinks as he wrestles the controls. Nearby, the inexperienced pilot of the spinning Devastator finally manages to snap out of his spin. He looks up to see the fight is moving towards the carriers, with a deep breath and shaking hands he turns his plane towards the enemy fleet.
As the bomber pilots begin their desperate attack run swarmed by enemy fighters and as Evan, Charge, Ben, Dan and Priest try their hardest to defend those brave pilots a glimmer appears over the enemy fleet. The allied pilots look on a waterfall of glints materializes above the enemy carriers. Dive bombers. Unknown to the desperate pilots several flights of dive bombers happened to approach from a different direction. The enemy fighters are busy with the attacking torpedo planes, leaving their carriers vulnerable. Explosions blossom from the Japanese ships as separate cheers go up inside of US cockpits to the south. Their morale boosted the pilots grit their teeth and continue the fight, now with a grim determination to make the price even higher for the enemy fleet.


Turn five finally saw some retribution from our characters. Ben and Evan manage to damage some Zeros. Notably Evan’s chance deflection shot on the 1st Shotai Junior Ace (1/1) inflicted enough damage to force it to turn for home. Knocking an ace of any sort out of the fight is huge, as they’re absolute demons in the air. Ben’s damage and position will hopefully lead to a kill as he stays on the tail and tries to lay down more damage.
The 3rd Shotai Zeros fell behind and played catch up, while the 2nd Shotai continued its attack on the Devastators of 4th Flight. That exchange proved especially brutal for the Devastators. 4/1 suffered engine damage and bad wing/aileron damage. 4/2 also suffered bad wing/aileron damage. With the damage mounting the bombers keep closing the distance on the enemy fleet to try to make an attack.
Priest got unlucky getting hit but quickly got away from his attacker. Dan spent the turn trying to catch up to Ben. Charge stayed tight on Evan’s wing to lend him wingman bonuses. The surviving Devastators of 3rd Flight also had a good turn. 3/2 escaped his deadly loss of control at Altitude 1, quite literally at the last second. It is very likely that on a failed roll to regain control, with the pilot being a Rookie with a -1 modifier on that roll, he would have also been forced to lose altitude which would have been a crash. 3/3 continued ahead, so far with no attention drawn to the lone plane.
The end of this turn heralded the arrival of the US 5th Flight, composed of six TBD Dauntless dive bombers. Really these were more representative than an actual player. I felt it was important for the campaign that the Japanese were, as in history, served a loss. I didn’t really play out the dive bomber attack as much as I staged pictures and made a decision for the campaign. There was already a lot going on so I apologize if it was a bit of a deus ex machina…but the history happened that way too! The mission was meant to highlight the brave attack of essentially doomed torpedo bombers which drew off Japanese fighters. When US dive bombers happened upon the Japanese fleet (in reality from multiple directions and with many more planes) they essentially had a excellent opportunity to attack, and did so to devastating effect. I won’t go on too long of a Midway history lesson here as there are some truly excellent books and literature on it much better at telling the story of the battle than a guy on blog.
All that said, the 5th flight will join us next time in Chapter 3. They will act as a normal flight which needs to exit the combat area. Meanwhile we will also see if the torpedo attack bears fruit and what explosive developments happen with our characters…

2 thoughts on “Battle of Midway Part 2 – Chapter 2 (BtH Pacific Campaign)”